- Products

- Developers
- User stories
- Blog
- Pricing

The easiest way to add realtime functionality to an ASP.NET e-commerce application

While adding realtime functionality to ASP.NET applications has often seemed difficult due to the connection limitations of the IIS platform, it can actually be achieved fairly easily by offloading this component to services like Pusher.
Introduction
While adding realtime functionality to ASP.NET applications has often seemed difficult due to the connection limitations of the IIS platform, it can actually be achieved fairly easily by offloading this component to third party services like Pusher. In this series of posts, I’ll get you started with this exciting technology through a number of hands-on tutorials. In the first one we’ll build a simple e-commerce application that displays realtime stock levels to the customers.
One of the problems with existing e-commerce solutions can be trying to buy something which, whilst you’ve been online, has sold out. This can be a big problem for high demand products like gig tickets or sporting events such as the Olympics. A really good way of avoiding this is to show the customers just how fast tickets are selling. The added benefit of this, from a business point of view, is that it can give users that little push they needed to make that purchase. In this tutorial I’ll show how to:
- establish a connection to Pusher in the view
- subscribe to a product channel
- bind events from this channel to our stock indicator in the view and update the stock level
- send stock level update from our server when someone buys something
Getting started with Realtime Functionality
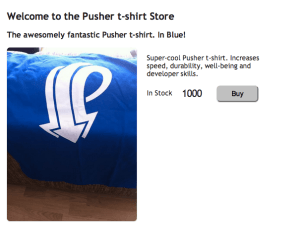
To demonstrate adding realtime functionality to an ASP.NET website I’m going to start with a simple one page e-commerce site which has one product: our cool Pusher t-shirt (Sorry, they’re not really for sale. You’ve got to earn them!). On the product page there is a counter which tells the customer how many t-shirts we have in stock.
To start off with our e-commerce website is a simple ASP.NET MVC3 app with:
- A
StoreControllerwith two actions. One to display the default view and one to handle the “Buy” button being clicked and the stock level being decreased. - A single Razor view displaying the single product
- Two models; one for the product called
ProductModeland one for images calledProductImage - A
ProductRepositorywhere we store our products
Connect to Pusher
As I’ve already said, adding realtime functionality is really simple – that’s the point! Firstly we have to include the Pusher JavaScript client library. We’ll add this to the view for the moment although we might want to make the include part of the site layout in the future.
Note: If your e-commerce page was being served up over HTTPS you would include our library over HTTPS too to avoid any browser warnings.
Since we are using ASP.NET MVC we’ve already got jQuery included from the _Layout.cs.html so we can wait until the page has loaded and connect to Pusher. The script include and the code that connects to Pusher looks as follows:
1<script src="http://js.pusherapp.com/2.0/pusher.min.js"></script> 2<script> 3 $(function() { 4 var pusher = new Pusher("006c79b1fe1700c6c10d"); 5 }); 6</script>
Subscribe to the product channel
Now that we’ve connected to Pusher we can push events from our StoreController to all connected browsers if any information changes about the product. The main piece of information that customers might want to know about is if the stock level changes. These t-shirts could sell out fast!
We need to choose a channel name to subscribe and publish to and the obvious choice is to use the unique product id for this. We’ll also prefix it with product- just so it’s really clear that the channels is for a product. We subscribe to this channel on the client as follows getting the product id from the Model that has been bound to the page:
1var channel = pusher.subscribe("product-@Model.ProductId");
Bind to stock update events
Once we’ve got a channel object we can bind to events on it. We want to be informed when the stock level changes so let’s bind to an event called stockUpdated. We’ll also expect a JSON object to be passed which represents the ProductModel and will have the same properties on it. That way we can simply update the stock level in the page to match the value on the server by accessing the ProductModel.StockLevel value. We can also update the stock status:
1channel.bind("stockUpdated", function(product) { 2 $(".product .stock .level").html(product.StockLevel); 3 $(".product .stock .status").html(product.StockStatus); 4});
Trigger stock update events
As you can see, this is really easy to do. It’s just as easy to trigger the event on the server too. To do this we’re going to be using the C# REST API library within our StoreController. You can get the PusherServer library from github or via NugGet.
Once we’ve added our PusherServer reference we can add a few lines of code to our StoreController to instantly push any changes in stock level to all connected web browsers viewing our t-shirt page.
The first thing to do is to create a Pusher instance and pass in our Pusher details. In this example we are storing these details in the ASP.NET MVC3 Web.config.
Web.config
1<configuration> 2 <appSettings> 3 <add key="application_id" value="APP_ID" /> 4 <add key="application_key" value="APP_KEY" /> 5 <add key="application_secret" value="APP_SECRET" /> 6 7 <!-- more settings --> 8 </appSettings> 9 10 <!-- more config --> 11</configuration>
StoreController.cs
1public class StoreController : Controller 2{ 3 private IPusher _pusher; 4 5 public StoreController() 6 { 7 string applicationKey = ConfigurationManager.AppSettings["application_key"]; 8 string applicaitonSecret = ConfigurationManager.AppSettings["application_secret"]; 9 string applicationId = ConfigurationManager.AppSettings["application_id"]; 10 _pusher = new Pusher(applicationId, applicationKey, applicaitonSecret); 11 } 12 13 // more code here... 14}
Once we’ve created our instance of the Pusher we can call the Trigger method to push the ProductModel, with an updated StockLevel following the purchase, to the clients. The serialisation of the model object is handled for us by the PusherServer library. The full StoreController.Index HTTP POST handling action looks like this:
1[HttpPost] 2public ActionResult Index() 3{ 4 bool bought = MvcApplication.ProductRepository.Buy(MvcApplication.BLUE_TSHIRT_ID); 5 var model = MvcApplication.ProductRepository.GetProductById(MvcApplication.BLUE_TSHIRT_ID); 6 7 if (bought) 8 { 9 ViewBag.Info = model.Title + " successfully bought"; 10 11 _pusher.Trigger("product-" + model.ProductId, "stockUpdated", model); 12 } 13 else 14 { 15 ViewBag.Error = "There was a problem buying " + model.Title; 16 } 17 18 return View("Index", model); 19}
Now, if you run your application and open two or more windows, as soon as a user in one window clicks the “Buy” button you’ll see that the stock level value instantly updates in all other windows.
Note: the video looks a little jittery because it was recorded on a VM running on Mac
Next time – displaying realtime “Who’s shopping” info with Pusher presence
We now have the stock level indicator changing in realtime. This tells the users that these t-shirts are selling out fast and gives them an added incentive to make that impulse buy. This is a simple yet effective change but there’s more we can do. What if we also show the user how many other users are viewing that product at the same time so that they know there is competition for the last few t-shirts? We can do that easily using Pusher’s presence functionality and I’ll cover that in my next RealTime ASP.NET blog post which will also go into how to add Pusher user authentication to your ASP.NET web application.
In the meantime you can download the source of the RealTime Web Store from github. The solution contains a project with the basic web store without any realtime Pusher functionality as well as a solution project. Here are some additional things you you might also want to try out:
- Changing the form submission when the user clicks “Buy” so that the
POSTto theBuyaction it is made using a jQuery ajax call - Making the change in stock levels more visually interesting. Try adding an effect to the number change or providing a growl-like notification
- Changing the CSS – it’s not my strong point :-)


© 2024 Pusher Ltd. All rights reserved.
Pusher Limited is a company registered in England and Wales (No. 07489873) whose registered office is at MessageBird UK Limited, 3 More London Riverside, 4th Floor, London, United Kingdom, SE1 2AQ.