- Products

- Developers
- User stories
- Blog
- Pricing

Full stack testing with Docker Compose
Learn how to use Docker to efficiently run end to end tests. In this tutorial you will build a simple app with React and MongoDB, write sample tests, and create a collection of Docker images to simplify running the tests.
Introduction
Introduction
Often when developing a complex web application there can be multiple layers that need to work together. For example, a database, backend, and UI layer that all need to fit together and work in harmony for the overall application to work.
One key way to ensure that your application works correctly is to implement full-stack testing. However, this can be complicated when there are more and more pieces involved. Docker is a fantastic tool that can make it significantly easier to run all of these pieces together on the same system.
In this tutorial, we are going to build just such an application. We are then going to build a test system for this, and build a Docker Compose cluster to allow us to execute these full-stack tests in a reliable and repeatable manner, without having any outside interactions that can interfere with them.
Prerequisites
Our application is going to be built in JavaScript with a MongoDB data store. As such, it will be necessary to have a recent version of Node.js – either the latest LTS or Current releases will suffice. You will also need either NPM or Yarn installed, and an understanding of how to use them. You will also need Docker and Docker Compose installed.
Note: Throughout the article we are going to be using Yarn. However, NPM is a perfectly suitable alternative if that is your preference.
In order to run the tests locally – without using Docker – you will also need a Selenium server available. The tests also use Google Chrome by default – though you can change that if desired. In order for them to work, you will need to have this installed and the Selenium ChromeDriver installed and on your system path.
Note: The Selenium server is a Java application and will need a recent JVM installed in order for it to run. Once that is done, it can be launched simply by executing
java -jar selenium-server.jar
It is assumed that these tools are already set up and available, and this article does not cover installation, configuration and debugging of them.
Writing the application
Our application is going to be the traditional To-Do List, using Express.js for the backend, MongoDB for the data store and React for the UI. This is going to be set up such that the UI is a Single Page Application, with the JavaScript calling the backend directly for reading and changing the data as needed.
Creating the backend
To start with, we want to create our backend application. To start with, we need to set up a new Node.js project with our required dependencies. Create a new directory and initialize a new project:
1$ mkdir backend 2 $ cd backend 3 $ yarn init -y
Then we’ll install our required dependencies:
1$ yarn add express cors body-parser dotenv mongodb
These give us:
express– the defacto web framework for Node.jscors– Express middleware to support Cross Origin Resource Sharing. Specifically, this will allow the web browser to access our backend from a different origin URL.body-parser– Express middleware to allow us to consume JSON payloads on incoming requestsdotenv– support for local configuration in .env filesmongodb– official Node.js drivers for communicating with MongoDB.
Once these are installed, we can start writing our application. The first part is a DAO (database access object) layer for interacting with the MongoDB data store to read and write our ToDos. For this, create a new file called todoDao.js at the root of the project as follows:
1const MongoClient = require('mongodb').MongoClient; 2 const ObjectID = require('mongodb').ObjectID; 3 4 let mongodb; 5 6 function getMongoConnection() { 7 if (!mongodb) { 8 mongodb = new Promise((resolve, reject) => { 9 MongoClient.connect(process.env.MONGODB_URL, { 10 poolSize: 10, 11 autoReconnect: true, 12 reconnectTries: 60, 13 reconnectInterval: 1000 14 }, (err, client) => { 15 if (err) { 16 console.log('Error connecting to MongoDB'); 17 console.log(err); 18 reject(err); 19 } else { 20 console.log('Connected to MongoDB'); 21 resolve(client.db(process.env.MONGODB_DATABASE)); 22 } 23 }); 24 }); 25 } 26 return mongodb; 27 } 28 29 function listTodos() { 30 return getMongoConnection() 31 .then((db) => db.collection('todos')) 32 .then((col) => col.find().toArray()); 33 } 34 35 function getTodoById(id) { 36 return getMongoConnection() 37 .then((db) => db.collection('todos')) 38 .then((col) => col.findOne({_id: new ObjectID(id)})); 39 } 40 41 function createTodo(todo) { 42 return getMongoConnection() 43 .then((db) => db.collection('todos')) 44 .then((col) => col.insertOne({ 45 title: todo.title, 46 status: todo.status === true ? true : false 47 })) 48 .then((r) => r.ops[0]); 49 } 50 51 function deleteTodo(id) { 52 return getMongoConnection() 53 .then((db) => db.collection('todos')) 54 .then((col) => col.findOneAndDelete({_id: new ObjectID(id)})); 55 } 56 57 function updateTodo(id, todo) { 58 return getMongoConnection() 59 .then((db) => db.collection('todos')) 60 .then((col) => col.findOneAndUpdate({_id: new ObjectID(id)}, { 61 title: todo.title, 62 status: todo.status === true ? true : false 63 }, { 64 returnOriginal: false 65 })) 66 .then((r) => r.value); 67 } 68 69 module.exports = { 70 listTodos, 71 getTodoById, 72 createTodo, 73 deleteTodo, 74 updateTodo 75 }
This exposes functions for the standard CRUD activities we wish to perform on our data.
Next, we can write the actual REST service in terms of this DAO. Create a new file called index.js as follows:
1require('dotenv').config(); 2 3 const express = require('express'); 4 const bodyParser = require('body-parser'); 5 const cors = require('cors'); 6 const todoDao = require('./todoDao'); 7 8 const app = express(); 9 app.use(cors()); 10 app.use(bodyParser.json()); 11 12 function translateTodo(todo) { 13 return todo && { 14 title: todo.title, 15 status: todo.status, 16 _meta: { 17 id: todo._id 18 } 19 }; 20 } 21 22 app.get('/todos', (req, res) => { 23 todoDao.listTodos() 24 .then((v) => v.map(translateTodo)) 25 .then((v) => res.send(v)) 26 .catch((e) => { 27 console.log(e); 28 res.status(500); 29 res.send(e); 30 }); 31 }); 32 app.get('/todos/:id', (req, res) => { 33 todoDao.getTodoById(req.params.id) 34 .then(translateTodo) 35 .then((v) => { 36 if (v) { 37 res.send(v) 38 } else { 39 res.status(404); 40 res.send(); 41 } 42 }) 43 .catch((e) => { 44 console.log(e); 45 res.status(500); 46 res.send(e); 47 }); 48 }); 49 app.post('/todos', (req, res) => { 50 todoDao.createTodo(req.body) 51 .then(translateTodo) 52 .then((v) => res.send(v)) 53 .catch((e) => { 54 console.log(e); 55 res.status(500); 56 res.send(e); 57 }); 58 }); 59 app.delete('/todos/:id', (req, res) => { 60 todoDao.deleteTodo(req.params.id) 61 .then((v) => { 62 res.status(204); 63 res.send(); 64 }) 65 .catch((e) => { 66 console.log(e); 67 res.status(500); 68 res.send(e); 69 }); 70 }); 71 app.put('/todos/:id', (req, res) => { 72 const updated = { 73 title: req.body.title, 74 status: req.body.status 75 }; 76 todoDao.updateTodo(req.params.id, req.body) 77 .then(translateTodo) 78 .then((v) => { 79 if (v) { 80 res.send(v) 81 } else { 82 res.status(404); 83 res.send(); 84 } 85 }) 86 .catch((e) => { 87 console.log(e); 88 res.status(500); 89 res.send(e); 90 }); 91 }); 92 93 app.listen(process.env.PORT, () => console.log(`Listening on port ${process.env.PORT}!`));
This exposes the following routes that can be used:
- GET /todos – return a list of all of the ToDos in the system
- GET /todos/:id – return the single specified ToDo
- POST /todos – create a new ToDo
- DELETE /todos/:id – delete the single specified ToDo
- PUT /todos/:id – update the single specified ToDo to match the provided data
Finally, in order to actually run the application, we need some configuration. Create a new file called .env to contain this. The dotenv module will automatically load this and make it available as properties on process.env, but in such a way that actual environment properties take precedence. Our example file will read as follows:
1MONGODB_URL=mongodb://localhost:27017 2 MONGODB_DATABASE=todo 3 PORT=4000
Note: This assumes you are running MongoDB locally and can access it on localhost:27017. If this is not the case then change the URL as needed.
At this point, the backend application can be started up:
1$ node index.js 2 Listening on port 4000!
Creating the frontend
Once we’ve got our backend written, we can move on to the UI. This will be developed using Create React App, which gives us a good starting point and can easily generate static files that can be deployed to any web server.
Start out by creating our project:
1$ create-react-app webapp 2 $ cd webapp
Then install the few additional dependencies we want:
1yarn add axios semantic-ui-react semantic-ui-css
Semantic UI is a CSS framework that has easy to use React bindings, and Axios is an HTTP client that is easy to configure and use.
The first thing we want to do is create a couple of components for our UI. The ones we need are a form for creating a new ToDo entry and a list for displaying the existing entries.
The form for the new ToDo entry will go in a file called src/NewTodo.js as follows:
1import React from 'react'; 2 import { Form, Button } from 'semantic-ui-react'; 3 4 export default class NewTodo extends React.Component { 5 state = { 6 value: '' 7 }; 8 9 render() { 10 const { value } = this.state; 11 return ( 12 <Form onSubmit={(e) => this.onSubmit(e)}> 13 <Form.Group inline> 14 <input placeholder='New ToDo' value={value} onChange={(e) => this.onChange(e)} /> 15 <Button>Add</Button> 16 </Form.Group> 17 </Form> 18 ); 19 } 20 21 onChange(e) { 22 this.setState({ 23 value: e.target.value 24 }); 25 } 26 27 onSubmit(e) { 28 this.props.onSubmit(this.state.value); 29 this.setState({ 30 value: '' 31 }); 32 } 33 }
Note that this is entirely self-contained except for the callback function when the form is submitted. This will be provided from the outer component and will do the work of calling our API to create the new entry.
Next is the list of existing entries. This goes in a file called src/TodoList.js as follows:
1import React from 'react'; 2 import { List, Checkbox } from 'semantic-ui-react'; 3 import './TodoList.css'; 4 5 function TodoItem({id, title, status, onToggle}) { 6 const className = status ? 'finished-todo' : ''; 7 8 return ( 9 <List.Item> 10 <Checkbox toggle label={title} checked={status} className={className} onChange={(e) => onToggle(id, !status)} /> 11 </List.Item> 12 ); 13 } 14 15 export default function TodoList({ todos, onToggle }) { 16 return ( 17 <List> 18 { 19 todos.map(({id, title, status}) => <TodoItem key={id} id={id} title={title} status={status} onToggle={ onToggle } />) 20 } 21 </List> 22 ); 23 }
This receives the list of ToDo entries to render, and a callback function to use to change the state of an existing entry. We also need a CSS file to define some styles here – specifically so that ToDo entries that are finished get a strike through them. This goes to src/TodoList.css as follows:
1.finished-todo label { 2 text-decoration: line-through; 3 }
Now we just need the overarching application to tie it all together. This belongs in the standard src/App.js file as follows:
1import React, { Component } from 'react'; 2 import 'semantic-ui-css/semantic.min.css'; 3 import { Container, Header } from 'semantic-ui-react'; 4 import axios from 'axios'; 5 import NewTodo from './NewTodo'; 6 import TodoList from './TodoList'; 7 8 const httpClient = axios.create({ 9 baseURL: process.env.REACT_APP_API_URL || window.API_URL_BASE, 10 timeout: 1000 11 }); 12 13 class App extends Component { 14 state = { 15 todos: [] 16 } 17 18 render() { 19 return ( 20 <Container> 21 <Header as='h1'>ToDo List</Header> 22 <NewTodo onSubmit={(title) => this.createNewTodo(title)} /> 23 <TodoList todos={this.state.todos} onToggle={(id, newState) => this.toggleTodo(id, newState)} /> 24 </Container> 25 ); 26 } 27 28 componentDidMount() { 29 this.loadTodos(); 30 } 31 32 loadTodos() { 33 httpClient.get('/todos') 34 .then((response) => response.data) 35 .then((response) => response.map((todo) => { 36 return { 37 title: todo.title, 38 status: todo.status, 39 id: todo._meta.id 40 } 41 })) 42 .then((todos) => { 43 this.setState({ 44 todos: todos 45 }) 46 }); 47 } 48 49 createNewTodo(title) { 50 httpClient.post('/todos', { 51 title: title 52 }) 53 .then(() => this.loadTodos()); 54 } 55 56 toggleTodo(id, newState) { 57 httpClient.get('/todos/' + id) 58 .then((response) => response.data) 59 .then((todo) => { 60 return httpClient.put('/todos/' + id, { 61 title: todo.title, 62 status: newState 63 }) 64 }) 65 .then(() => this.loadTodos()); 66 } 67 } 68 69 export default App;
This renders both of our other components as well as providing the callbacks necessary for the API interactions. It does all of this using a configured Axios instance, which is given the base URL to use.
You will notice that the base URL comes from a slightly unusual construct – process.env.REACT_APP_API_URL || window.API_URL_BASE. This is to allow us the ability to configure it on a per-deploy basis.
When running the application in development mode, the process.env object is populated from a .env.development file automatically. This allows us to specify where our backend is located whilst we’re running locally. As such, create the file .env.development in the root of the project as follows:
1REACT_APP_API_URL=http://localhost:4000
When this is not specified then we will fall back to a global variable of window.API_URL_BASE. This will be populated by creating a file called public/api.js as follows:
1window.API_URL_BASE = '<Place URL Here>';
Which can then be replaced with a real URL when the files are deployed on a real server. This is then loaded by adding the following to the head block of public/index.html:
1<script src="%PUBLIC_URL%/api.js"></script>
We can now start the UI up by executing yarn start and, assuming your backend and data store are running as needed, everything will work.
Note: If you see JavaScript errors stating that “GET http//localhost:3000/%3CPlace%20URL%20Here%3E/todos 404 (Not Found)” then the webapp has failed to load the
.env.developmentfile and thus does not know where to find the backend.
Testing the application
Now that we’ve got our application, we need to be able to prove that it works. This is where our end-to-end tests will come in. The tests that we write here will not be completely comprehensive but will be enough to give an example of how such a setup can work.
Ensure that the complete application – backend, frontend, and database – are running for now, so that we have something to execute our tests against. Later on when we do this using Docker this will become less important – the Docker cluster will automatically start and stop everything – but for now, we need something running to test against.
For our tests, we will be using the Nightwatch.js library, which is a Node.js library allowing for Selenium based browser testing.
In order to get started, we need another new project:
1$ mkdir e2e 2 $ cd e2e 3 $ yarn init -y
We then need our dependencies:
1$ yarn add nightwatch mongodb
Note that in addition to Nightwatch.js we are also including the MongoDB drivers again. This is because we want our tests to be able to interact with the database – in our case to reset the data, but potentially to insert test data or to assert that data was created or updated as appropriate.
Nightwatch.js is powered by a central configuration file – nightwatch.json. This tells it everything it needs to know in order to find the appropriate source files and execute the tests. Ours will look like this:
1{ 2 "src_folders" : ["src/tests"], 3 "custom_commands_path" : "src/commands", 4 "output_folder" : "target/reports", 5 "page_objects_path" : "src/pages", 6 "globals_path" : "", 7 "test_workers": false, 8 "live_output": false, 9 10 "test_settings" : { 11 "default" : { 12 "selenium_host" : "localhost", 13 "selenium_port" : 4444, 14 "silent": true, 15 "screenshots" : { 16 "enabled" : true, 17 "on_failure": true, 18 "on_error": true, 19 "path" : "target/reports" 20 }, 21 "desiredCapabilities": { 22 "browserName": "chrome" 23 } 24 }, 25 26 "local": { 27 "launch_url" : "http://localhost:3000", 28 "globals": { 29 "mongo_uri": "mongodb://localhost:27017", 30 "mongo_database": "todo" 31 } 32 } 33 } 34 }
Note that at the top it refers to some source directories. These need to exist for the test runner to work, so let’s create them:
1$ mkdir -p src/tests src/commands src/pages
These directories are used as follows:
src/tests– this is where the actual tests will live.src/commands– this is where any custom commands will live.src/pages– this is where our page objects will live.
The target directory does not need to exist and will be created automatically when the tests are run to store the output.
First test – checking the page loads
At this point, we are ready to write our first test. This will simply be that the page loads, and not that any functionality works. This is always a good first test to write, since if this fails then everything else is going to fail as well.
In order for this to work, we need to write a couple of page objects to describe areas of the page to interact with.
The first of these represents the page as a whole, and is in src/pages/main.js as follows:
1module.exports = { 2 elements: { 3 body: ".container" 4 } 5 }
The second represents the Add ToDo form, and goes to src/pages/add.js as follows:
1module.exports = { 2 elements: { 3 input: "form input", 4 submit: "form button" 5 } 6 }
Now we’re ready to write our test. This will go to src/tests/loadPage.js as follows:
1module.exports = { 2 'Load Page' : function (browser) { 3 browser.url(browser.launchUrl); 4 5 browser.page.main().expect.element("@body").to.be.visible; 6 browser.page.add().expect.element('@input').to.be.visible; 7 8 browser.end(); 9 } 10 };
Very simply, this loads the page, and checks that there are a couple of targeted elements present – the main body and the input box on the New ToDo form.
Second test – adding a ToDo entry
The second test we will write is to actually interact with the page and add a new entry. This will involve typing into the New ToDo form, submitting the form, and then checking that the new entry appears in the list correctly.
Firstly, we want a new page object to represent the list of ToDo entries. This goes to src/pages/todos.js as follows:
1module.exports = { 2 elements: { 3 list: ".list" 4 } 5 }
We are also going to write a custom command that can be used to access the MongoDB data store. This goes to src/commands/mongo.js as follows:
1const util = require('util'); 2 const events = require('events'); 3 const MongoClient = require('mongodb').MongoClient; 4 5 function Mongo() { 6 events.EventEmitter.call(this); 7 } 8 9 util.inherits(Mongo, events.EventEmitter); 10 11 Mongo.prototype.command = function (handler, cb) { 12 var self = this; 13 14 new Promise((resolve, reject) => { 15 MongoClient.connect(self.api.globals.mongo_uri, (err, client) => { 16 if (err) { 17 console.log('Error connecting to MongoDB'); 18 reject(err); 19 } else { 20 console.log('Connected to MongoDB'); 21 resolve(client); 22 } 23 }); 24 }).then((client) => { 25 return new Promise((resolve, reject) => { 26 resolve(client.db(self.api.globals.mongo_database)); 27 }).then((db) => handler(db)) 28 .catch((err) => { 29 console.log('An error occurred'); 30 console.log(err); 31 }) 32 .then(() => { 33 client.close(); 34 35 if (cb) { 36 cb.call(self.client.api); 37 } 38 39 self.emit('complete'); 40 }); 41 }); 42 return this; 43 }; 44 45 module.exports = Mongo;
This gets the details of the MongoDB database to access from the globals section of the Nightwatch configuration and allows any of our tests to access the database.
We can now write our test. This goes in src/tests/addTodo.js as follows:
1module.exports = { 2 'Add a new Todo' : function (browser) { 3 browser.mongo(function(db) { 4 console.log('Dropping all Todos'); 5 const col = db.collection('todos'); 6 return col.remove({}); 7 }); 8 9 browser.url(browser.launchUrl); 10 11 const addTodoForm = browser.page.add(); 12 addTodoForm.setValue('@input', 'Run first test'); 13 addTodoForm.click('@submit'); 14 15 addTodoForm.expect.element('@input').value.to.equal(''); 16 17 const todosList = browser.page.todos(); 18 todosList.expect.element('.item:nth-child(1) label').text.to.equal('Run first test'); 19 todosList.assert.cssClassNotPresent('.item:nth-child(1) .checkbox', 'checked'); 20 21 browser.end(); 22 } 23 };
Notice right at the start of the test we use our custom command to drop every record from the todos collection. This guarantees that we start from a clean slate, but it does mean that we can never safely run this against an environment where the data would be important. This will be solved later on by building an entire test environment using Docker Compose every time.
We can now run our test suite against our running application and ensure that everything is working correctly. You will need to have a Selenium Server running locally, and then simply execute the tests as follows:
1$ ./node_modules/.bin/nightwatch -e local 2 3 [Add Todo] Test Suite 4 ========================= 5 6 Running: Add a new Todo 7 Connected to MongoDB 8 Dropping all Todos 9 ✔ Expected element <form input> to have value equal: "" 10 ✔ Expected element <.item:nth-child(1) label> text to equal: "Run first test" 11 ✔ Testing if element <.item:nth-child(1) .checkbox> does not have css class: "checked". 12 13 OK. 3 assertions passed. (5.593s) 14 15 [Load Page] Test Suite 16 ========================== 17 18 Running: Load Page 19 ✔ Expected element <.container> to be visible 20 ✔ Expected element <form input> to be visible 21 22 OK. 2 assertions passed. (2.327s) 23 24 OK. 5 total assertions passed. (8.127s)
Setting up Docker
At this point, we have our application and end-to-end tests. But this does not give us an easily repeatable experience. Any new user who wants to work with this needs to get their system set up, it’s not possible to run the end-to-end tests against a live database without damaging the data, and so on.
What we want to do next is to set up a Docker infrastructure to run the application and to run the tests against it. This is surprisingly easy if you’ve already got the tools installed.
Creating Docker images
The first step is to create the Docker images for our application. There are three images that we want to build:
- todos/backend – The backend application
- todos/webapp – The UI for the application
- todos/e2e – The end-to-end tests
Each of these is done by writing a Dockerfile inside the appropriate project and then requesting that it is built.
First the backend. Inside this project, create our Dockerfile as follows:
1FROM node:9.9.0-alpine 2 3 COPY index.js todoDao.js package.json /opt/todos/ 4 WORKDIR /opt/todos 5 RUN yarn install 6 7 ENV MONGODB_URL mongodb://mongo:27017 8 ENV MONGODB_DATABASE todos 9 ENV PORT 4000 10 11 EXPOSE 4000/tcp 12 13 CMD node index.js
This creates an image based off of the Node.js base image, copies our application into it and causes it to build – which downloads all of the dependencies inside of the image. We then set the environment properties needed for database access to some defaults – they can be overridden at runtime if needed – and inform it that we are going expose port 4000 for external applications to call.
In order to build this image, we execute the following:
1$ docker build -t todos/backend 2 Sending build context to Docker daemon 4.438MB 3 Step 1/8 : FROM node:9.9.0-alpine 4 ---> 3e60aa6db49b 5 Step 2/8 : COPY index.js todoDao.js package.json yarn.lock /opt/todos/ 6 ---> 527036c179bf 7 Step 3/8 : WORKDIR /opt/todos 8 Removing intermediate container 43a95995e43a 9 ---> 63555efe5304 10 Step 4/8 : RUN yarn install 11 ---> Running in c3581351fb6a 12 yarn install v1.5.1 13 [1/4] Resolving packages... 14 [2/4] Fetching packages... 15 [3/4] Linking dependencies... 16 [4/4] Building fresh packages... 17 Done in 1.84s. 18 Removing intermediate container c3581351fb6a 19 ---> 1f134ed46d2a 20 Step 5/8 : ENV MONGODB_URL mongodb://mongo:27017 21 ---> Running in ea9d5b1e738b 22 Removing intermediate container ea9d5b1e738b 23 ---> 623de75a61c9 24 Step 6/8 : ENV MONGODB_DATABASE todos 25 ---> Running in f3ba07cafbb9 26 Removing intermediate container f3ba07cafbb9 27 ---> fbcd2e9d89af 28 Step 7/8 : EXPOSE 3000/tcp 29 ---> Running in ff2e2c920316 30 Removing intermediate container ff2e2c920316 31 ---> 2a74be827d8a 32 Step 8/8 : CMD node index.js 33 ---> Running in 1c23fef6aee3 34 Removing intermediate container 1c23fef6aee3 35 ---> 2c007489f6cc 36 Successfully built 2c007489f6cc 37 Successfully tagged todos/backend:latest
Next is the UI. Inside this project, create our Dockerfile as follows:
1FROM nginx:1.13.7 2 3 COPY ./build /usr/share/nginx/html 4 5 ENV API_URI= 6 CMD echo "window.API_URL_BASE = '$API_URI';" > /usr/share/nginx/html/api.js && nginx -g 'daemon off;'
This is significantly easier. Notice that the CMD line creates a new api.js file before starting our web server. If you remember earlier, this file can be used to tell the UI where the backend application resides, and this is generated using an environment property that is provided at runtime.
Note as well that we are copying the entire build directory into the container. Create React App creates this when you run yarn build, and it contains static files that are ready to use. As such, building this container is done as follows:
1$ yarn build 2 yarn run v1.5.1 3 $ react-scripts build 4 Creating an optimized production build... 5 Compiled successfully. 6 7 File sizes after gzip: 8 9 122.54 KB build/static/js/main.c05a9237.js 10 99.01 KB build/static/css/main.e2f12779.css 11 ✨ Done in 34.71s. 12 13 $ docker build -t todos/webapp 14 Sending build context to Docker daemon 142.8MB 15 Step 1/4 : FROM nginx:1.13.7 16 ---> f895b3fb9e30 17 Step 2/4 : COPY ./build /usr/share/nginx/html 18 ---> Using cache 19 ---> f44495dd8a9a 20 Step 3/4 : ENV API_URI= 21 ---> Using cache 22 ---> b2e16917f2ba 23 Step 4/4 : CMD echo "window.API_URL_BASE = '$API_URI';" > /usr/share/nginx/html/api.js && nginx -g 'daemon off;' 24 ---> Using cache 25 ---> 10fb3b31a053 26 Successfully built 10fb3b31a053 27 Successfully tagged todos/webapp:latest
Finally, we have our end-to-end tests. For these, we want to obtain a simple shell script that can be used to ensure that other services have started first. This is called wait-for-it.sh and can be downloaded from here. Drop this file into the e2e project, and then write our Dockerfile as follows:
1FROM node:9.9.0 2 3 COPY package.json nightwatch.json wait-for-it.sh /opt/tests/e2e/ 4 COPY src /opt/tests/e2e/src/ 5 6 WORKDIR /opt/tests/e2e 7 8 VOLUME /opt/tests/e2e/target 9 10 RUN chmod +x wait-for-it.sh 11 RUN yarn install
Note: We do not use the Alpine image here as our
wait-for-it.shscript requires thatbashis available, which isn’t the case in Alpine.
We also want to extend out nightwatch.json file slightly, so it knows about running tests inside out cluster. Add the following to it, alongside the local block:
1"local": { 2 "launch_url" : "http://localhost:3000", 3 "globals": { 4 "mongo_uri": "mongodb://localhost:27017", 5 "mongo_database": "todo" 6 } 7 }, 8 9 "integration_chrome": { 10 "launch_url": "http://todos-webapp", 11 "selenium_host" : "todos-selenium-chrome", 12 "selenium_port" : 4444, 13 "desiredCapabilities": { 14 "browserName": "chrome" 15 }, 16 "globals": { 17 "mongo_uri": "mongodb://todos-mongo:27017", 18 "mongo_database": "todos" 19 } 20 }
As before, building this image is done as follows:
1$ docker build -t todos/e2e . 2 Sending build context to Docker daemon 9.273MB 3 Step 1/5 : FROM node:9.9.0 4 ---> 4885ab8871c2 5 Step 2/5 : COPY package.json yarn.lock nightwatch.json wait-for-it.sh src /opt/tests/e2e/ 6 ---> 9da9fae297d0 7 Step 3/5 : WORKDIR /opt/tests/e2e 8 Removing intermediate container 5ff8169cb44a 9 ---> f7e9027a0ba5 10 Step 4/5 : VOLUME /opt/tests/e2e/target 11 ---> Running in d6d3b69a9789 12 Removing intermediate container d6d3b69a9789 13 ---> a8a10a0ecff6 14 Step 5/5 : RUN yarn install 15 ---> Running in 4e7938ee2c23 16 yarn install v1.5.1 17 [1/4] Resolving packages... 18 [2/4] Fetching packages... 19 [3/4] Linking dependencies... 20 [4/4] Building fresh packages... 21 Done in 2.38s. 22 Removing intermediate container 4e7938ee2c23 23 ---> 0cee76b31526 24 Successfully built 0cee76b31526 25 Successfully tagged todos/e2e:latest
Creating the application cluster
Now that we have our Docker images, we want to use them. We could just start them up manually every time, but that’s a lot of hassle. Instead, we will use Docker Compose to orchestrate this.
Note: Docker Compose allows you to define a series of Docker Containers that are all started up as one cluster
For our application, we will write a docker-compose.yml file as follows:
1version: '3' 2 services: 3 todos-mongo: 4 image: mongo 5 ports: 6 - "127.0.0.1:27017:27017" 7 todos-backend: 8 image: todos/backend:latest 9 ports: 10 - "127.0.0.1:4000:4000" 11 environment: 12 MONGODB_URL: mongodb://todos-mongo/27017 13 MONGODB_DATABASE: todos 14 todos-webapp: 15 image: todos/webapp:latest 16 ports: 17 - "127.0.0.1:3000:80" 18 environment: 19 API_URI: http://localhost:4000
This starts up three containers – our todos/backend and todos/webapp ones that we have just built, and a mongo image to act as the database. It also configures the todos/backend container to know where the database is, and the todos/webapp container to know where the backend is.
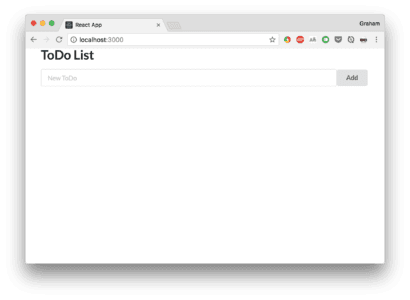
At this point, it’s possible to execute docker-compose up and visit http://localhost:3000 to see a fully working application:
Creating the test cluster
Finally, we want to create a cluster that extends this and allows us to run the tests against it. Fortunately, Docker Compose allows for multiple configuration files to be used together, and it will combine them.
For this, we will write a docker-compose.e2e.yml alongside our previous docker-compose.yml file, as follows:
1version: '3' 2 services: 3 todos-webapp: 4 environment: 5 API_URI: http://todos-backend:4000 6 todos-selenium-chrome: 7 image: selenium/standalone-chrome 8 todos-e2e: 9 image: todos/e2e:latest 10 volumes: 11 - ./target:/opt/tests/e2e/target 12 command: ./wait-for-it.sh todos-selenium-chrome:4444 -- ./wait-for-it.sh todos-webapp:80 -- ./wait-for-it.sh todos-backend:4000 -- ./node_modules/.bin/nightwatch -e integration_chrome
You will notice that the todos-e2e container has a complicated command that is a chain of several calls to wait-for-it.sh. This ensures that the various components we depend on are all available and running before we run our tests.
We also specify a volumes entry. This ensures that the reports from the tests are available on the filesystem outside of the container, which is essential to know what happened and diagnose any problems.
We can now run the tests by executing:
1$ docker-compose -f docker-compose.yml -f docker-compose.e2e.yml up --exit-code-from todos-e2e
The --exit-code-from flag here is the special trick. It will cause Docker Compose to start all of the containers, but when the command from todos-e2e finishes it will then shut everything down again. At the same time, the exit code from this container is used as the exit code from the entire command, meaning that – for example – it will cause builds to fail if this container returns a failure exit code.
Conclusion
This article highlights a way that Docker and Docker Compose can be used to produce a 100% repeatable end-to-end testing environment, either on a developers workstation or on a CI system. The only requirement is a working Docker setup and access to the images which were built as part of the individual application.
Our setup only has three layers, but the only limit is your imagination (and your system resources). Why not try expanding on the tests here, or adding more complexity to the infrastructure – may be a Redis cache as well as the MongoDB data store?
Full source code for this application from GitHub.


© 2024 Pusher Ltd. All rights reserved.
Pusher Limited is a company registered in England and Wales (No. 07489873) whose registered office is at MessageBird UK Limited, 3 More London Riverside, 4th Floor, London, United Kingdom, SE1 2AQ.