- Products

- Developers
- User stories
- Blog
- Pricing

Build a modern web application with Laravel and Vue – Part 3: Testing your application’s API endpoints

In the last chapter, we looked at how to make RESTful API Endpoints. The next thing we will consider is how to test the application’s endpoints before releasing it for public consumption.
Introduction
In the last chapter, we looked at how to make RESTful API Endpoints. The next thing we will consider is how to test the application’s endpoints before releasing it for public consumption. This is useful because it makes sure that throughout the lifetime of the application, you can be sure that the API works as expected.
Prerequisites
This part of the series requires that you have:
- Postman installed on your machine.
- Completed part 2 of the series.
When you have met all the requirements above, let’s continue.
Using Postman for testing endpoints
To test our API endpoints, we are going to use Postman. Postman is a complete tool-chain for API developers and is available on all desktop platforms.
Download and installation
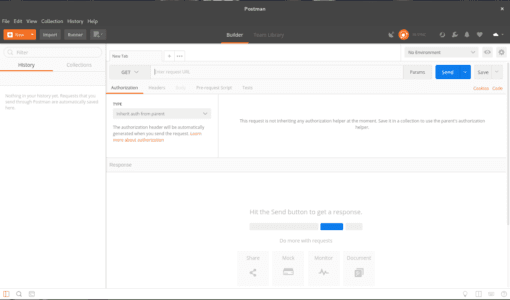
To download Postman, head over here. Once you have successfully downloaded and installed Postman, run it and when you get the interface below, you’re good to go.
Now that we have Postman successfully installed, we can start making our requests to the API. Let’s start by making a GET request to fetch the resources from our API Server.
? For brevity, we will show examples for a few endpoints and you can repeat the rest for other endpoints.
For all requests made using Postman, remember to set the header Accept: application/json in the headers tab of Postman to make sure we get the right response from our API.
? Postman collections help you organize and save all your requests. This makes it easier to go back to an existing request without having to retype it.
Fetching resources in Postman
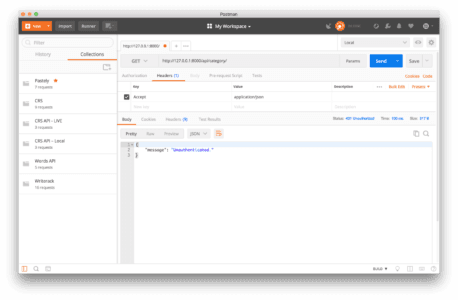
To fetch resources, you need to provide the HTTP method, usually GET, and the URL to fetch the resources from. In the case of our application, we will test a simple endpoint.
Start your Laravel server, if it’s not already running, using the php artisan serve command and hit the following endpoint:
⚠️ Because we have added an authorization middleware to the routes, calling these endpoints without authentication will fail with a “401 Unauthorized” response. We will consider how to make authorized requests later in this article.
URL: http://127.0.0.1:8000/api/category/
Method: GET
Creating resources using Postman
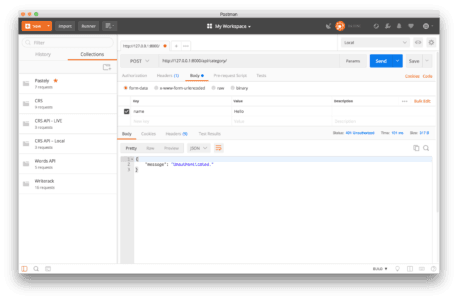
To create resources, you need to provide the HTTP method, usually POST, and the URL to post the data to be created too. In the case of our application, we will test a simple endpoint.
Start your Laravel server, if it’s not already running, using the php artisan serve command and hit the following endpoint:
URL: http://127.0.0.1:8000/api/category
Method: POST
Body: name
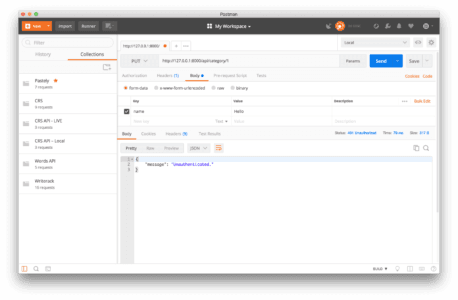
Updating resources using Postman
To update a resource, you need to provide the HTTP method, usually PUT (or PATCH, depending on your preference), and the URL to post the data to be updated too. In the case of our application, we will test a simple endpoint.
Start your Laravel server, if it’s not already running, using the php artisan serve command and hit the following endpoint:
Good Read: Difference between PUT and PATCH.
URL: http://127.0.0.1:8000/api/category/{category_id}
Method: PUT
Body: name
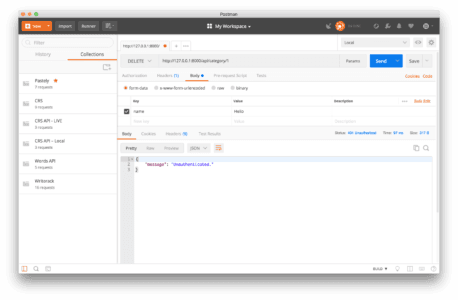
Deleting resources using Postman
To delete a resource, you need to provide the HTTP method, usually DELETE, and the URL to the resource to be deleted. In the case of our application, we will test a simple endpoint.
Start your Laravel server, if it’s not already running, using the php artisan serve command and hit the following endpoint:
URL: http://127.0.0.1:8000/api/category/{category_id}
Method: DELETE
Making authorized requests using access tokens
Certain parts of our application can only be accessed by authenticated users. For this, in the previous article, we added a few endpoints for authentication. When a user hits these endpoints, they will be authenticated and provided with an access token. Attaching this access token to a request on a protected route will grant the user access to the resource.
To create tokens on the backend for the API, we will be using Laravel Passport we setup earlier. Now we will be looking at how to use our access tokens with Postman. First of all, you need to get the token by logging the user in. If the user doesn’t have an account, we create one and then log in.
Creating a new user account
To create a new user, make a POST request using Postman as shown below:
URL: http://127.0.0.1:8000/api/register
Method: POST
Body: name, email, password
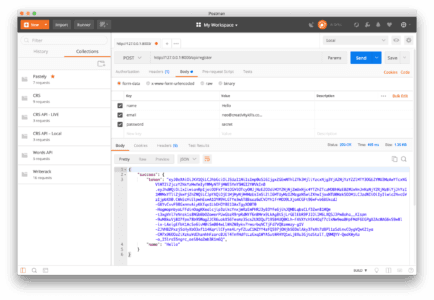
As seen from the response above, there is a token that is returned with the response. The client can make requests using the token obtained from the API as the access_token for further request.
? You will need to copy this
tokenfor use on other API endpoints except for the/api/loginendpoint.
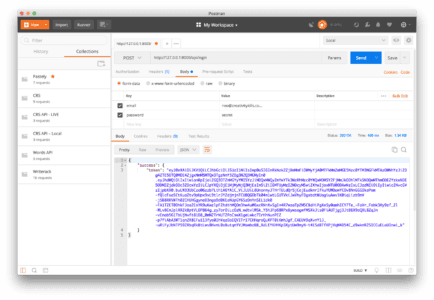
Logging into a user account
To log into a user account, send a request to the endpoint using Postman as seen below:
URL: http://127.0.0.1:8000/api/login
Method: POST
Body: email, password
Applying access tokens to authenticate requests
Now that we have obtained the token from the previous requests, the next we want to do is to now use the access tokens to make our next request. We are going to make a request to fetch all the categories.
Before doing this, go to the CategoryController.php and update the index method as seen below:
1[...] 2 3 public function index() 4 { 5 return response()->json(Category::all()->toArray()); 6 } 7 8 [...]
Now we can make our request in Postman.
? Making a request without specifying the mode of authentication and the token will fail. To authenticate the request, go to the
Authorizationtab and then paste the token obtained from the lastlogin/registerrequest.
URL: http://127.0.0.1:8000/api/category
Method: GET
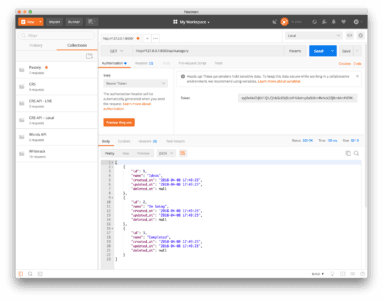
As seen from the screenshot above, the categories are displayed in the response section. If you remove or change the token and make a new request you will get an “Unauthorised” response.
Automatically generating access tokens for Postman requests
Now that we know how to use access tokens to make requests with Postman, you’ll notice how manual the process is. Since we know we will be making a lot of requests using Postman, let’s get Postman to generate our access tokens automatically.
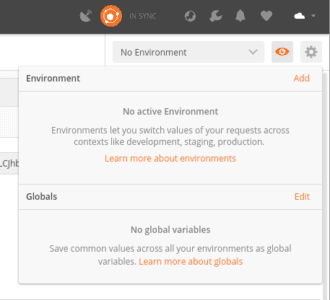
To get started, we need to create a Postman environment. In the environment, we are going to create some variables. To create a new environment, click the Environment quick look button on the top right and then enter the name of the environment you want to create.
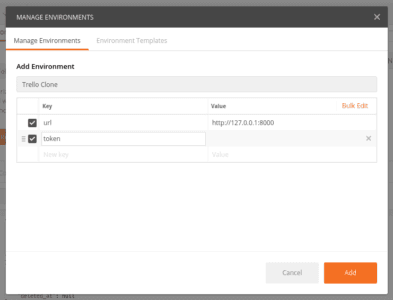
Next, add the environment variables. We’ll create a variable for the url and also one for the token.
? We will leave the value for the
tokenfield blank as that is what we are going to generate so we don’t need to put a value.
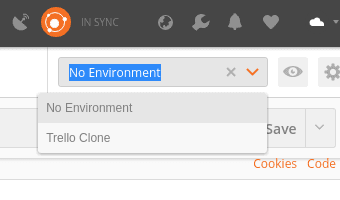
Save your new environment. Next, on the top right of the panel where the url is usually entered, you need to change the environment from No Environment to the name of the environment you want to use – in this case, Trello Clone.
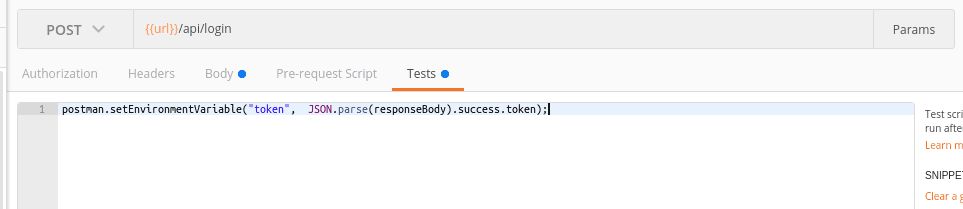
Let’s modify the login request we made earlier. Now in the Tests tab, add the following code:
1postman.setEnvironmentVariable("token", JSON.parse(responseBody).success.token);
What this script does is that it fetches the token from the response and then sets the value to our token environment variable. It’s a bit hacky but it will solve the issue of having to copy the data manually.
After doing this, make the request to the login endpoint. Next, go to any endpoint that requires an access token and add {{token}} to the Authorization tab. After that, the token will be automatically added there and you won’t need to copy the access token to make other requests.

Quick dive into unit tests for your endpoints
By now you have probably heard of Test Driven Development and writing tests for your application. Some developers shy away from writing tests but writing tests is a good way to make sure that you can update your code confidently without worrying about introducing bugs.
What are the unit tests?
In computer programming, unit testing is a software testing method by which individual units of source code, sets of one or more computer program modules together with associated control data, usage procedures, and operating procedures, are tested to determine whether they are fit for use. – Wikipedia.
Writing unit tests in Laravel
Let’s take a look at how to write unit tests. We are going to write tests for the Trello Clone application. We are not going to have 100% coverage, it’s just a few to show you how you can write your own tests.
Laravel comes built with some starter code for unit tests and we will be building on top of that in the following examples. To make a new test in Laravel, you run the following artisan command:
1$ php artisan make:test APITest --unit
Test registering a new user
Let’s write a test to check if our register endpoint works. Open the APITest.php file in the tests/Unit directory and paste this into the file:
1<?php 2 3 namespace Tests\Unit; 4 5 use Tests\TestCase; 6 7 class APITest extends TestCase 8 { 9 public function testUserCreation() 10 { 11 $response = $this->json('POST', '/api/register', [ 12 'name' => 'Demo User', 13 'email' => str_random(10) . '@demo.com', 14 'password' => '12345', 15 ]); 16 17 $response->assertStatus(200)->assertJsonStructure([ 18 'success' => ['token', 'name'] 19 ]); 20 } 21 }
In the code above, we created a mock request using the json method that comes with Laravel’s TestCase class and then checked the response to see if the status code is 200 and if the returned structure matches what we expect.
Test logging in a new user
To test if the login endpoint works, let’s add a new method to the APITest class:
1public function testUserLogin() 2 { 3 $response = $this->json('POST', '/api/login', [ 4 'email' => 'demo@demo.com', 5 'password' => 'secret' 6 ]); 7 8 $response->assertStatus(200)->assertJsonStructure([ 9 'success' => ['token'] 10 ]); 11 }
Test fetching all categories
Next, let’s test fetching categories. Add the following method to the class:
1public function testCategoryFetch() 2 { 3 $user = \App\User::find(1); 4 5 $response = $this->actingAs($user, 'api') 6 ->json('GET', '/api/category') 7 ->assertStatus(200)->assertJsonStructure([ 8 '*' => [ 9 'id', 10 'name', 11 'created_at', 12 'updated_at', 13 'deleted_at' 14 ] 15 ] 16 ); 17 }
The above structure assertion is indicated by the * that the key can be any string.
Since we don’t have any logic for some methods in our category controller, let’s add some make-believe logic for now. We will update it in one of the next parts. Open the CategoryController and update the following methods as seen below:
1public function store(Request $request) 2 { 3 return response()->json(['status' => true, 'message' => 'Category Created']); 4 } 5 6 public function destroy(Category $category) 7 { 8 return response()->json(['status' => true, 'message' => 'Category Deleted']); 9 }
Now let’s test these endpoints.
Test creating a new category resource
To test adding a new category, add the following method to the APITest class:
1public function testCategoryCreation() 2 { 3 $this->withoutMiddleware(); 4 5 $response = $this->json('POST', '/api/category', [ 6 'name' => str_random(10), 7 ]); 8 9 $response->assertStatus(200)->assertJson([ 10 'status' => true, 11 'message' => 'Category Created' 12 ]); 13 }
In the above, we make a call to $this->withoutMiddleware(). This leaves out the middleware(s) registered to this endpoint. Because the auth:api is a middleware registered to this endpoint, it is left put and we can call without authentication. This is not a recommended method but it’s good to know it exists.
Test deleting a category resource
Let’s write a test to test deleting a resource. In the test class, add the following method:
1public function testCategoryDeletion() 2 { 3 $user = \App\User::find(1); 4 5 $category = \App\Category::create(['name' => 'To be deleted']); 6 7 $response = $this->actingAs($user, 'api') 8 ->json('DELETE', "/api/category/{$category->id}") 9 ->assertStatus(200)->assertJson([ 10 'status' => true, 11 'message' => 'Category Deleted' 12 ]); 13 }
Running the unit tests
Now that you have written your tests, you can run them using the command below in the root of your project:
1$ ./vendor/bin/phpunit
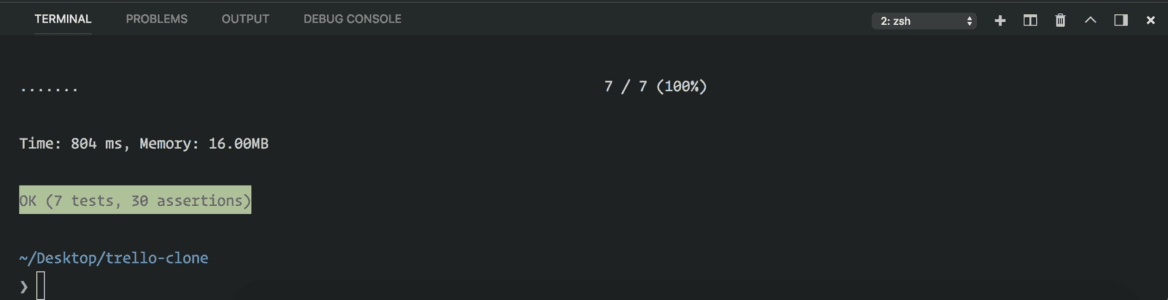
From the output above, can see that all our tests passed and we are good to continue writing more test cases or maybe release our API for public consumption!
Bonus: using a separate database for unit tests
On a side note, when running tests, we will definitely want to use a different database from our current one so it does not become cluttered. Laravel helps us handle this effectively.
If you want to do this in any other project you are working with, open the phpunit.xml file in the root of your project and look for the <php> tag. Replace the children of this tag with the following:
1[...] 2 <env name="APP_ENV" value="testing"/> 3 <env name="APP_URL" value="http://127.0.0.1:8000"/> 4 <env name="DB_CONNECTION" value="sqlite"/> 5 <env name="DB_DATABASE" value=":memory:"/> 6 <env name="CACHE_DRIVER" value="array"/> 7 <env name="SESSION_DRIVER" value="array"/> 8 <env name="QUEUE_DRIVER" value="sync"/> 9 [...]
This forces PHPUnit to use in-memory SQLite as its database. Next, in the test class, add the following:
1<?php 2 3 [...] 4 use Illuminate\Foundation\Testing\DatabaseMigrations; 5 6 class SomeTest extends TestCase 7 { 8 use DatabaseMigrations; 9 10 [...] 11 } 12 13 [...]
You don’t need to do this in the current project’s tests though as the project was not set up for that. It’s just a good to know.
? The
DatabaseMigrationstrait makes sure that a migration is run before the test is run. This ensures the tables exist before the tests are run so we do not get database errors.
Conclusion
In this part of the series, we have seen how to use Postman to test API endpoints. We also automate the token generation process for requests. We have also seen how to unit test our API Endpoints.
In the next chapter we will diverge from PHP a little and look at how to create our front facing Vue Application.


© 2024 Pusher Ltd. All rights reserved.
Pusher Limited is a company registered in England and Wales (No. 07489873) whose registered office is at MessageBird UK Limited, 3 More London Riverside, 4th Floor, London, United Kingdom, SE1 2AQ.