- Products

- Developers
- User stories
- Blog
- Pricing

Build a modern web application with Laravel and Vue – Part 1: Setting up your environment
In this series, we are going to walk through building modern web applications with Laravel and Vue. We will go from the basics, setting up your environment, to more technical concepts like building endpoints RESTfully and even testing your endpoints.
Introduction
In this series, we are going to walk through building modern web applications with Laravel and Vue. We will go from the basics, setting up your environment, to more technical concepts like building endpoints RESTfully and even testing your endpoints.
In this chapter, we will be setting up an environment for PHP development, Laravel to be specific. We will also be installing NodeJS and NPM as we will need them to manage and build our JavaScript and Vue files.
⚠️ Development environments differ a lot so it may be impossible to have a perfect setup guide that will be applicable to everyone. Therefore some of the setup guides contained in this article may not apply directly to your own OS or environment but there will be alternatives and I will try to mention any if I know of them. I am building on a Mac so other Mac users will be able to follow along 100%.
Prerequisites
To follow along in this series you will need the following:
- Knowledge of PHP.
- Very basic knowledge of the Laravel framework.
- Knowledge of JavaScript and the Vue framework.
- Basic knowledge of Node.js **and NPM.
- SQLite installed on your machine. Installation guide.
Setting up for PHP development: installing composer

Composer is a package manager for PHP applications. It allows you install libraries and packages that are publicly available and make use of it in your own applications. This makes it easy to share reusable code among other PHP developers.
Laravel uses Composer to pull in the dependent libraries and so we need to install Composer on our machine so we can pull in these packages.
Installing Composer on Windows
Download and run Composer-Setup.exe. It will install the latest Composer version and set up your PATH so that you can just call composer from any directory in your terminal.
Installing on Linux/macOS
To install Composer, run the following script in your terminal:
1$ curl -sS https://getcomposer.org/installer | sudo php -- --install-dir=/usr/local/bin --filename=composer
This will download the composer installer and then move it to your /usr/local/bin directory so you can call the composer command from anywhere on your terminal.
To test your installation, run:
1$ composer
And you should get output similar to this:
1______ 2 / ____/___ ____ ___ ____ ____ ________ _____ 3 / / / __ \/ __ `__ \/ __ \/ __ \/ ___/ _ \/ ___/ 4 / /___/ /_/ / / / / / / /_/ / /_/ (__ ) __/ / 5 \____/\____/_/ /_/ /_/ .___/\____/____/\___/_/ 6 /_/ 7 Composer version 1.6.3 2018-01-31 16:28:17 8 9 Usage: 10 command [options] [arguments] 11 12 Options: 13 --help (-h) Display this help message 14 --quiet (-q) Do not output any message 15 --verbose (-v|vv|vvv) Increase the verbosity of messages: 1 for normal output, 2 for more verbose output and 3 for debug 16 --version (-V) Display this application version 17 --ansi Force ANSI output 18 --no-ansi Disable ANSI output 19 --no-interaction (-n) Do not ask any interactive question 20 --profile Display timing and memory usage information 21 --working-dir (-d) If specified, use the given directory as working directory. 22 ...
This means Composer was successfully installed on your system.
Setting up for PHP development: installing Valet (optional)
⚠️ Although Valet is only, officially, available to Mac users, there is a Linux port available here.
Valet is a Laravel development environment for Mac users. Laravel Valet configures your Mac to always run Nginx in the background when your machine starts. Valet also proxies all requests on the
*.testdomain to point to sites installed on your local machine. – Laravel Valet Documentation
Valet is not essential to follow along in this tutorial but is a good to have. With Valet you can quickly set up development environments for Laravel applications.
Before installation, you should make sure that no other programs such as Apache or Nginx are binding to your local machine’s port 80.
To install Valet, run the command below:
1$ composer global require laravel/valet
When composer is done, run the valet install command. This will configure and install Valet and DnsMasq, and register Valet’s daemon to launch when your system starts.
Once Valet is installed, you can check if it is installed correctly by pinging any *.test domain on your terminal using a command:
1ping -c 1 foo.test
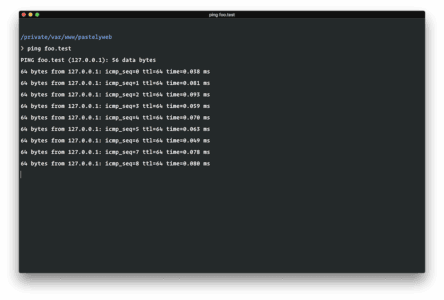
If Valet is installed correctly you should see this domain responding on 127.0.0.1. You can read more about Laravel Valet in the documentation.
Setting up for PHP development: installing the Laravel CLI
Laravel makes building and managing applications easy. It bootstraps a lot of components that work together to create the perfect framework that would let you focus on what is core and important to your application. If this is your first time using Laravel, you may never go back to the old ways again.
The Laravel CLI can be installed easily with Composer. Run the following command to install it:
1$ composer global require "laravel/installer"
This command will install the Laravel CLI globally for you. So whenever you want to start a new project with Laravel, you’ll just need to run the following command:
1$ laravel new appname
When creation of the sample application is complete, you just need to cd appname and then if you are not using Laravel Valet, run the command below to start a PHP server on port 8000:
1$ php artisan serve
? You’ll need to press
ctrl + cto exit the running Laravel application.
If you are using Laravel valet, you can link the project to a .test domain by running the command below in the root of the project:
1$ valet link appname
Then you can visit appname.test on your browser to see your new Laravel application. It’s that easy.
To see all the available Laravel CLI commands, run:
1$ php artisan list
Useful Laravel CLI commands
The make command is the one you’ll use the most. It lets you create different kinds of components for your application. You can use it to create models, controllers, database migrations, and other things which we will not cover in this series.
To make a new model class, that will be created in the app/ directory, run the command:
1$ php artisan make:model SampleModel
To make a new controller class, that will be created in the app/Http/Controller/directory, run the command:
1$ php artisan make:controller SampleController
To make a new database migration class, that will be created in the database/migrations/ directory, run the command:
1$ php artisan make:migration create_sample_table
To migrate changes to your database using the migrations you generated earlier, run the following command:
1$ php artisan migrate
For a really simple Laravel application, these are the commands you may likely use all through. We will learn more about them as we progress through the application. You can also check out the console documentation.
Should I use Lumen or Laravel
Lumen is a scaled down version of the Laravel framework. It removes a lot of components that it deems not as useful for lightweight development. Because it is made from Laravel, applications built in Lumen can easily be upgraded to Laravel.
It is mainly designed for building apps with microservice architecture or building APIs. In Lumen, sessions, cookies, and templating are not needed so they are taken away, keeping what’s essential – routing, logging, caching, queues, validation, error handling and a few more.
The choice between Lumen and Laravel comes when you are deciding how you want your application to function. If you want to build a single page application using Vue or React, you may decide to use Lumen to power your business logic.
If you want to integrate them into the application so that a few components are embedded directly in your templates, Laravel is the way to go. With Lumen you will not get the full functionality Laravel has to offer. So if you decide you need the full functionality, choose Laravel over Lumen.
For this series, we will be using Laravel in its full glory.
Installing and configuring dependencies (Passport)
Our application is going to be API based, so we need a way to secure our APIs so only recognized users can get into it.
Installing Laravel Passport
Laravel Passport is the tool for API Authentication. Passport makes authentication a breeze and provides a full OAuth2 server implementation for your Laravel application in a matter of minutes.
To install passport, run the following command:
1$ composer require laravel/passport
API Auth using Laravel Passport
There is an extensive article on authentication with Laravel Passport available here. You should give it a read before moving to the next part of this series as it will help you get familiar with Laravel Passport.
Conclusion
In this part, we considered how you can set up your development environment for building modern web applications. In the next parts, we will build a Laravel application and while building, we will explain some concepts you need to know.
As we progress with building our application, you will see how we can bring all the tools together to build modern applications using Vue and Laravel. See you in the next part.


© 2024 Pusher Ltd. All rights reserved.
Pusher Limited is a company registered in England and Wales (No. 07489873) whose registered office is at MessageBird UK Limited, 3 More London Riverside, 4th Floor, London, United Kingdom, SE1 2AQ.