- Products

- Developers
- User stories
- Blog
- Pricing

How to troubleshoot React errors

This article examines some of the most common errors encountered when building React applications, and shows how to avoid or solve them.
Introduction
There are a few common problems that are frequently faced by users who are new to React. Although they are all mentioned somewhere in the official docs, they are easy to miss and can be hard to find when you do get bitten.
Therefore, I’m aggregating them in this post and hope it helps you avoid some strange errors.
Rendering adjacent JSX elements
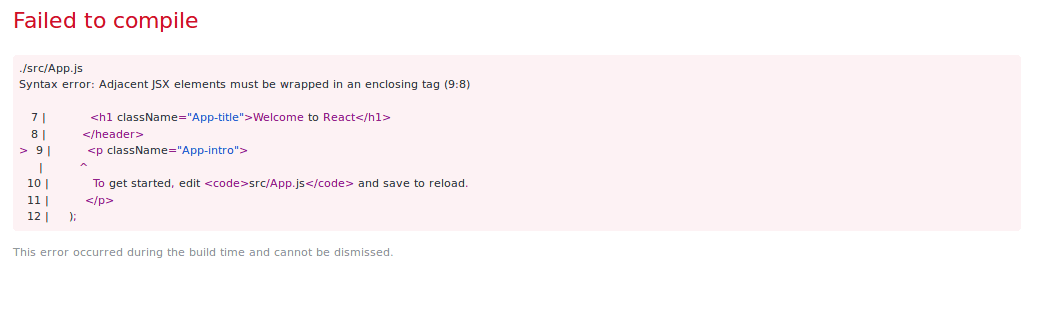
Let’s say you want to render multiple elements from a React component’s render function, you might think that the following code sample below should just work:
1import React, { Component } from 'react'; 2 3 class App extends Component { 4 render() { 5 return ( 6 <header className="App-header"> 7 <h1 className="App-title">Welcome to React</h1> 8 </header> 9 <p className="App-intro"> 10 To get started, edit <code>src/App.js</code> and save to reload. 11 </p> 12 ); 13 } 14 } 15 16 export default App;
But it doesn’t. React throws up an error with a message that says “Adjacent JSX elements must be wrapped in an enclosing tag“. This is because you cannot return multiple elements from a React component without wrapping them in something.
Before React 16, the common way to solve the problem was to enclose the adjacent JSX elements inside a wrapper tag, usually a div.
1import React, { Component } from 'react'; 2 3 class App extends Component { 4 render() { 5 return ( 6 <div> 7 <header className="App-header"> 8 <h1 className="App-title">Welcome to React</h1> 9 </header> 10 <p className="App-intro"> 11 To get started, edit <code>src/App.js</code> and save to reload. 12 </p> 13 </div> 14 ); 15 } 16 } 17 18 export default App;
And it totally works. But many people do not like this solution because it adds extra markup to the output of the component which is undesirable in many cases.
So the React developers made it possible to return an array of elements in React 16, which enabled developers to skip the wrapper tag:
1import React, { Component } from "react"; 2 3 class App extends Component { 4 render() { 5 return [ 6 <header className="App-header"> 7 <h1 className="App-title">Welcome to React</h1> 8 </header>, 9 <p className="App-intro"> 10 To get started, edit <code>src/App.js</code> and save to reload. 11 </p> 12 ]; 13 } 14 } 15 16 export default App;
React 16.2 introduced another way to solve this problem: using Fragments. Fragments let you group a list of children without adding extra nodes to the DOM.
Here’s an example of how that works:
1import React, { Component } from "react"; 2 3 class App extends Component { 4 render() { 5 return ( 6 <React.Fragment> 7 <header className="App-header"> 8 <h1 className="App-title">Welcome to React</h1> 9 </header> 10 <p className="App-intro"> 11 To get started, edit <code>src/App.js</code> and save to reload. 12 </p> 13 </React.Fragment> 14 ); 15 } 16 } 17 18 export default App;
If you check out the rendered component using your browser’s dev tools, you will see that there no extra node was inserted into the DOM.
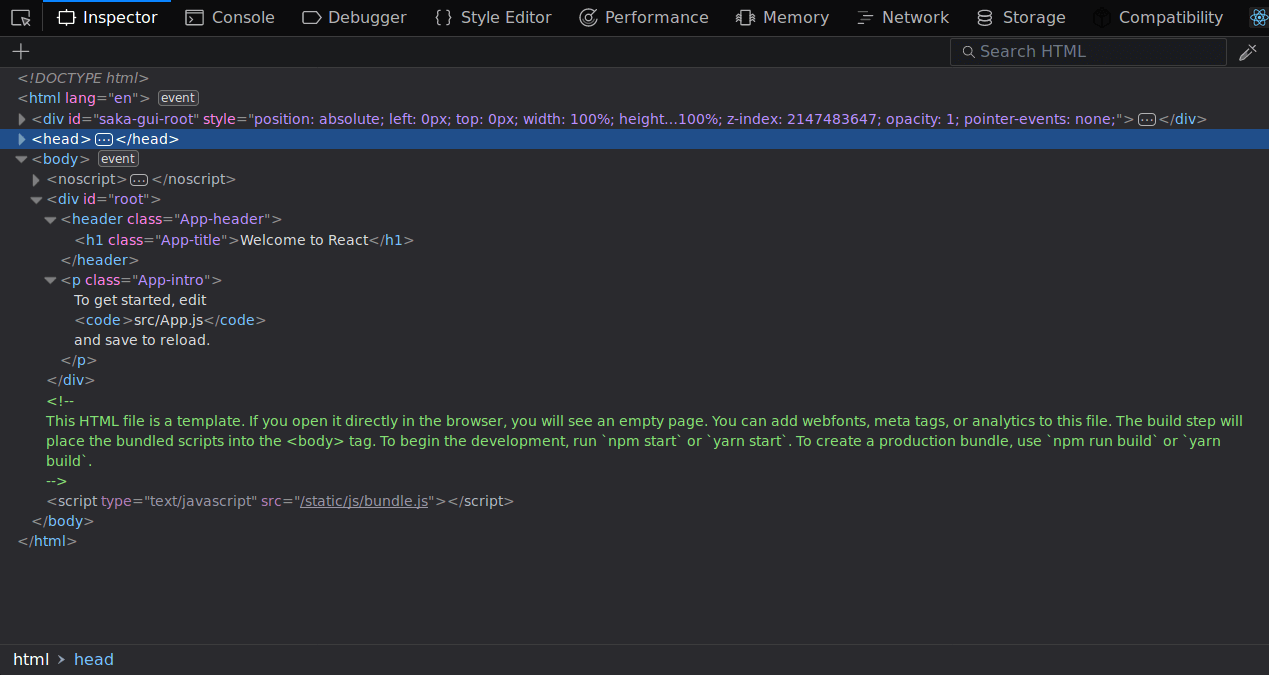
This is my preferred way of rendering multiple elements from a React component because, according to Dan Abramov, it’s faster and uses less memory than container divs. It also makes it easier to work with CSS layout techniques such as Grid and Flexbox where having extra markup can have an impact on the layout.
Not starting component names with a capital letter
All React component names must start with a capital letter. If you start a component name with a lowercase letter, it will be treated like a built-in element like a <div> or a <span>. This is because of the way JSX works.
In JSX, rendering a component that begins with a lowercase letter compiles down to React.createElement('component'), the equivalent of an HTML element. For example, let’s say you have a button component that returns a simple button element, this will not work as expected.
1import React, { Component } from "react"; 2 import ReactDOM from "react-dom"; 3 4 class button extends Component { 5 render() { 6 return <button className="App-button">Yo!</button>; 7 } 8 } 9 10 ReactDOM.render(<button />, document.getElementById("root"));
Instead of rendering your <button /> component, React ignores it and renders a vanilla <button> element instead because the button component is not capitalized when referenced in ReactDOM.render().
If your component name is not a valid HTML tag, such as <app /> you’ll get a warning in your browser console:

This problem is easily avoided by beginning all component names with a capital letter. Here’s an example that provides the correct output:
1import React, { Component } from "react"; 2 import ReactDOM from "react-dom"; 3 4 class Button extends Component { 5 render() { 6 return <button className="App-button">Yo!</button>; 7 } 8 } 9 10 ReactDOM.render(<Button />, document.getElementById("root"));

Not binding class methods in event handlers
When working with React components, you can define class methods within the component and use them in the component’s render function.
1import React, { Component } from "react"; 2 3 class App extends Component { 4 sayName(name) { 5 return name; 6 } 7 8 render() { 9 return `Hello ${this.sayName("Ayo")}`; 10 } 11 } 12 13 export default App;
This above code will work just fine because React makes sure this refers to the instance of the class.
However, when you reference a class method from an event handler, such as onClick, the class methods lose their this bindings so you cannot this.state, this.props or this.setState() unless you re-bind them.
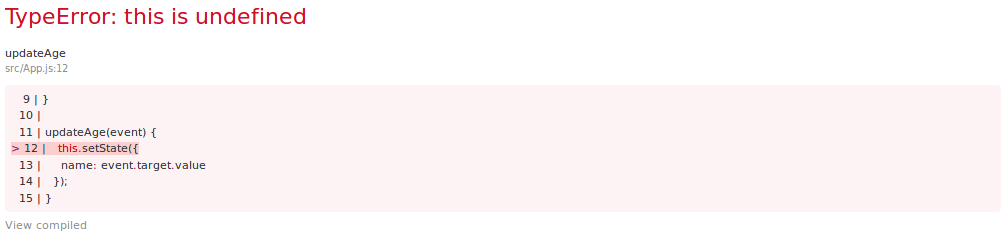
For example, the code sample below will not work as expected. When you try to update the form, you get an error with a message that says “this is undefined”.
1class App extends Component { 2 constructor(props) { 3 super(props); 4 this.state = { 5 age: '' 6 }; 7 } 8 9 updateAge(event) { 10 this.setState({ 11 age: event.target.value 12 }); 13 } 14 15 render() { 16 return ( 17 <form> 18 <input onChange={this.updateAge} value={this.state.age} /> 19 </form> 20 ) 21 } 22 }
There are quite few approaches you can take to solve this problem. One way is to bind wrap the methods in an arrow function like this:
1class App extends Component { 2 constructor(props) { 3 super(props); 4 this.state = { 5 age: "" 6 }; 7 } 8 9 updateAge(event) { 10 this.setState({ 11 age: event.target.value 12 }); 13 } 14 15 render() { 16 return ( 17 <form> 18 <input 19 onChange={event => this.updateAge(event)} 20 value={this.state.age} 21 /> 22 </form> 23 ); 24 } 25 }
Or you can just bind them in the constructor function as shown below:
1class App extends Component { 2 constructor(props) { 3 super(props); 4 this.state = { 5 age: "" 6 }; 7 8 this.updateAge = this.updateAge.bind(this); 9 } 10 11 updateAge(event) { 12 this.setState({ 13 age: event.target.value 14 }); 15 } 16 17 render() { 18 return ( 19 <form> 20 <input onChange={this.updateAge} value={this.state.age} /> 21 </form> 22 ); 23 } 24 }
A more elegant solution is to utilize the class property syntax and just use an arrow function for the methods. At the time of writing, the class property syntax is not yet part of the official ECMAScript spec yet (stage-3) so you’ll need to utilize Babel’s class properties transform plugin in your project.
If you’re using create-react-app to bootstrap your projects, it already has the class properties transform plugin enabled, so the following should work just fine.
1import React, { Component } from "react"; 2 3 class App extends Component { 4 constructor(props) { 5 super(props); 6 this.state = { 7 age: "" 8 }; 9 } 10 11 updateAge = event => { 12 this.setState({ 13 age: event.target.value 14 }); 15 }; 16 17 render() { 18 return ( 19 <form> 20 <input onChange={this.updateAge} value={this.state.age} /> 21 </form> 22 ); 23 } 24 } 25 26 export default App;
Accessing state before it is updated
Using setState can be problematic for beginners to React due to its asynchronous nature.
Since setState() does not always immediately update a component, reading this.state right after calling setState() is a potential pitfall.
The React docs describes this concept in greater detail:
Think of
setState()as a request rather than an immediate command to update the component. For better-perceived performance, React may delay it, and then update several components in a single pass. React does not guarantee that the state changes are applied immediately.
Here’s an example that illustrates this:
1import React, { Component } from "react"; 2 3 class App extends Component { 4 constructor(props) { 5 super(props); 6 this.state = { 7 checked: false 8 }; 9 } 10 11 updateCheckbox = event => { 12 this.setState({ 13 checked: !this.state.checked 14 }); 15 console.log(this.state); 16 }; 17 18 render() { 19 return ( 20 <form> 21 <label> 22 Checkbox: 23 <input 24 onChange={this.updateCheckbox} 25 type="checkbox" 26 value={this.state.checked} 27 /> 28 </label> 29 </form> 30 ); 31 } 32 } 33 34 export default App;
As you can see from the gif above, logging the state object immediately after the call to setState() returns the previous state instead of the updated state. This is because, by the time the console.log() statement is invoked, setState() hasn’t done its job yet.
If you need to access the state object immediately after updating the state, you can pass in a callback function to setState. The callback is guaranteed to fire after the update has been applied so you’ll always get the latest state object.
1this.setState( 2 { 3 checked: !this.state.checked 4 }, 5 () => { 6 console.log(this.state); 7 } 8 );
You can also use the componentDidUpdate lifecycle hook which is also certain to be invoked immediately after updating occurs.
If you need to set the state based on the previous state and props, you can use the following pattern:
1this.setState((previousState, currentProps) => { 2 return { ...previousState, name: currentProps.name }; 3 });
Here, setState receives the previousState and currentProps as arguments so you can use them to construct the next state. The return value of this function is merged with the existing state to form the new state.
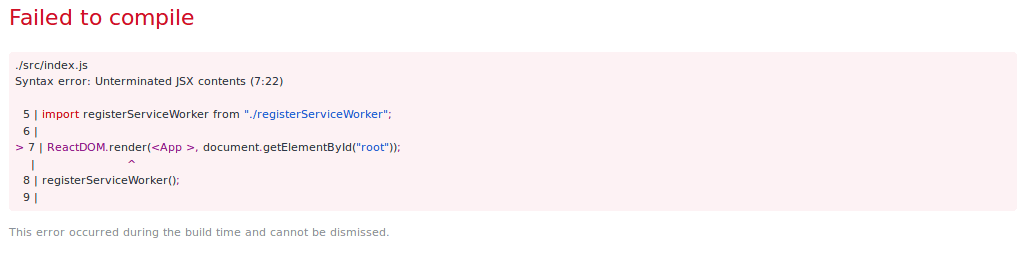
Not closing element or component tags
In HTML, there is the concept of self-closing tags. These tags do not enclose any content so you can just leave them open or use a closing backslash in the opening tag. Some examples are <img />, <br /> e.t.c.
JSX, on the other hand, requires that all elements must be closed, either with the self-closing format or with a corresponding closing tag. This also applies to React components: <ComponentName />, and <ComponentName></ComponentName> is valid but <ComponentName> isn’t.
Wrap up
React is intuitive for the most part, but there are quite a few stumbling points which might catch you by surprise. If you keep in mind the biggest problems when working with React, you’ll know how to fix them without breaking a sweat.


© 2024 Pusher Ltd. All rights reserved.
Pusher Limited is a company registered in England and Wales (No. 07489873) whose registered office is at MessageBird UK Limited, 3 More London Riverside, 4th Floor, London, United Kingdom, SE1 2AQ.