- Products

- Developers
- User stories
- Blog
- Pricing

How to track our pizza in realtime with Pusher and Google Maps
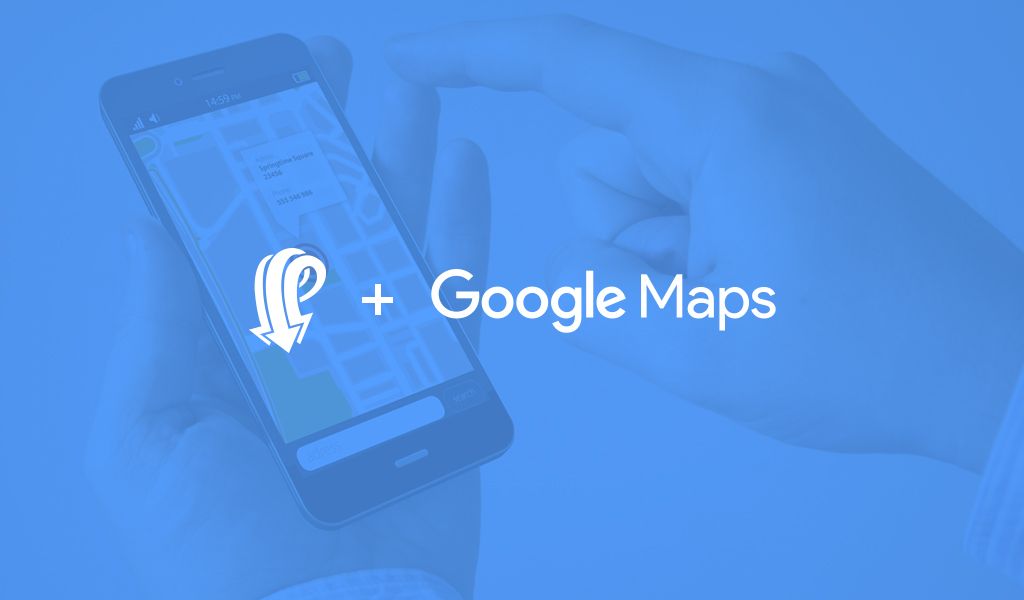
In this tutorial, we will cover how to build a realtime map to track pizza delivery using Pusher and Google Maps API. I was really hungry the other night and ordered something old school style and called up this small canteen which has some delicious, fresh and mouth-watering pizza!
Introduction
In this tutorial, we will cover how to build a realtime map to track pizza delivery using Pusher and Google Maps API.
I was really hungry the other night and ordered something old school style and called up this small canteen which has some delicious, fresh and mouth-watering pizza! Now they did not have a tracker app and I couldn’t wait to hog on the cheesy deliciousness so I decided to track it myself!
It wasn’t much of an effort though, thanks to the Pusher APIs the task was easy peasy! So I gave this link to my delivery hero (Anyone who delivers pizza is a hero) and he, having a better smart phone than I do, got on-board quickly and I could track my pizza! :D
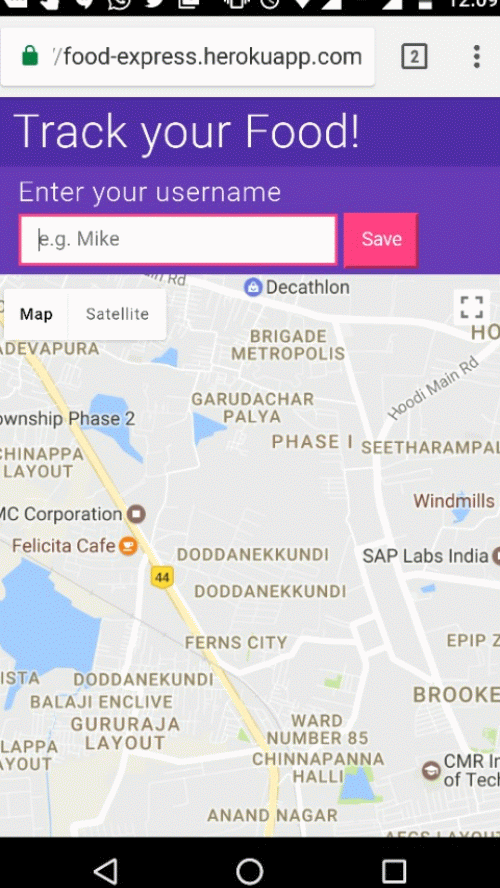
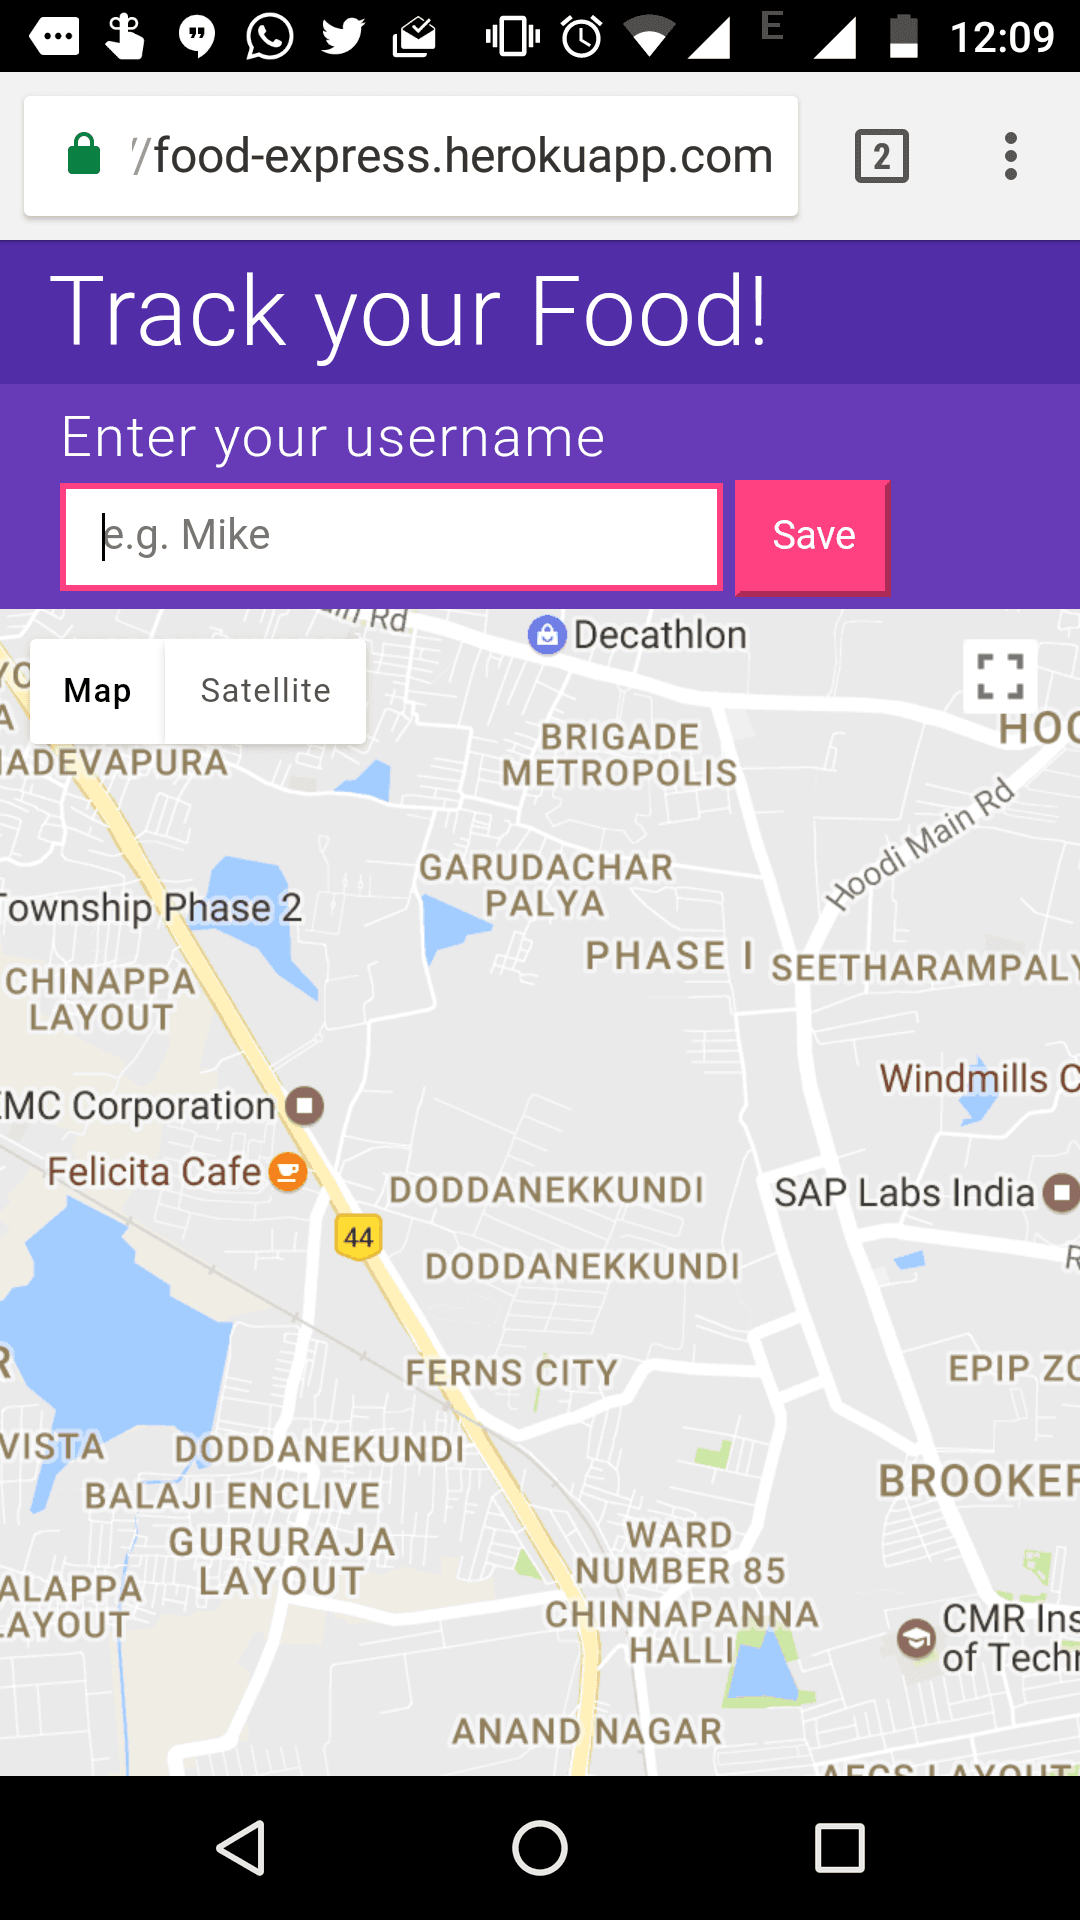
Here’s a sneak peak of how our app will look once it’s done.
Step 0: Setting up our app
- Start off by creating an
index.htmlwith this code snippet. - Our humble index.html doesn’t do much except including a
metatag in theheadsection so that our app looks crisp and works great in mobile browsers as well.
1<!DOCTYPE html> 2<html> 3 <meta name="viewport" content="width=device-width, initial-scale=1"> 4 <head> 5 <title>Realtime Tracking with Pusher</title> 6 <meta charset="utf-8"> 7 </head> 8 <body> 9 <h1>Food Express - Track your food delivery realtime!</h1> 10 </body> 11</html>
- Since we’ll be using Google Maps, let’s add their JavaScript API and see the map in action!
- But before you can integrate Google Maps you need to get your key. Click here to get the key.
- Once you get the key, copy it, and include their JS file in the
index.html. Also add the script tag forapp.jswhich will contain our app’s code. - We’ll also add a CSS file
app.cssfor making our app look nice! - This is how your
index.htmlwill look like:
1<!DOCTYPE html> 2<html> 3 <meta name="viewport" content="width=device-width, initial-scale=1"> 4 <head> 5 <title>Realtime Tracking with Pusher</title> 6 <meta charset="utf-8"> 7 <link href="app.css" rel="stylesheet"></link> 8 </head> 9 <body> 10 <div class="header"> 11 <h1>Food Express - Track your food delivery realtime!</h1> 12 </div> 13 <div class="container"> 14 <div id="map"></div> 15 </div> 16 <script src="https://maps.googleapis.com/maps/api/js?key=INSERT_YOUR_KEY_HERE"></script> 17 <script type="text/javascript" src="src/app.js"></script> 18 </body> 19</html>
- Let’s add some code quickly to render the map in our
app.js
1(function () { 2 // load the map 3 map = new google.maps.Map(document.getElementById('map'), { 4 center: {lat: -34.397, lng: 150.644}, 5 zoom: 8 6 }); 7}());
Step 1: Capture device’s location
- We’ll use Web’s Geolocation API to get the user’s location on start-up.
- With this code, we get the location and centre the map. See we’re already into delivering a personalized experience!
1// get the location via Geolocation API 2if ('geolocation' in navigator) { 3 var currentLocation = navigator.geolocation.getCurrentPosition(function (position) { 4 map.setCenter({ 5 lat: position.coords.latitude, 6 lng: position.coords.longitude 7 }); 8 }); 9}
Step 2: Capture
- It’s important to capture a username to identify my Delivery Hero on the map.
- Let’s code a
divwhich will take input and store it in-memory. - Add the following code in
index.html
1<div id="name-box" class="name-box"> 2 <h3>Enter your username</h3> 3 <input id="name" type="text" placeholder="e.g. Mike"> 4 <button id="saveNameButton">Save</button> 5</div>
- And some JavaScript to get the name.
1var username; 2 3// reference for DOM nodes 4var saveNameButton = document.getElementById('saveNameButton'); 5var saveNameBox = document.getElementById('name-box'); 6var nameInput = document.getElementById('name'); 7var welcomeHeading = document.getElementById('welcome-message'); 8var deliveryHeroBox = document.getElementById('delivery-hero-box'); 9 10saveNameButton.addEventListener('click', saveName); 11 12// all functions, event handlers 13function saveName (e) { 14 var input = nameInput.value; 15 if (input && input.trim()) { 16 username = input; 17 18 // hide the name box 19 saveNameBox.classList.add('hidden'); 20 21 // set the name 22 welcomeHeading.innerHTML = 'Hi! <strong>' + username + 23 (mode === 'user' 24 ? '</strong>, type in your Delivery Hero\'s name to track your food.' 25 : '</strong>, type in the customer name to locate the address'); 26 // show the delivery hero's div now 27 deliveryHeroBox.classList.remove('hidden'); 28 } 29 return; 30}
Step 3: Set up tracking logic and send events on location change for realtime map
- To track the location of our Delivery Hero (and pizza) we’ll use Pusher’s real time capabilities. We’ll trigger events whenever we change our location and also at the same time listen for the location change events of our Delivery Hero.
- Signup for Pusher, or Login if you already have an account.
- Once you login, create an app by giving an
app-nameand choose aclusterin the Create App screen. - Now that we’ve registered and created the app, add
Pusher's JavaScript libraryin yourindex.html
1<script src="https://js.pusher.com/4.0/pusher.min.js"></script>
- Connect to your app by calling the
Pusherconstructor with yourapp keyas shown in the below line.
1var pusher = new Pusher('<INSERT_PUSHER_APP_KEY_HERE>', { 2 cluster: '<INSERT_PUSHER_CLUSTER_HERE>', 3 encrypted: true 4});
- Next, I need to start triggering events when my location changes, so that my Delivery Hero knows that I am at my friend’s place now. (He said he was hungry too and I am a good guy :D ).
- While we’ll trigger events for our location change, we need to secure these events so that only intended recipients can track us. We’ll accomplish this by using Pusher’s Channel concept.
- Channels are a way to filter and secure events. In our app each user will be represented as a
channel. We’ll be using Pusher’s Private Channels.
1var myLocationChannel = pusher.subscribe('private-<USERNAME>');
- A
channelwill be named after the username chosen by the user, and with this the other party can subscribe and listen the location change events for a particular user. - To use private channels, you must be authenticated. Pusher makes writing an auth server very easy. I used their NodeJS template here.
- My server.js looks like this:
1var express = require('express'); 2var bodyParser = require('body-parser'); 3var Pusher = require('pusher'); 4 5var app = express(); 6app.use(bodyParser.json()); 7app.use(bodyParser.urlencoded({ extended: false })); 8 9// to serve our JavaScript, CSS and index.html 10app.use(express.static('./')); 11 12var pusher = new Pusher({ 13 appId: 'INSERT_YOUR_APP_ID_HERE', 14 key: 'INSERT_YOUR_KEY_HERE', 15 secret: 'INSERT_YOUR_SECRET_HERE', 16 cluster: '<INSERT_PUSHER_CLUSTER_HERE>' 17}); 18 19app.post('/pusher/auth', function(req, res) { 20 var socketId = req.body.socket_id; 21 var channel = req.body.channel_name; 22 var auth = pusher.authenticate(socketId, channel); 23 res.send(auth); 24}); 25 26var port = process.env.PORT || 5000; 27app.listen(port, () => console.log('Listening at http://localhost:5000'));
- To trigger events we’ll be using Pusher’s Client Events as clients can directly trigger these events from their devices and they need not necessarily go via a server first.
- You need to enable
Client Eventsin yourSettingstab on Pusher’s Dashboard. Client Eventsshould start withclient-. (Note thatClient Eventshave a number of restrictions that are important to know about while creating your awesome app. Read more about them here).- On startup we create a channel using the code below, and then send our client events to it every time we change location.
- We’ll also save the last location in an object (
myLastKnownLocation) for later retrieval.
1function createMyLocationChannel (name) { 2 var myLocationChannel = pusher.subscribe('private-' + name); 3 myLocationChannel.bind('pusher:subscription_succeeded', function() { 4 // safe to now trigger events 5 // use the watchPosition API to watch the changing location 6 // and trigger events with new coordinates 7 locationWatcher = navigator.geolocation.watchPosition(function(position) { 8 var location = { 9 lat: position.coords.latitude, 10 lng: position.coords.longitude 11 }; 12 triggerLocationChangeEvents(myLocationChannel, location); 13 }); 14 15 // also start a setInterval to keep sending the loction every 5 secs 16 sendLocationInterval = setInterval(function () { 17 // not using `triggerLocationChangeEvents` to keep the pipes different 18 myLocationChannel.trigger('client-location', myLastKnownLocation) 19 }, 5000); 20 }); 21}
- To handle the case when the user isn’t moving, we add a
setIntervalto keep sending the last captured location. This means that my Delivery Hero can track my last location, if I dozed off!
1sendLocationInterval = setInterval(function () { 2 // not using `triggerLocationChangeEvents` to keep the pipes different 3 myLocationChannel.trigger('client-location', myLastKnownLocation) 4 }, 5000); 5 6// also update myLastKnownLocation everytime we trigger an event 7function triggerLocationChangeEvents (channel, location) { 8 // update myLastLocation 9 myLastKnownLocation = location; 10 channel.trigger('client-location', location); 11}
Step 4: Subscribe to Delivery Hero’s location channels
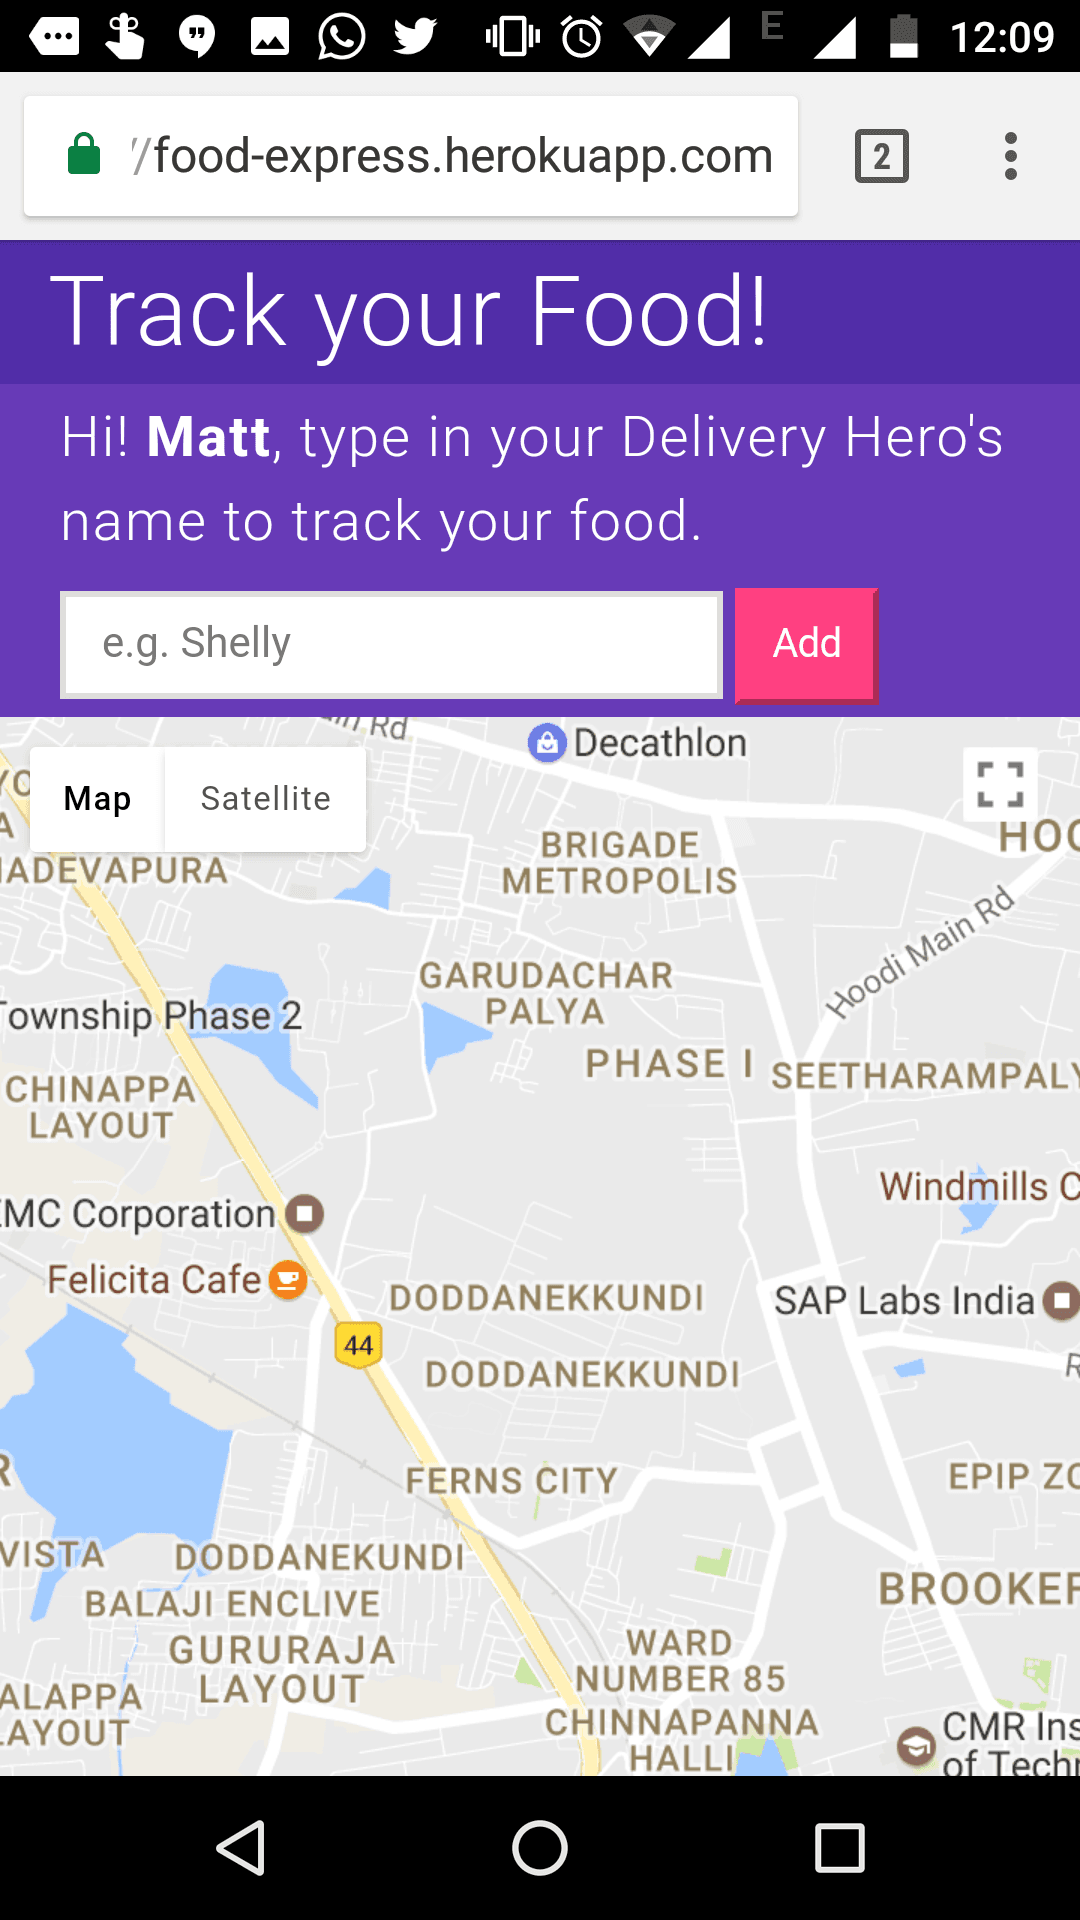
- First up, code a div in
index.htmlto enter Delivery Hero’s username.
1<div id="delivery-hero-box" class="name-box hidden"> 2 <h3 id="welcome-message"></h3> 3 <h4 id="delivery-heroes-list"></h4> 4 <input id="deliveryHeroName" type="text" placeholder="e.g. Shelly"> 5 <button id="addDeliveryHeroButton">Add</button> 6 </div>

Let’s make the button functional by adding an event listener on it:
1deliveryHeroesAddButton.addEventListener('click', addDeliveryHero);
- So every time you add a username,
addDeliveryHerofunction would get called.
1function addDeliveryHero (e) { 2 var deliveryHeroName = deliveryHeroNameInput.value; 3 // if already present return 4 if (deliveryHeroesLocationMap[deliveryHeroName]) return; 5 if (deliveryHeroName) { 6 var deliveryHeroChannelName = 'private-' + deliveryHeroName; 7 var deliveryHeroChannel = pusher.subscribe(deliveryHeroChannelName); 8 deliveryHeroChannel.bind('client-location', function (nextLocation) { 9 // first save the location 10 // bail if location is same 11 var prevLocation = deliveryHeroesLocationMap[deliveryHeroName] || {}; 12 deliveryHeroesLocationMap[deliveryHeroName] = nextLocation; 13 showDeliveryHeroOnMap(deliveryHeroName, false, true, prevLocation); 14 }); 15 } 16 17 // add the name to the list 18 var deliveryHeroTrackButton = document.createElement('button'); 19 deliveryHeroTrackButton.classList.add('small'); 20 deliveryHeroTrackButton.innerHTML = deliveryHeroName; 21 deliveryHeroTrackButton.addEventListener('click', showDeliveryHeroOnMap.bind(null, deliveryHeroName, true, false, {})); 22 deliveryHeroesList.appendChild(deliveryHeroTrackButton); 23 }
- In the above code, we first
subscribeto theprivatePusher channel of the Delivery Hero.
1var deliveryHeroChannelName = 'private-' + deliveryHeroName; 2var deliveryHeroChannel = pusher.subscribe(deliveryHeroChannelName);
- And listen to all the events triggered on that channel.
1deliveryHeroChannel.bind('client-location', function (nextLocation) { 2 // first save the location 3 // bail if location is same 4 var prevLocation = deliveryHeroesLocationMap[deliveryHeroName] || {}; 5 deliveryHeroesLocationMap[deliveryHeroName] = nextLocation; 6 showDeliveryHeroOnMap(deliveryHeroName, false, true, prevLocation); 7});
- We keep the
event namethe same i.e.client-locationas every user has a distinct channel. - Read more about keeping the data private here.
- Each new event contains the latest location and we save that in an object to retrieve later.
- Also we take the help of another function to plot the location on a map,
showDeliveryHeroOnMap.
1function showDeliveryHeroOnMap (deliveryHeroName, center, addMarker, prevLocation) { 2 if (!deliveryHeroesLocationMap[deliveryHeroName]) return; 3 // first center the map 4 if (center) map.setCenter(deliveryHeroesLocationMap[deliveryHeroName]); 5 var nextLocation = deliveryHeroesLocationMap[deliveryHeroName]; 6 7 // add a marker 8 if ((prevLocation.lat === nextLocation.lat) && (prevLocation.lng === nextLocation.lng)) { 9 return; 10 } 11 12 if (addMarker) { 13 var marker = deliveryHeroesMarkerMap[deliveryHeroName]; 14 marker = marker || new google.maps.Marker({ 15 map: map, 16 label: deliveryHeroName, 17 animation: google.maps.Animation.BOUNCE, 18 }); 19 marker.setPosition(deliveryHeroesLocationMap[deliveryHeroName]); 20 deliveryHeroesMarkerMap[deliveryHeroName] = marker; 21 } 22 }
- The above function adds a marker at the new location on the map, and bails if the new location is same as previous location.
- If we’re already tracking a Delivery Hero, it updates the new location in the same marker.
- If the person is moving, you can see the marker moving on the map in realtime. ZOMG! I KNOW! More excited because as soon as I finish writing this I can eat my tracked pizza! :D
Step 5: Finding multiple Delivery Heroes, all at once
- Now that you’ve learned how to find a Delivery Hero in the above step, we can do it for multiple Heroes. Yay! I am a foodie and I know it.
- Notice that we are also adding a button (
deliveryHeroTrackButton) for all the Heroes that we add via the textbox. - On clicking that button we’ll center the screen with the last known location of that Delivery Hero.
Next Steps
- Since we’re using the awesome concept of Pusher Channels, we can easily build on top of it to track anything: food parcel or an e-commerce delivery.
- Also, Google Maps API integration is a piece-of-cake.
PS:
Running locally
- Clone the repository
1git clone git@github.com:ankeetmaini/food-express.git 2 cd food-express 3 npm install 4 npm start
- Generate Pusher API keys and insert in
src/app.jsas well asserver.js - Generate Google Maps API key and add in
index.html - Open http://localhost:5000
Running the Demo
- To track your food delivery open https://food-express.herokuapp.com/
- Login with your username, any name for sake of simplicity.
- The Delivery Hero should also Login at this address https://food-express.herokuapp.com/?mode=delivery
- In a typical Food Delivery service, once you place an order, you receive some confirmation with the expected time of delivery and the delivery person’s contact information and name/username. Assuming you received an SMS/E-mail of the same
- Type in the username of the Delivery person to track your Food!
Show me the code
- Code is hosted on GitHub.


© 2024 Pusher Ltd. All rights reserved.
Pusher Limited is a company registered in England and Wales (No. 07489873) whose registered office is at MessageBird UK Limited, 3 More London Riverside, 4th Floor, London, United Kingdom, SE1 2AQ.