- Products

- Developers
- User stories
- Blog
- Pricing

How to write tests for Laravel applications

This tutorial discusses writing tests for Laravel applications. It provides an overview of different types of testing in an existing Laravel application. This is followed by a practical example, where you will write tests for a sample app (provided).
Introduction
Writing tests for an application is a great software development practice. Often, it is the first coding task to be performed before building the features of an application. As the first coding task, tests are initially written to fail because we have no code to satisfy the requirements of the test. Once our tests fail, we can then build our application to pass our tests. This practice ensures our code meets specified software requirements. It also serves as a guide when extending our application or when refactoring. This practice is commonly known as “Test-driven Development” (TDD).
In this guide, we are going to look at how to write tests for an existing Laravel application.
Prerequisites
- Basic knowledge of PHP and Laravel
- Have Composer installed on your local machine
- Have PHP setup on your local machine
- Git installed on your local machine
- A clone of this project
Introduction
There are different types of tests you can run on your application. There is unit testing, which focuses on testing the functionality of a little part of your application like a handful of methods or a class.
There is a feature testing that tests that an entire feature actually works. At this point, you can test many classes and methods, or an entire package depending on how your application is structured.
There is also integration testing which looks at how the different parts of your application couple with each other. Integration tests are always important when building large-scale applications with many functional units. These tests help make sure that each part of your application will work as it ought to. It also ensures other parts relying on them do not fail due to their error.
This first paragraph of Laravel’s testing guide reads:
Laravel is built with testing in mind. In fact, support for testing with PHPUnit is included out of the box and a
phpunit.xmlfile is already set up for your application. The framework also ships with convenient helper methods that allow you to expressively test your applications.
This shows we have the right foundation for building a test-driven application. We are going to take advantage of Laravel’s provision for testing to set up a testing environment.
Setting up the application
We are going to write tests for an e-commerce application built with Laravel and Vue. Click here to view the project on Github. Set up the project on your local machine before you continue with this guide. Setup instructions are in the readme file.
If you want to see how the sample app was built, you can work through the tutorials, starting with Build an e-commerce application using Laravel and Vue – Part 1: Setting up the application
Setting up our testing environment
Laravel ships with a phpunit.xml file that contains settings your phpunit will run tests with. If you wish to change these settings, you can do so from the file or create an .env.testing file.
The phpunit.xml file contains environment variables that will define how your application runs when testing. You can set up a different database configuration for testing to preserve the integrity of the data you have. You can also set different configurations for sessions, caching, queues, emails or even third-party tools.
As you’re building applications with sensitive data, always use a different database for testing. Depending on your application needs, you might want to use
sqliteas your test database.
We are going to create a separate configuration file for testing. Create a .env.testing file and add the following code:
1APP_NAME=Laravel 2 APP_ENV=testing 3 APP_KEY=base64:5CpEFQ9UTR543dbJUsT3araoSSyxuN8NF92gCJJXpk8= 4 APP_DEBUG=true 5 APP_URL=http://localhost 6 7 LOG_CHANNEL=stack 8 9 DB_CONNECTION=sqlite 10 DB_DATABASE=/absolute/path/to/test.sqlite 11 12 BROADCAST_DRIVER=log 13 CACHE_DRIVER=array 14 SESSION_DRIVER=array 15 SESSION_LIFETIME=120 16 QUEUE_DRIVER=sync 17 18 MAIL_DRIVER=array
Next, create the database/test.sqlite file:
1$ touch database/test.sqlite
Now, migrate and seed the test database:
1$ php artisan migrate --seed --env=testing
Adding
--env=testingflag will tell laravelartisanto use the test configurations we made in.env.testingfile.
Now, we are set to start writing our tests.
What should you test?
There is a common concern many people have when they start out with test driven development. It has no right answer. It is not difficult to determine once you know the requirements of the application.
The first thing you may want to do is write tests for every class you create. You would want to assert it actually executes and returns the kind of response you want. You also want to ensure that the response returned contains accurate data, and does not only come in the right format. You would also want to be sure your code does not break when wrong data is passed, or an exception does not cause your entire system to malfunction.
You should automate everything you would test manually. You can test the page rendered to the client to be sure it contains the right information. You can test that buttons click, links go to the right place, forms act as they should, you can also test to ensure certain information exists on a page.
The great thing about tests is that they are automated and can be run many times without any room for error. Tests will identify gaps in your code and will also help you know when you built a feature right.
Writing our test cases
For the e-commerce application, we will be writing tests for each unit of our application. We want to write tests to ensure that:
- Products, User, and Orders can be created, read, updated and deleted.
- A user can place orders that are valid.
- A user cannot place an order for a product that does not exist.
- An administrator can confirm an order has been shipped.
- A user’s order will be updated when it has been shipped.
We will be testing all the API endpoints to ensure it actually works as expected. If we had observers or repositories that handled complex application logic, we may want to test them to ensure they work as expected. This is because errors that we may encounter from the API endpoints would originate from there.
Since our sample application is simple and lean, we will be testing the API endpoints instead.
Testing the product endpoints
To test the product endpoints, run the following command in your terminal to create the test class:
1$ php artisan make:test ProductTest --unit
Now, open the tests/Unit/ProductTest.php file, you should see the template created for us to work with.
1<?php 2 3 namespace Tests\Unit; 4 5 use Tests\TestCase; 6 use Illuminate\Foundation\Testing\WithFaker; 7 use Illuminate\Foundation\Testing\RefreshDatabase; 8 9 class ProductTest extends TestCase 10 { 11 /** 12 * A basic test example. 13 * 14 * @return void 15 */ 16 public function testExample() 17 { 18 $this->assertTrue(true); 19 } 20 }
We are going to replace the contents of ProductTest with seven different test methods.
testCreateProductWithMiddleware
The first test we will create is a test that tries to create a product without an authentication token. It will act as if a user who is not logged in tries to create a product. For this test to pass, the test must return a 401 Unauthenticated HTTP code and will not create a new product. If this test fails, it means an unauthenticated user can create a product on this application. We will know what to fix right away. Insert the code below into the ProductTest class
1[...] 2 public function testCreateProductWithMiddleware() 3 { 4 $data = [ 5 'name' => "New Product", 6 'description' => "This is a product", 7 'units' => 20, 8 'price' => 10, 9 'image' => "https://images.pexels.com/photos/1000084/pexels-photo-1000084.jpeg?auto=compress&cs=tinysrgb&dpr=2&h=650&w=940" 10 ]; 11 12 $response = $this->json('POST', '/api/products',$data); 13 $response->assertStatus(401); 14 $response->assertJson(['message' => "Unauthenticated."]); 15 } 16 [...]
testCreateProduct
In this test, we will use factory(\App\User::class)->create() to create a fake user object using the factory helper in Laravel. It creates the user object and prefills the contents of the fillable array we defined on the user model.
We will use the fake user created to make an XHR request to our API like this $this->actingAs($user, 'api')->json() and get a full response object. We will check to ensure that the response object contains a success HTTP status code 200 Ok.
We will also check that the JSON response returned from the request contains some arguments. After which, we check that those arguments contain some data using $response→assertJson().
1public function testCreateProduct() 2 { 3 $data = [ 4 'name' => "New Product", 5 'description' => "This is a product", 6 'units' => 20, 7 'price' => 10, 8 'image' => "https://images.pexels.com/photos/1000084/pexels-photo-1000084.jpeg?auto=compress&cs=tinysrgb&dpr=2&h=650&w=940" 9 ]; 10 $user = factory(\App\User::class)->create(); 11 $response = $this->actingAs($user, 'api')->json('POST', '/api/products',$data); 12 $response->assertStatus(200); 13 $response->assertJson(['status' => true]); 14 $response->assertJson(['message' => "Product Created!"]); 15 $response->assertJson(['data' => $data]); 16 } 17 [...]
testGettingAllProducts
Here, we call the API for returning all products and check the status code is 200 Ok. We also check to ensure that the data it returns takes a certain structure with certain arguments. We do not know the data returned, but if the data takes a particular structure, then we are sure it would be accurate.
This is an important assertion that is useful when you are returning a large dataset.
1[...] 2 public function testGettingAllProducts() 3 { 4 $response = $this->json('GET', '/api/products'); 5 $response->assertStatus(200); 6 7 $response->assertJsonStructure( 8 [ 9 [ 10 'id', 11 'name', 12 'description', 13 'units', 14 'price', 15 'image', 16 'created_at', 17 'updated_at' 18 ] 19 ] 20 ); 21 } 22 [...]
testUpdateProduct
For this test, we will make a call to the products API endpoint to get all available products. Next, we pick the first product returned by the endpoint. This is an important step, so as to ensure that we are updating an actual product and do not have the API throwing errors.
After picking an actual product, we then try to update the name of the product and check that the response message we get is correct for when the product is updated.
1[...] 2 public function testUpdateProduct() 3 { 4 $response = $this->json('GET', '/api/products'); 5 $response->assertStatus(200); 6 7 $product = $response->getData()[0]; 8 9 $user = factory(\App\User::class)->create(); 10 $update = $this->actingAs($user, 'api')->json('PATCH', '/api/products/'.$product->id,['name' => "Changed for test"]); 11 $update->assertStatus(200); 12 $update->assertJson(['message' => "Product Updated!"]); 13 } 14 [...]
testUploadImage
To test this endpoint, we will need to include an UploadFile class into our ProductTest class.
1[...] 2 <?php 3 use Illuminate\Http\UploadedFile; 4 5 use Illuminate\Foundation\Testing\WithFaker; 6 use Illuminate\Foundation\Testing\RefreshDatabase; 7 [...]
We will use the UploadedFile class to create a fake uploaded image file and then test that image upload works. Since the response data is the full image path based on the application, we will check that the response returned is not null.
1[...] 2 public function testUploadImage() 3 { 4 $response = $this->json('POST', '/api/upload-file', [ 5 'image' => UploadedFile::fake()->image('image.jpg') 6 ]); 7 $response->assertStatus(201); 8 $this->assertNotNull($response->getData()); 9 } 10 [...]
testDeleteProduct
This test acts the same way testUpdateProduct test works, except we send a DELETE request instead of a POST request.
1[...] 2 public function testDeleteProduct() 3 { 4 $response = $this->json('GET', '/api/products'); 5 $response->assertStatus(200); 6 7 $product = $response->getData()[0]; 8 9 $user = factory(\App\User::class)->create(); 10 $delete = $this->actingAs($user, 'api')->json('DELETE', '/api/products/'.$product->id); 11 $delete->assertStatus(200); 12 $delete->assertJson(['message' => "Product Deleted!"]); 13 } 14 [...]
That concludes the all test needed for the “Product” endpoints. Next, we will test all “Order” endpoints.
Testing the order endpoints
To create the test class, run the following command:
1$ php artisan make:test OrderTest --unit
Now, open the tests/Unit/OrderTest.php file, you should see the template created for us to work with.
1<?php 2 3 namespace Tests\Unit; 4 5 use Tests\TestCase; 6 use Illuminate\Foundation\Testing\WithFaker; 7 use Illuminate\Foundation\Testing\RefreshDatabase; 8 9 class OrderTest extends TestCase 10 { 11 /** 12 * A basic test example. 13 * 14 * @return void 15 */ 16 public function testExample() 17 { 18 $this->assertTrue(true); 19 } 20 }
We will write all our test functions inside the OrderTest class.
testCreateOrder
In this test, we will use a fake user to make an XHR post request to XHR post request to our API. We check if the response object has the success HTTP status code 200 Ok.
We will also check that the JSON response returned from the request contains some arguments. We will also check to ensure that those arguments contain some data since that is what we are expecting. Finally, we will check the structure of the data to be sure it contains the right information.
1[....] 2 public function testCreateOrder() 3 { 4 $data = [ 5 'product' => 1, 6 'quantity' => 20, 7 'address' => "No place like home" 8 ]; 9 $user = factory(\App\User::class)->create(); 10 $response = $this->actingAs($user, 'api')->json('POST', '/api/orders',$data); 11 $response->assertStatus(200); 12 $response->assertJson(['status' => true]); 13 $response->assertJson(['message' => "Order Created!"]); 14 $response->assertJsonStructure(['data' => [ 15 'id', 16 'product_id', 17 'user_id', 18 'quantity', 19 'address', 20 'created_at', 21 'updated_at' 22 ]]); 23 } 24 [...]
testGetAllOrders
For this test, we will call the endpoint responsible for returning all orders and check that the status code returned is 200 Ok. We will also check that the data it returns takes a certain structure containing certain arguments.
1[...] 2 public function testGetAllOrders() 3 { 4 $user = factory(\App\User::class)->create(); 5 $response = $this->actingAs($user, 'api')->json('GET', '/api/orders'); 6 $response->assertStatus(200); 7 $response->assertJsonStructure( 8 [ 9 [ 10 'id', 11 'product_id', 12 'user_id', 13 'quantity', 14 'address', 15 'created_at', 16 'updated_at' 17 ] 18 ] 19 ); 20 } 21 [...]
testDeliverOrder
Here, we will make a call to the endpoint responsible for returning all available orders, then we pick the first order. We try to deliver the order and get the data from the response.
We will examine that data to ensure that the is_delivered attribute is true and that it has the same id as the order we actually tried to update.
1[...] 2 public function testDeliverOrder() 3 { 4 $user = factory(\App\User::class)->create(); 5 $response = $this->actingAs($user, 'api')->json('GET', '/api/orders'); 6 $response->assertStatus(200); 7 8 $order = $response->getData()[0]; 9 10 $update = $this->actingAs($user, 'api')->json('PATCH', '/api/orders/'.$order->id."/deliver"); 11 $update->assertStatus(200); 12 $update->assertJson(['message' => "Order Delivered!"]); 13 14 $updatedOrder = $update->getData('data'); 15 $this->assertTrue($updatedOrder['data']['is_delivered']); 16 $this->assertEquals($updatedOrder['data']['id'], $order->id); 17 } 18 [...]
testUpdateOrder
Here, we will make a call to the endpoint responsible for returning all orders and check that the status code is 200 Ok. Next, we will pick the first order and try to change its quantity. We will check the response we received and ensure that it contains a status code of 200 Ok. We will also check that the message returned after updating the order.
1[...] 2 public function testUpdateOrder() 3 { 4 $user = factory(\App\User::class)->create(); 5 $response = $this->actingAs($user, 'api')->json('GET', '/api/orders'); 6 $response->assertStatus(200); 7 8 $order = $response->getData()[0]; 9 10 $update = $this->actingAs($user, 'api')->json('PATCH', '/api/orders/'.$order->id,['quantity' => ($order->id+5)]); 11 $update->assertStatus(200); 12 $update->assertJson(['message' => "Order Updated!"]); 13 } 14 15 [...]
testDeleteOrder
This test acts the same way testUpdateOrder test works, except we send a DELETE request instead of a POST request. The goal is to successfully delete an order.
1[...] 2 public function testDeleteOrder() 3 { 4 $user = factory(\App\User::class)->create(); 5 $response = $this->actingAs($user, 'api')->json('GET', '/api/orders'); 6 $response->assertStatus(200); 7 8 $order = $response->getData()[0]; 9 10 $update = $this->actingAs($user, 'api')->json('DELETE', '/api/orders/'.$order->id); 11 $update->assertStatus(200); 12 $update->assertJson(['message' => "Order Deleted!"]); 13 } 14 [...]
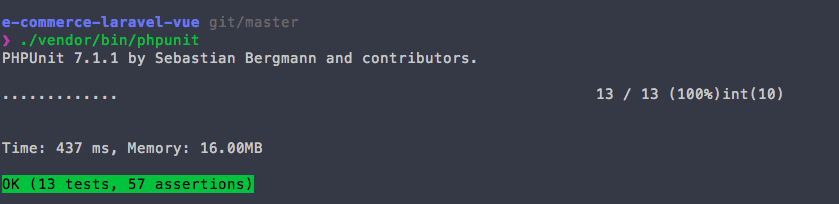
Running the tests
After you are done writing the tests, run it with the following command on your terminal:
1$ ./vendor/bin/phpunit
Note: On a Windows machine, Your result will be slightly different. You will see an error relating to the
testUploadImagetest case. This is due to a Windows-only permissions issue. If you have a way to fix this error, I will love to get a pull request from you.
Conclusion
We have examined how to write tests for applications and what should be tested. We examined how to set up our development environment for testing our application so data is not compromised. We wrote tests for a sample application to see how testing works. We looked at how to use different assertions to ensure our application returns the right data
There are still different kinds of tests we did not consider. These tests become necessary with increasing complexity of our application. At the basic level, what we have looked at would ensure our application works fine.
Feel free to change the application to return data differently to see if the tests would still pass.
The source code to the application in this article is available on GitHub.


© 2024 Pusher Ltd. All rights reserved.
Pusher Limited is a company registered in England and Wales (No. 07489873) whose registered office is at MessageBird UK Limited, 3 More London Riverside, 4th Floor, London, United Kingdom, SE1 2AQ.