- Products

- Developers
- User stories
- Blog
- Pricing

Speeding up your website using Varnish

Varnish is a great tool and it can make your website extremely fast when used correctly, so learn how to use it with this tutorial.
Introduction
In this tutorial, we will see how to make your websites faster using Varnish.
Building web applications are great. Now, imagine you build a blog using PHP and your web server is Nginx. If you consider how web servers work, you’ll realize that your web application does a lot of the same tasks (like retrieving a blog post that rarely changes) every time someone visits the post page.
Let’s assume visitor A visits the post page and the post is fetched from the database, images, CSS, JavaScript etc are all served from the server. When visitors B, C, D etc visit and the post contents have not changed, the same content will be served over and over again.
Now imagine 1,000,000 visitors go to the page in a day. The server will have to process these 1,000,000 visits and serve all the assets, handle all the database queries every time and eventually, the site will slow down or even stop responding completely when the server runs out of worker processes/connections. This is where Varnish comes in.
Getting started with Varnish
Getting started is easy and requires a few minutes of your time if you already know what you are doing. I will advise you get a DigitalOcean droplet to experiment with while following this article. Note though that droplets are not free.
This is not aimed at total beginners to server management. Therefore, to follow along, you need to have the following requirements:
– Knowledge of Ubuntu (or any Linux based operating system)
– Knowledge of command-line interface or terminal
– A server with root SSH access
– Basic knowledge of configuring a web server will be helpful (this tutorial uses Nginx)
If you have these then let’s start.
We are going to be creating a Digital Ocean droplet and using this droplet for this tutorial.
Getting your web server ready for Varnish
Before we start the installation, let’s create a new server using Digital Ocean. Head over to Digital Ocean and create an account there if you have not.
⚠️ If you already have a web server with root SSH access, you can skip this section altogether. However, it is a good idea to experiment first using a disposable droplet before attempting the same on a live server.
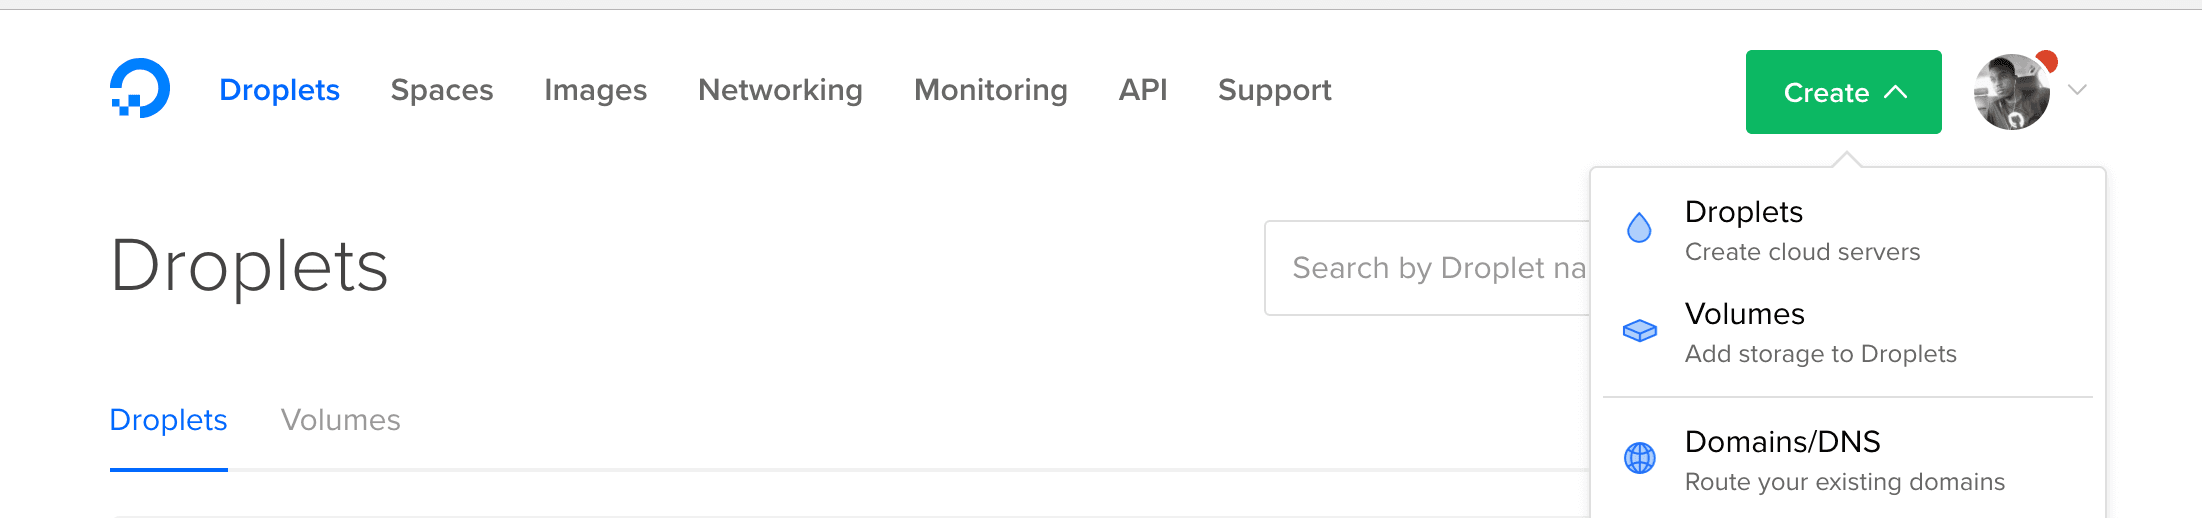
When you have created an account, click on “Create” and “Droplets” to create a new Droplet.
When the Create Droplet page is done loading, we can now select the stack to pre-build. Select
Ubuntu 16.04 and the smallest size for the Droplet, which is 512mb.
Scroll down until you get to SSH and then, if you have an SSH key, you can add it so you do not have to use a password to log in to the server. You can also do it without an SSH key if you want, it’s up to you.
Now click on Create to start creating the Droplet. This may take a few minutes.
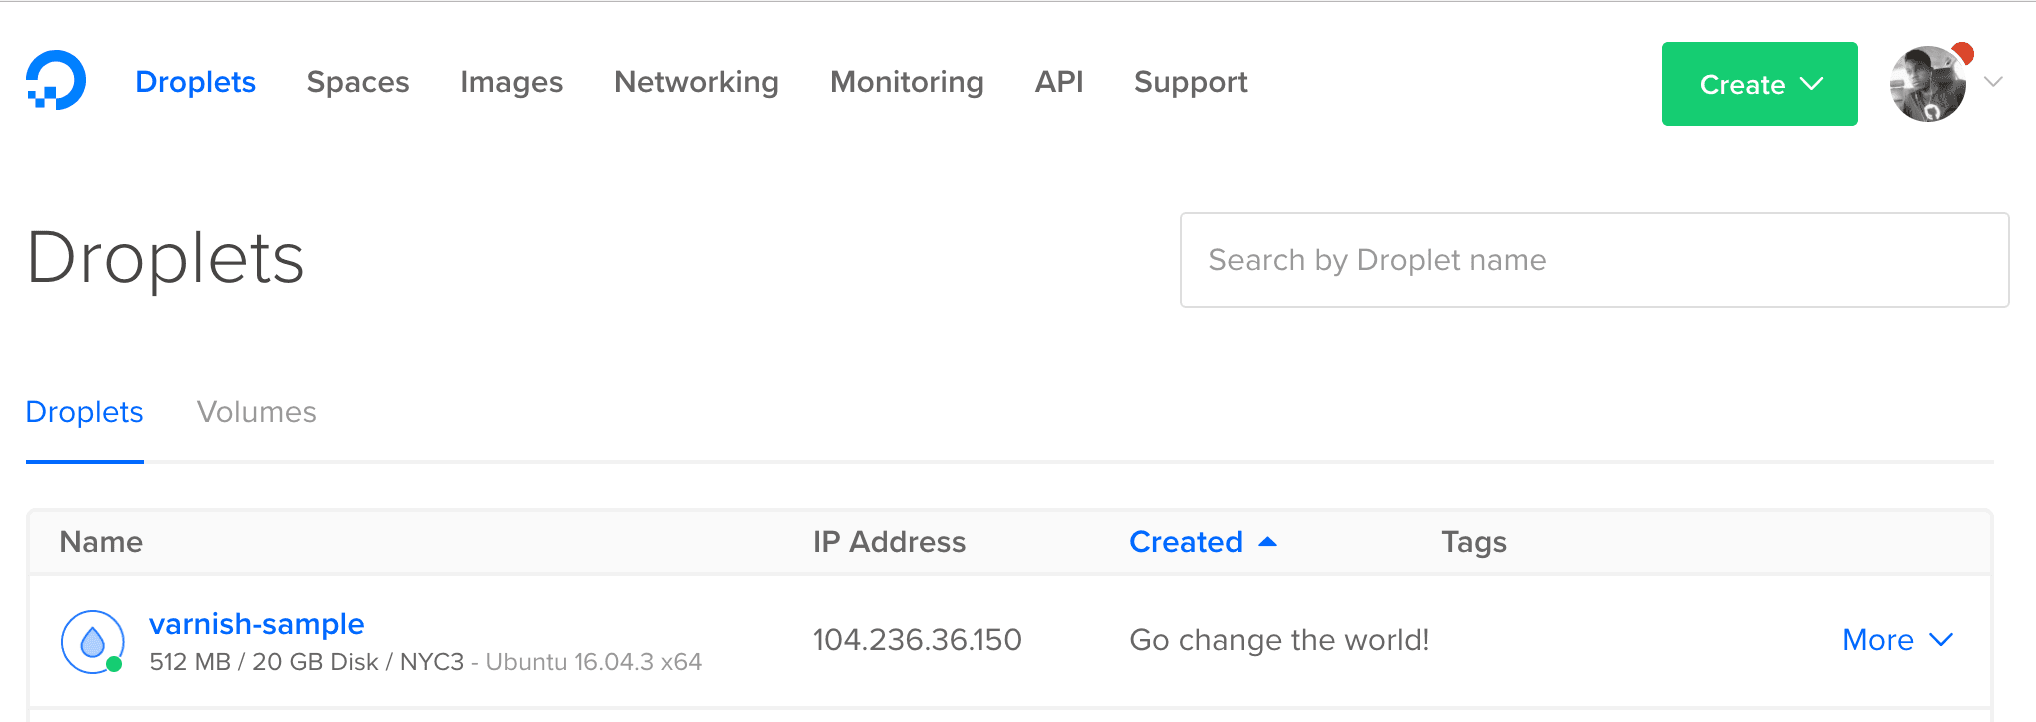
Once it’s done, you will see the new droplet in the list of droplets. SSH into your droplet using the IP address provided beside the droplet’s name.
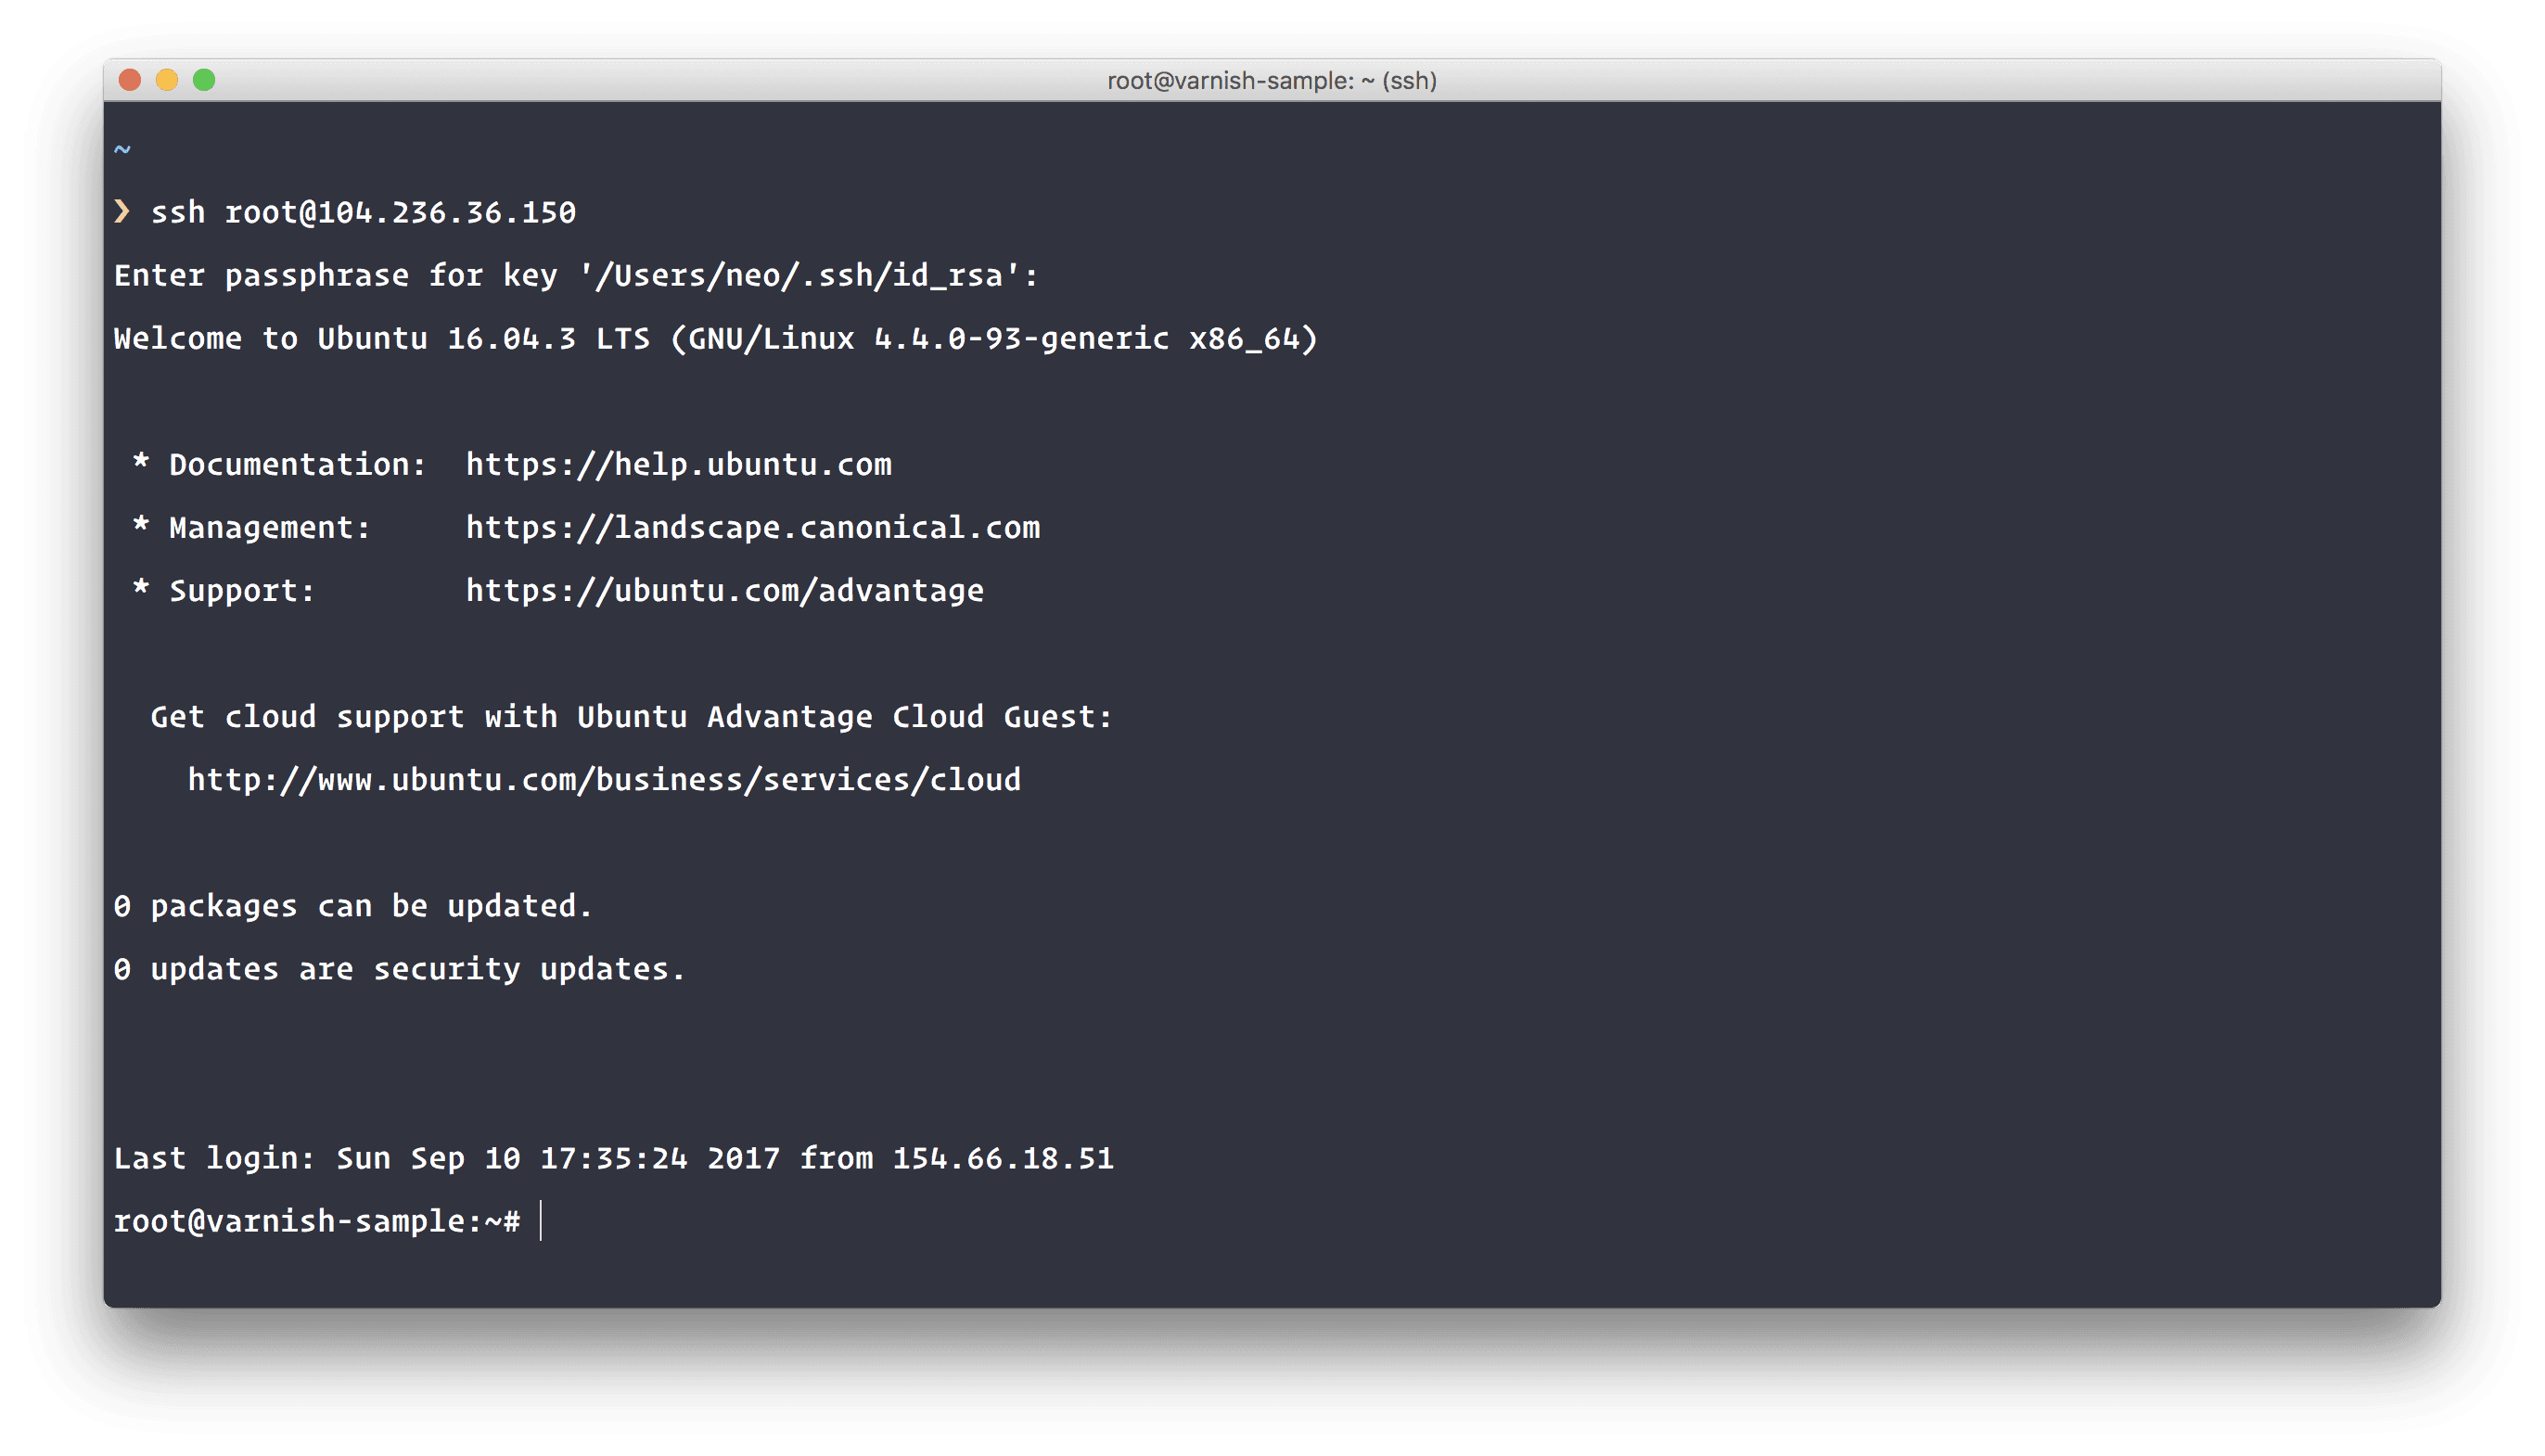
SSH into your server
Install Nginx web server
The next thing we will do is install Nginx. To do so we will run the following commands in our new server:
1# Updates the package list 2 $ apt-get update 3 4 # Upgrade any packages that need to be upgraded 5 $ apt-get upgrade -y 6 7 # Install Nginx in the machine 8 $ apt-get install -y nginx
The first command will update the package list, the next will upgrade any packages that need to be upgraded and the last command will install Nginx. Once the installation is complete, visit the IP address of your droplet in your browser. You should see a “Welcome to Nginx” page. Great!
Create a sample website to work with
Now we have Nginx installed in our droplet, let us create a quick website to work with. We will be using a free theme that is available on GitHub for this.
1# Installs git if not already installed 2 $ apt-get install -y git 3 4 # Remove the web server public directory, recreate the directory and cd into it 5 $ rm -r /var/www/html 6 $ mkdir -p /var/www/html 7 $ cd /var/www/html 8 9 # Clone the repository to have access to the theme 10 $ git clone https://github.com/BlackrockDigital/startbootstrap-creative.git ./
Now when you visit the IP address, you should see the theme, great.

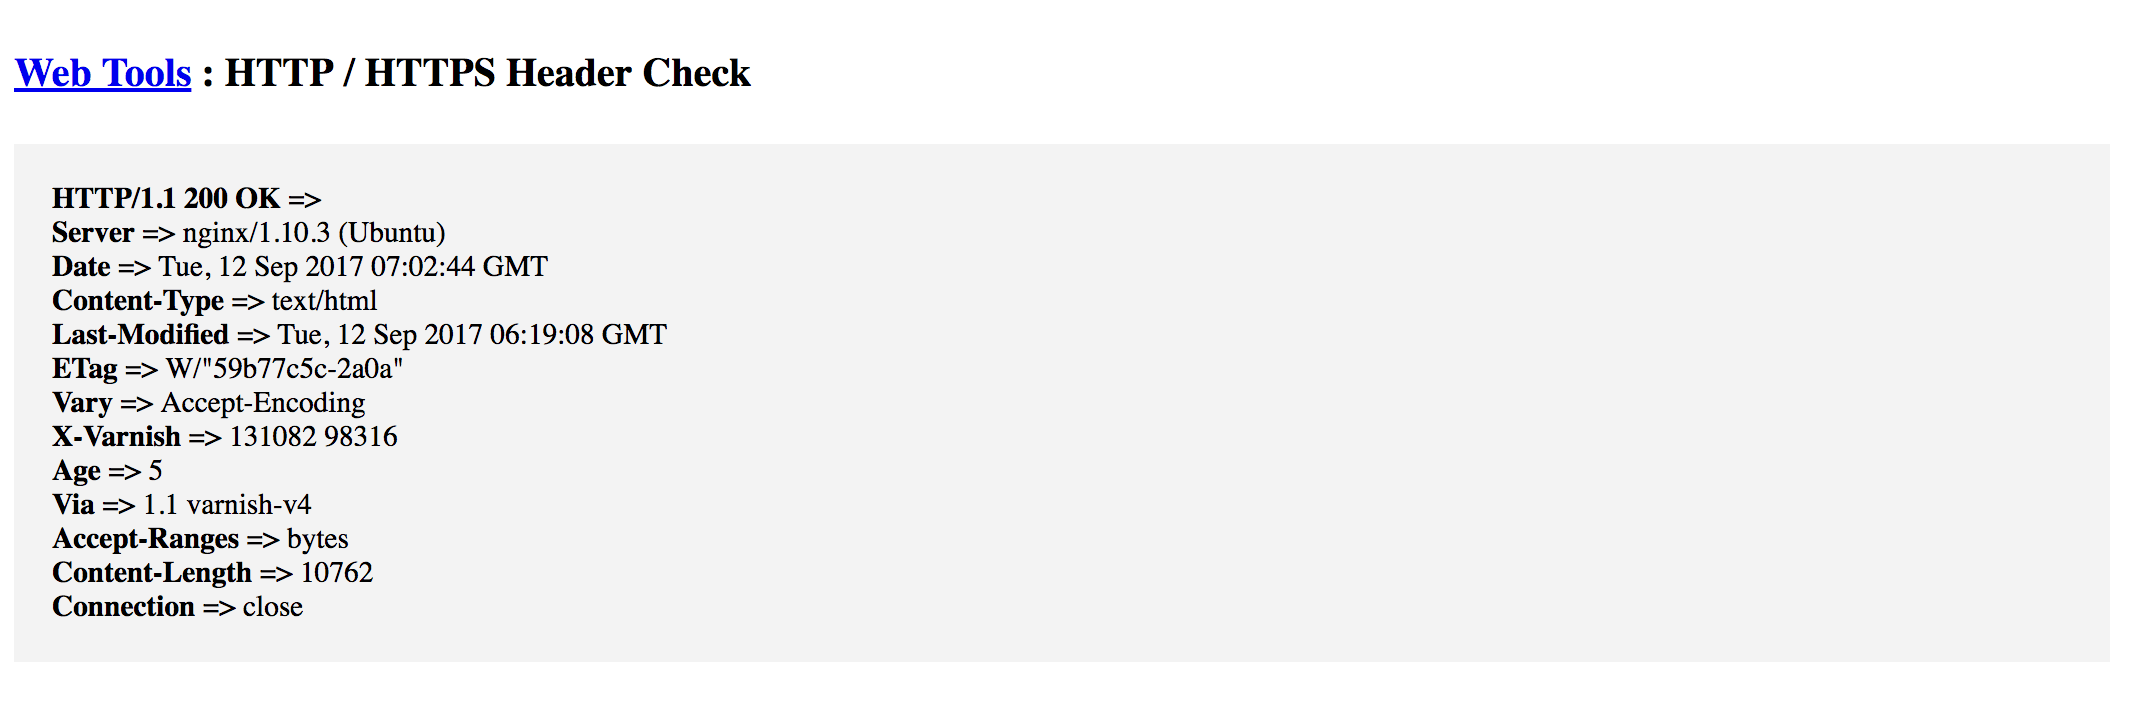
Now head on over to this page. We will use this tool to display the headers of the page. We will use this information to know when Varnish is handling the server requests and responses.
When you enter the details, you should see something like this:
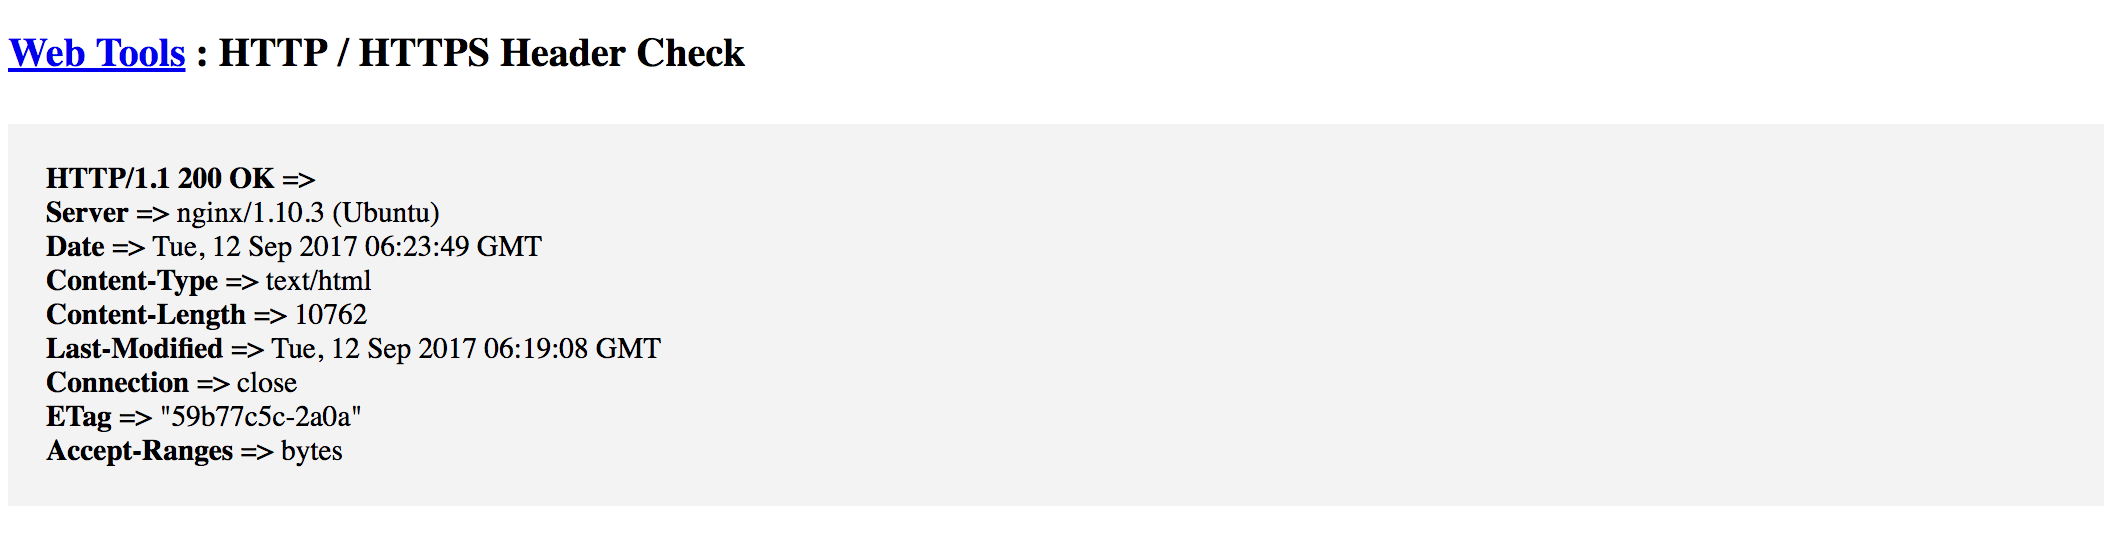
As you can see, there is no indication that Varnish handles anything on the server. If Varnish was active, there will be a “X-Varnish” header saying it is. Great! Let’s install Varnish.
Installing Varnish to your server to improve its speed
Installing Varnish on your server is easy. Most of the work will be the configuration and tweaking. To install Varnish, enter the commands below:
1$ sudo apt-get install -y varnish
This will go through the process of installing Varnish on your server. After it is installed, you will get two configuration files:
- /etc/default/varnish
- /etc/varnish/default.vcl
Configuring Varnish on your server to work on port 80
Let’s start with the bare minimum needed configuration.
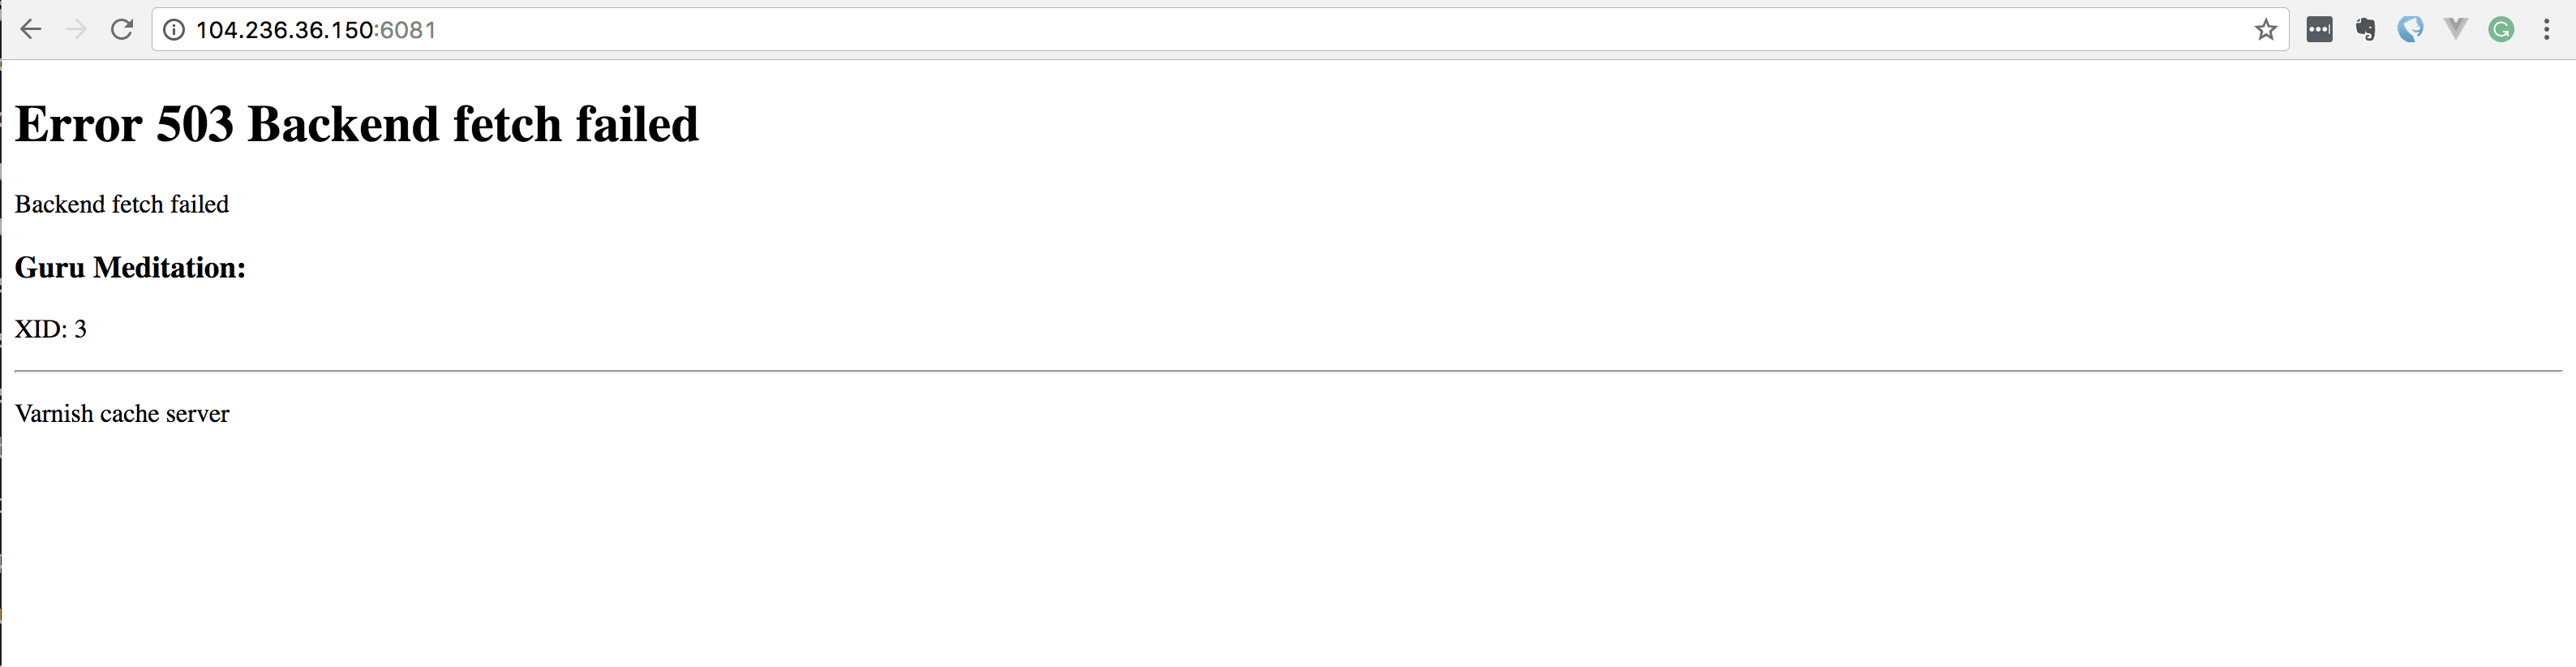
The first thing to change is the port Varnish listens on. By default, it listens on port 6081 which is not really useful to us. If you visit your IP address and append :6081, you should see a Varnish error page.
We will be changing this so it listens on port 80 and Nginx listens on port 8080. To do this, edit your site’s Nginx configuration file. In our case, this file is /etc/nginx/sites-available/default.
When you open the file for editing, change the port Nginx listens on to 8080. Look for references to listen 80 and change to 8080. In our case, we just edited the line below to 8080.
1server { 2 listen 8080 default_server; 3 listen [::]:8080 default_server; 4 5 # Leave the other configuration items intact... 6 }
Now reload your Nginx configuration with sudo service nginx reload, then go to your IP address with the port 8080. You should still see your website if everything worked correctly.
Now that port 80 is free, let’s configure Varnish to be the one that responds. Open the file /etc/default/varnish for editing. Look for the line below:
1## Alternative 2, Configuration with VCL 2 # 3 # Listen on port 6081, administration on localhost:6082, and forward to 4 # one content server selected by the vcl file, based on the request. 5 # 6 DAEMON_OPTS="-a :6081 \ 7 -T localhost:6082 \ 8 -f /etc/varnish/default.vcl \ 9 -S /etc/varnish/secret \ 10 -s malloc,256m"
and change the -a :6081 to -a :80.
Next, open the file /etc/varnish/default.vcl and check that the default backend is set to port 8080, because this is where Nginx serves from now. Look for the line below and make sure the .port is 8080.
1# Default backend definition. Set this to point to your content server. 2 backend default { 3 .host = "127.0.0.1"; 4 .port = "8080"; 5 }
Once you have confirmed this, the next thing will be to copy the varnish.service file to our systemd directory. This will enable systemd to start varnish on port 80. Run the command below:
1$ sudo cp /lib/systemd/system/varnish.service /etc/systemd/system/ 2 $ sudo nano /etc/systemd/system/varnish.service
This will copy the varnish service file, and then open a nano editor with the contents. Look for the ExecStart line:
1ExecStart=/usr/sbin/varnishd -j unix,user=vcache -F -a :6081 -T localhost:6082 -f /etc/varnish/default.vcl -S /etc/varnish/secret -s malloc,256m
Now change the -F -a :6081 to -F -a :80. Leave the localhost:6082 on the same line as it is. Now save and exit the file. Run the commands below to reload everything you have just configured:
1$ sudo systemctl daemon-reload 2 $ sudo systemctl reload varnish.service 3 $ sudo service varnish restart 4 $ sudo service nginx restart
The commands above will reload the system daemon, reload varnish, restart the varnish service, and restart Nginx.
Now visit the IP of your web page and you should see nothing has changed. However, when you run it through the HTTP checker we used before, you should see that the headers have changed.
There are now a few new header keys: X-Varnish, Age, and Via. These are introduced by Varnish.
Purging the Varnish cache
Sometimes, you make changes to your website and the changes do not show up immediately because Varnish is caching aggressively. You can purge the cache easily using a command on your terminal (you can integrate this into your build process if you have one):
1$ varnishadm -T 127.0.0.1:6082 -S /etc/varnish/secret 2 varnish> ban req.http.host ~ ENTER_IP_ADDRESS_OR_HOST_NAME 3 200
In the ENTER_IP_ADDRESS_OR_HOST_NAME just enter the IP address of your server or your hostname. This will clear the Varnish cache.
You can also clear the cache by restarting Varnish using the /etc/init.d/varnish restart command.
Deeper dive into configuring Varnish
Let’s take a deep dive into some of the cool things you can do with Varnish.
We will be working with the default varnish configuration file for the rest of this section. The file is located at /etc/varnish/default.vcl. Open the file and let’s see a few things we can do.
Varnish hooks into several parts of your clients request and response and it does several ‘callbacks’ depending on the stage of the request and response. Let’s see some of these callbacks:
1sub vcl_recv { 2 }
This callback is triggered when Varnish receives the request initially, even before it checks if it has a cached version of this request to serve back. This is where you can sanitize the request and clean it up as much as you want.
Let us see an example of some things that can be done at this stage. In the default.vcl file, scroll to that callback and add the following:
1sub vcl_recv { 2 3 # ------------------------------------------------------------------------ 4 # Clean up the Accept-Encoding header 5 # ------------------------------------------------------------------------ 6 7 if (req.http.Accept-Encoding) { 8 if (req.url ~ "\.(jpg|jpeg|png|gif|gz|tgz|bz2|tbz|mp3|ogg|swf|woff)$") { 9 unset req.http.Accept-Encoding; 10 } elsif (req.http.Accept-Encoding ~ "gzip") { 11 set req.http.Accept-Encoding = "gzip"; 12 } elsif (req.http.Accept-Encoding ~ "deflate") { 13 set req.http.Accept-Encoding = "deflate"; 14 } else { 15 # unknown algorithm (aka crappy browser) 16 unset req.http.Accept-Encoding; 17 } 18 } 19 20 21 # ------------------------------------------------------------------------ 22 # Bypass Caching for GET and HEAD requests 23 # ------------------------------------------------------------------------ 24 25 if (req.method != "GET" && req.method != "HEAD") { 26 return (pass); 27 } 28 29 30 # ------------------------------------------------------------------------ 31 # Update some HTTP header values 32 # ------------------------------------------------------------------------ 33 34 if (req.restarts == 0) { 35 if (req.http.X-Forwarded-For) { 36 set req.http.X-Forwarded-For = client.ip; 37 } 38 } 39 }
From the above we have three blocks, in the first block, we take the request and morph the Accept-Encoding header sent by the client. We just simplify it to remove unnecessary encodings. We unset it entirely for files (like images) that should not be encoded.
On the second block, we bypass caching totally for requests that are sent to mutate data like POST, PUT, DELETE, and PATCH. We only want to cache read requests like GET and HEAD.
On the third block, we simply modify the X-Forwarded-For header.
The next Varnish callback we will look at is the vcl_backend_response. It is called after the response headers have been successfully retrieved from the backend.
Let us see some things we can modify here:
1sub vcl_backend_response { 2 3 # ------------------------------------------------------------------------ 4 # Set TTL and grace period 5 # ------------------------------------------------------------------------ 6 7 set beresp.ttl = 1h; 8 set beresp.grace = 10h; 9 10 if (bereq.method == "GET" && bereq.url ~ "\.(css|js|xml|gif|jpg|jpeg|swf|png|zip|ico|img|wmf|txt)$") { 11 set beresp.ttl = 30d; 12 } 13 14 # ------------------------------------------------------------------------ 15 # Set how long the client should keep the item 16 # ------------------------------------------------------------------------ 17 18 set beresp.http.cache-control = "max-age = 300"; 19 20 if (bereq.url ~ ".(xml|gif|jpg|jpeg|swf|css|js|png|zip|ico|img|wmf|txt)$") { 21 set beresp.http.cache-control = "max-age = 604800"; 22 } 23 24 return (deliver); 25 }
In the subroutine vcl_backend_response above we have done a few things. We have set the TTL (time to live) for the Varnish cache and also the grace period. The grace period is how long Varnish has to keep and serve the content when the server is down or is not responding. We finally set the TTL longer for static assets.
The next thing we did is set the cache control header. This header instructs the browser to cache the content locally and tells it how long it should cache it for. We initially set a default of 300 seconds and then, for static assets, we increase to 604800 seconds (7 days).
The last Varnish callback we will consider is vcl_deliver. This is called when we have all the pieces we need and are about to send the response to the client.
Let us see some things we can do at this point:
1sub vcl_deliver { 2 3 # ------------------------------------------------------------------------ 4 # Remove unnecessary response headers 5 # ------------------------------------------------------------------------ 6 7 unset resp.http.Server; 8 unset resp.http.X-Powered-By; 9 unset resp.http.Via; 10 unset resp.http.X-Varnish; 11 12 # ------------------------------------------------------------------------ 13 # Set a new response header to show if the cache attempt was a hit or miss 14 # ------------------------------------------------------------------------ 15 16 if (obj.hits > 0) { 17 set resp.http.X-Cache = "HIT"; 18 } else { 19 set resp.http.X-Cache = "MISS"; 20 } 21 }
In this callback, we have done 2 things mainly. First, we remove all the headers we do not want to send with the response. This is cool because now we can totally hide the Server we are serving from, which is Nginx in our case. We can also remove the X-Powered-By header that PHP adds. We can also hide the fact that we are using Varnish at all by removing the Via and X-Varnish header items.
The last thing we did in this callback is set a new header X-Cache. We use this to just know if the request hit a cached item or its serving using the web server.
Now, save and exit the configuration file. Then run the command below to restart Varnish and start seeing the changes you made:
1$ /etc/init.d/varnish restart
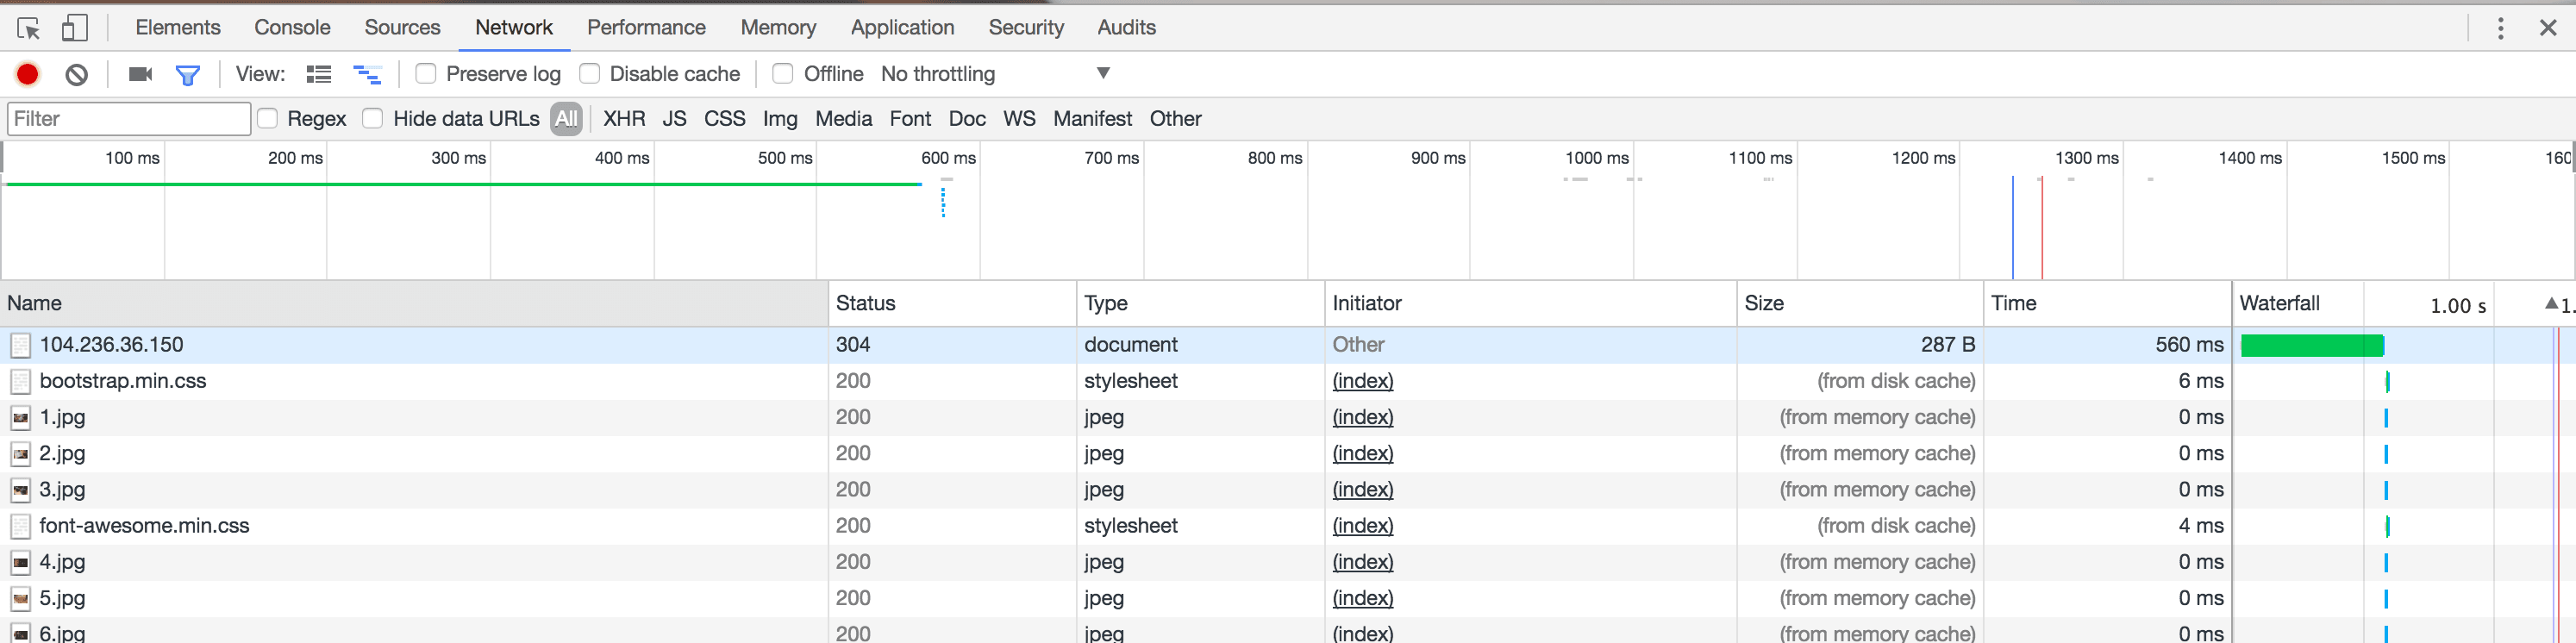
Now, visit your web page using the IP you were provided. You should notice that after the first load, subsequent loads are extremely fast!
If we take a peek into the networks tab of Chrome developer tools, you will notice that all the images are loaded directly from the disk cache, because we have instructed the browser to cache the images.
So that is just a small preview of what you can do with Varnish and how it can greatly improve the speed on your website.
Conclusion
Varnish is a great tool and it can make your website extremely fast when used correctly. However, remember that caching is always a double-edged sword and should always be used with caution. If you are using Varnish, make sure that everything is well thought out and configured properly. Also, make sure you test every part of your website to make sure it works properly.
To learn more about Varnish and what is actually possible, go through Varnish’s documentation. There are some examples where you might want to try.
If you have any questions and feedback, please do not hesitate to ask using the comment section below.


© 2024 Pusher Ltd. All rights reserved.
Pusher Limited is a company registered in England and Wales (No. 07489873) whose registered office is at MessageBird UK Limited, 3 More London Riverside, 4th Floor, London, United Kingdom, SE1 2AQ.