- Products

- Developers
- User stories
- Blog
- Pricing

Getting started with Reason React and BuckleScript

This tutorial introduces Reason, Reason React and Bucklescript. It provides an overview of the technologies and an introduction to key concepts.
Introduction
This tutorial will introduce OCaml, Reason React, and BuckleScript, and explain their relevance. To wrap things up, we will take a look at a demo project built with ReasonReact. ReasonReact is a simpler and much safer way to build React components in Reason, and with the help of BuckleScript, we can have access to a JavaScript version of all code written in Reason. More about this later in the tutorial.
Introduction
The importance of productivity in programming is very crucial to the success of any Software Engineer in particular, as it facilitates an implementation of features on time, working successfully with a very large team, and my favorite, being able to sleep at night without getting worried about the new code you just merged with the master branch.
There are many competing programming paradigms, each with their own approaches to application flow, syntax and other conventions.
Easy access to relevant tools, you will agree with me, will go a long way to not only make you productive as a Software Engineer but also enhance your current skill set.
The semantics
OCaml is an expressive and dynamic strictly typed general purpose programming language. It lays more emphasis on expressiveness and safety. Its been around for a while (over 20 years) now but its popularity has been on the lower side due to its small community. Most notable companies make use of it to minimize errors and improve speed. Facebook, for example, uses OCaml to developed type checkers like Hack for PHP and Flow for JavaScript.
The syntax
Reason on the other hand is not another programming language per say, but a new syntax and toolchain powered by OCaml. It provides a familiar, usable interface intended to make interoperation with JavaScript and adoption by JavaScript developers easier. In view of this, ReactReason was introduced to give JavaScript developers, especially the ReactJS community, to leverage the greater type system of Reason.
The compiler
BuckleScript compiles OCaml/Reason code down to plain JavaScript that can easily be shipped to virtually any browser in the world. One of the benefits of BuckleScript is the amazing speed at which it compiles down to human-readable JavaScript.
Getting started
Run the command below to globally install BuckleScript on your machine:
1$ npm install -g bs-platform
Once the installation process is completed, we will now fully have access to the bsb command that would be used to easily initialize a quick Reason project.
Creating a basic project
By now, you should have BuckleScript installed successfully. To see it in action, let’s generate a lightweight Reason project template with:
1$ bsb -init reason-sample-project -theme basic-reason
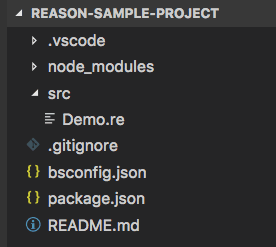
The boilerplate should have a similar project structure as shown here:
Next, run a command to build the project from the terminal in the root directory of the project:
1$ npm run build
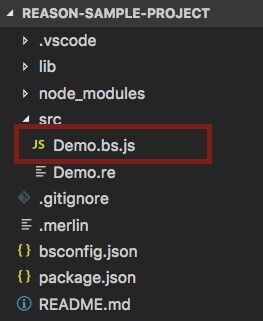
Did you notice a new file Demo.bs.js that was quickly generated for the project? The compiled version of Reason to JavaScript is housed by this file. Feel free to check and view it.
Lastly, type node src/demo.bs.js in your terminal to run the JavaScript output.
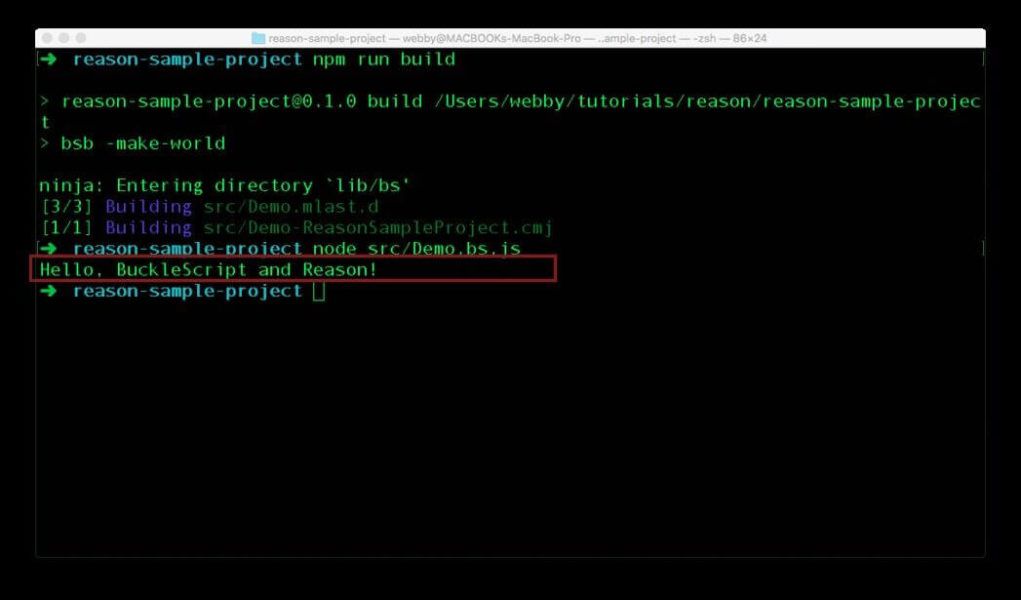
This will log a message Hello, BuckleScript and Reason! to the console. Now open the project with your favorite text editor and make a change to the message within the Js.log() method located in ./src/Demo.re , then proceed to build and see your changes.
Concepts overview
Reason introduces a new way of writing OCaml and still retains access to the beauty of static types. Let’s take a quick look at some basic concepts of Reason, such as variants, functions, and pattern-matching since we’ll be using it to build a demo.
Variants in Reason are data types and structures. It can be used to define sets of symbols and data structures. You can read more about variant here.
1/* ./src/Demo.re */ 2 type animal = Cat(string) | Dog(string);
We have the type of an animal which can either be a Cat or Dog and both will only accept a string as an argument.
Functions in Reason are declared with an arrow and a return expression. Declare one as shown here:
1/* ./src/Demo.re */ 2 3 let speak = (animal) => 4 switch (animal) { 5 | Cat(name) => name ++ " says: meow" 6 | Dog(name) => name ++ " says: woof" 7 };
Here, what we have done is to declare a function speak and passed an argument using the type that was declared earlier. Within it, we used a switch expression and checked for every possible case of the animal variant, this is referred to as pattern-matching in Reason. One of the advantages of pattern-matching is that it is very exhaustive, you will get a warning in the console if you did not check for both cases.
Furthermore, for each of the variants, we passed a variable name and later concatenated it with a statement representing what we want each of the animal to say.
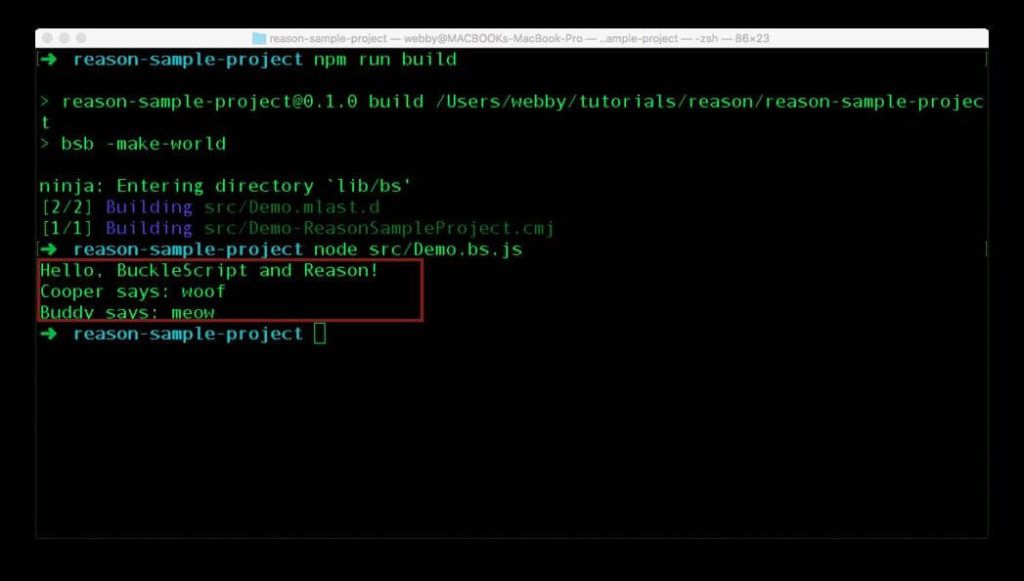
Now we can simply call the function and passed any of the types of animal into it:
1/* ./src/Demo.re */ 2 3 Js.log(speak(Dog("Cooper"))); 4 Js.log(speak(Cat("Buddy")));
Navigate to ./src/Demo.bs.js to see the equivalent JavaScript version of the functions declared in Reason above as compiled by BuckleScript.
Let’s build a todo app with Reason
To get a better grasp of the concept of building web applications with Reason, we’ll use Reason-scripts to build a simple todo list application. This will be a familiar experience for ReactJS users that are conversant with create-react-app. While building this app we will get a much better introduction to the syntax and type system of Reason.
Prerequisites
A basic understanding of React will be of great assistance with this tutorial. Before we get started, we need to install some required set of tools:
- We will be using
create-react-appto create a boilerplate for this project. Run this command from your terminal to install it globally on your machine:
1$ npm i -g create-react-app
Creating the Reason React project
We’ll create our project using the create-react-app command. Navigate to your project folder and run a command that will create a project named reason-bucklescript-todo:
1$ create-react-app reason-bucklescript-todo --scripts-version reason-scripts
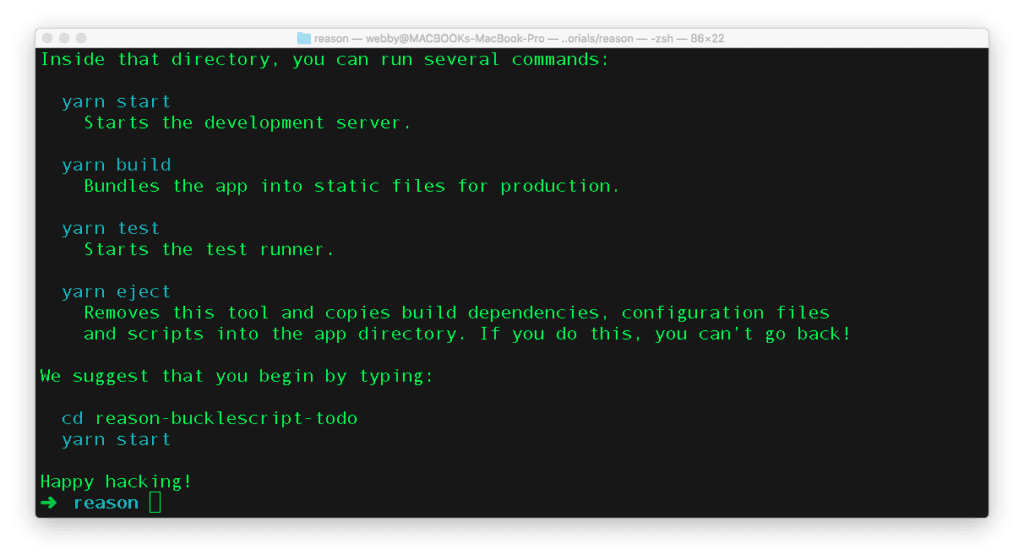
Next, change directory into the newly created project and first, run npm link bs-platform and start the application with npm start or yarn start:
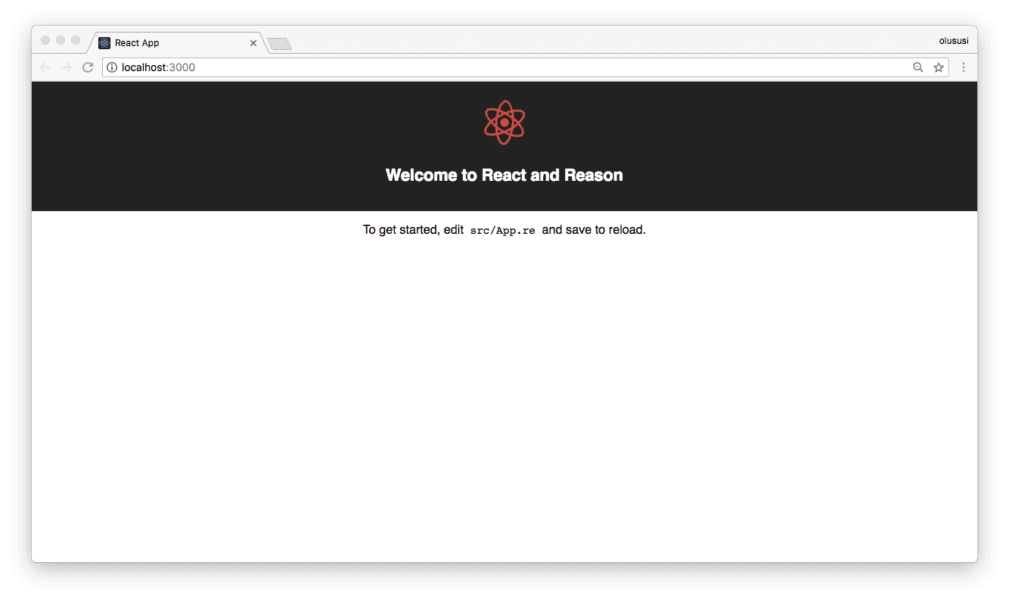
ReasonReact components
Similar to a ReactJS application, ReasonReact supports the use of components to structure an application. By default, the create-react-app already generated a basic App component for us. Navigate to ./src/App.re and edit as follow:
1/* ./src/App.re */ 2 3 [%bs.raw {|require('./App.css')|}]; 4 [@bs.module] external logo : string = "./logo.svg"; 5 6 let component = ReasonReact.statelessComponent("App"); 7 8 let make = (~message, _children) => { 9 ...component, 10 render: _self => 11 <div className="App"> 12 <div className="App-header"> 13 <img src=logo className="App-logo" alt="logo" /> 14 <h2> {ReasonReact.string(message)} </h2> 15 </div> 16 <div className="App-intro"> <Todo /> </div> 17 </div>, 18 };
Since the structure of the file above is similar to what we would have for other components, let’s take a quick look at some of its parts.
First, we required a stylesheet with [%bs.raw {|require('./App.css')|}]; at the top of the file. BuckleScript allows us to include some raw JavaScript code by using [%bs.raw ] and wrapping the JavaScript code with {| |}.
Defining a component
Next, a component can either be stateless or stateful. In ReasonReact, there are different ways of defining them:
- Stateless components: defined as
ReasonReact.statelessComponent("componentName") - Stateful components: defined as
ReasonReact.reducerComponent("componentName")
Furthermore, we declared a make function which takes in two different parameters. The first parameter has a symbol ~ indicating that it was passed into the App component as a props and the second parameter has _, this is a more explicit way of showing that the parameter isn’t used and ignored.
In addition, the …component spread operator indicated that the make function declared is building upon the component that was just defined. We also declare a render function with a single argument _self that is not used at the moment.
Rendering a string in ReasonReact is a little bit different than what we have in ReactJS, here you will have to wrap the string with a function named ReasonReact.string().
Finally, we included and rendered a component <Todo /> without importing any file, interesting right? In ReasonReact, every component is a module and doesn’t need to be imported before it can be used in another module. We’ll create this Todo component in a bit.
Creating components
For a better folder structure, we will group all new components in the same directory that will be named components. For BuckleScript to detect the Reason files and compile them easily to JavaScript we’ll need to edit the BuckleScript configuration file. Open ./bsconfig.json and add a new source as shown below:
1// ./bsconfig.json 2 3 { 4 "name": "reason-scripts", 5 "sources": [ 6 "src", 7 "src/components" // Add this line 8 ], 9 ... 10 }
With the configuration above, any .re file created within the components directory will be compiled down to JavaScript. Before we start creating the required files, locate the src directory and create another directory named components inside of it.
Set up the todo component
First, let’s create a new file, TodoType.re in the components directory and paste the code below in it. This will define the data structure for the list of Todo items:
1/* ./src/components/TodoType.re */ 2 3 type item = { 4 id: int, 5 title: string, 6 completed: bool, 7 };
As pointed out earlier, every file in ReasonReact is a module and all the things defined at the top level of the file using the keywords let, type, and module are exposed to be used from other files. So in other components we will need to reference the TodoType component that we just created.
Todo component
Navigate to the src/components directory and create a new file Todo.re within it. Open the new file and paste in this code:
1/* ./src/components/Todo.re */ 2 3 type state = { 4 items: list(TodoType.item), 5 inputText: string, 6 }; 7 8 type action = 9 | InputText(string) 10 | Toggle(int) 11 | RemoveItem(int) 12 | Submit; 13 14 let component = ReasonReact.reducerComponent("Todo"); 15 16 let make = _children => { 17 let handleSubmit = state => { 18 let newId: int = List.length(state.items); 19 let newItem: TodoType.item = { 20 id: newId, 21 title: state.inputText, 22 completed: false, 23 }; 24 let newList = [newItem, ...state.items]; 25 ReasonReact.Update({items: newList, inputText: ""}); 26 }; 27 { 28 ...component, 29 initialState: () => { 30 items: [{id: 0, title: "Fix more bugs", completed: false}], 31 inputText: "", 32 }, 33 reducer: action => 34 switch (action) { 35 | InputText(newText) => ( 36 state => ReasonReact.Update({...state, inputText: newText}) 37 ) 38 | Toggle(id) => (state => ReasonReact.Update({ 39 ...state, 40 items: 41 List.map((item: TodoType.item) => 42 item.id == id ? 43 { 44 ...item, 45 TodoType.completed: ! TodoType.(item.completed), 46 } : 47 item, 48 state.items, 49 ), 50 }) 51 ) 52 | RemoveItem(id) => ( state => 53 ReasonReact.Update({ 54 ...state, 55 items: 56 List.filter( 57 (item: TodoType.item) => item.id !== id, 58 state.items, 59 ), 60 }) 61 ) 62 | Submit => (state => handleSubmit(state)) 63 }, 64 render: self => { 65 let {items, inputText} = self.state; 66 <div className="app"> 67 <div className="app-header"> 68 <div className="title"> {ReasonReact.string("Todo List")} </div> 69 </div> 70 <Input 71 submit=(_ => self.send(Submit)) 72 value=inputText 73 onInputText=(text => self.send(InputText(text))) 74 /> 75 <div className="list"> 76 ( 77 ReasonReact.array( 78 Array.of_list( 79 List.map( 80 (item: TodoType.item) => 81 <Item 82 key=(string_of_int(item.id)) 83 item 84 onRemove=(id => self.send(RemoveItem(id))) 85 onToggle=(id => self.send(Toggle(id))) 86 />, 87 items, 88 ), 89 ), 90 ) 91 ) 92 </div> 93 </div>; 94 }, 95 }; 96 };
The file above is an example of a stateful component in ReasonReact. And within it, first, we defined the state for the component and a set of actions that will be required to mutate the state of each item. And within the make function of the component, we defined a function named handleSubmit to handle the addition of new item and then update the existing todo list once created.
Next, we defined the initialState of the todo items and added a reducer method which takes the action as a parameter and used pattern-matching on the action type, returning a ReasonReact.Update which contains the new state.
Input component
This component will be used to add an item to a to-do list and therefore can be maintained as a stateless component since its main function is to emit an event that will trigger the handleSubmit function within the Todo component. Create this file within ./src/components and name it Input.re. Once you are done, paste the content below in it:
1/* ./src/components/Input.re */ 2 3 let component = ReasonReact.statelessComponent("Input"); 4 let make = (~value, ~onInputText, ~submit, _children) => { 5 ...component, 6 render: _self => 7 <div className="input"> 8 <input 9 value 10 placeholder="Enter item and click add" 11 onChange=( 12 event => 13 onInputText( 14 ReactDOMRe.domElementToObj(ReactEventRe.Form.target(event))##value, 15 ) 16 ) 17 /> 18 <button onClick=(_ => submit())> (ReasonReact.string("Add")) </button> 19 </div>, 20 };
Item component
Finally, we will define a stateless component for rendering the items as they are being added. To do this, create a new file named Item.re within ./src/components directory and paste the code below:
1/* ./src/components/Item.re */ 2 3 let component = ReasonReact.statelessComponent("Item"); 4 let make = (~item: TodoType.item, ~onRemove, ~onToggle, _children) => { 5 ...component, 6 render: _self => 7 <div className="item"> 8 <input 9 _type="checkbox" 10 checked=item.completed 11 onChange=(_ => onToggle(item.id)) 12 /> 13 <p> {ReasonReact.string(item.title)} </p> 14 <button onClick=(_ => onRemove(item.id))> 15 {ReasonReact.string("Remove")} 16 </button> 17 </div>, 18 };
Stylesheet
Open ./src/App.css and paste the code below to add some styling to the application:
1/* ./src/App.css */ 2 3 .App { 4 text-align: center; 5 } 6 .App-logo { 7 animation: App-logo-spin infinite 20s linear; 8 height: 80px; 9 } 10 .App-intro { 11 font-size: large; 12 display: flex; 13 justify-content: center; 14 flex-direction: column; 15 align-items: center; 16 } 17 .App-header { 18 background-color: #222; 19 height: 150px; 20 padding: 20px; 21 color: white; 22 } 23 .app { 24 width: 500px; 25 margin: 10px; 26 } 27 .app-header { 28 margin: 10px; 29 } 30 .title { 31 font-size: 25px; 32 font-weight: 500; 33 } 34 .input { 35 display: flex; 36 justify-content: flex-start; 37 } 38 .input input { 39 width: 80%; 40 height: 30px; 41 padding: 5px; 42 font-size: medium; 43 } 44 .input button { 45 background-color: green; 46 color: white; 47 font-size: medium; 48 width: 30%; 49 margin-left: 20px; 50 } 51 .list { 52 margin-top: 25px; 53 } 54 .item { 55 display: flex; 56 border: #f5f5f5 2px solid; 57 align-items: center; 58 height: 30px; 59 padding: 10px; 60 margin-top: 5px; 61 font-size: larger; 62 } 63 .item p { 64 text-align: left; 65 margin: auto; 66 } 67 .item button { 68 padding: 10px; 69 background-color: grey; 70 font-size: 14px; 71 opacity: 0.95; 72 } 73 @keyframes App-logo-spin { 74 from { 75 transform: rotate(0deg); 76 } 77 to { 78 transform: rotate(360deg); 79 } 80 }
And that is it. You should have a functional todo app by now
Conclusion
I hope this very simple application was helpful enough to increase your enthusiasm for exploring Reason and its syntax.
We barely scratched the surface of some awesome features in Reason and BuckleScript. You can visit the documentation to learn more about it.
The source code for the todo app can be found here on GitHub.


© 2024 Pusher Ltd. All rights reserved.
Pusher Limited is a company registered in England and Wales (No. 07489873) whose registered office is at MessageBird UK Limited, 3 More London Riverside, 4th Floor, London, United Kingdom, SE1 2AQ.