- Products

- Developers
- User stories
- Blog
- Pricing

Serving multiple apps with one Laravel codebase using subdomain routing
How to serve multiple apps from one Laravel codebase, using subdomain routing. It works through a practical, hands-on example featuring two web interfaces and an API.
Introduction
When building modern applications, it is not uncommon to have several isolated yet connected aspects of your application. For instance, you can have a website, an admin panel, and an API all powering the same application. There are many ways you can decide to handle this setup and we will consider one of the ways you can do this in this article.
We will be building an application with an administrative dashboard, the main web app, and an API that serves both the admin and the web app. We will be using just one Laravel codebase to do this and we will use Laravel’s subdomain routing to make sure the request are routed correctly. Let’s get started.
Prerequisites
To follow along you will need the following:
- Basic knowledge of the Laravel framework.
- Laravel CLI installed on your machine.
- Valet installed on your machine.
- A code editor like Visual Studio Code.
- SQLite installed on your machine.
⚠️ Valet is only officially available to Mac users. However, there are ports for both Linux and Windows available.
If you have all the requirements, let’s start.
Setting up your environment
The first thing you need to do is to create a new Laravel project. This will be the base for our application. Create a new Laravel project using the command below:
1$ laravel new acme
This will create a new Laravel application in an acme directory. Open the project in a code editor of your choice.
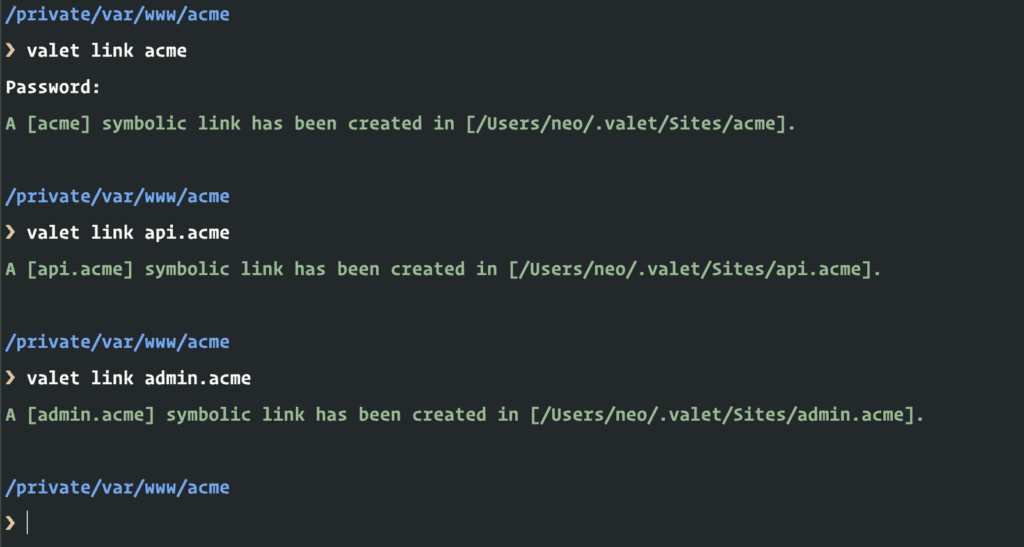
The next thing we need to do is create our primary domain using Valet and then add the other two proposed subdomains. We will be using the valet link command to create the local domains. Read more about serving sites using Valet.
In the root of your application run the following commands:
1$ valet link acme 2 $ valet link api.acme 3 $ valet link admin.acme
At this point, if you visit either of the URL’s below, you should be pointed to the same Laravel welcome page:
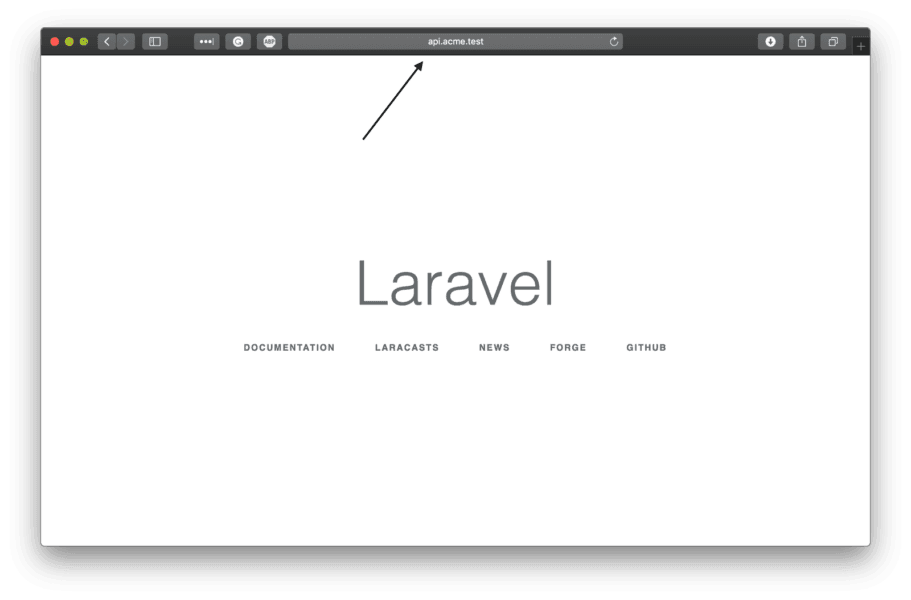
We will be using the Laravel subdomain routing to route different parts of the application to different logic.
Open the app/Providers/RouteServiceProvider.php file and replace the contents map method with the following:
1public function map() 2 { 3 $this->mapApiRoutes(); 4 5 $this->mapAdminRoutes(); 6 7 $this->mapWebRoutes(); 8 }
Next, replace the mapApiRoutes and mapWebRoutes in the same class with the following:
1protected function mapApiRoutes() 2 { 3 Route::domain('api.acme.test') 4 ->middleware('api') 5 ->namespace($this->namespace) 6 ->group(base_path('routes/api.php')); 7 } 8 9 protected function mapWebRoutes() 10 { 11 Route::domain('acme.test') 12 ->middleware('web') 13 ->namespace($this->namespace) 14 ->group(base_path('routes/web.php')); 15 }
In the methods above, we have added the domain method, which will tell Laravel to respond to the request if the domain matches what we passed as the parameter.
Now, add the new mapAdminRoutes method below to the class:
1protected function mapAdminRoutes() 2 { 3 Route::domain('admin.acme.test') 4 ->middleware('web') 5 ->namespace($this->namespace) 6 ->group(base_path('routes/admin.php')); 7 }
As seen from the three methods above, we pass the path to the file where the routes are defined. However, the mapAdminRoutes references a file that does not yet exist so let’s create it. Create a new admin.php file in the routes directory and add the following:
1<?php 2 3 Route::get('/', function () { 4 return 'Admin!'; 5 });
Open the routes/api.php file and replace the contents with the following:
1<?php 2 3 Route::get('/', function () { 4 return ['hello']; 5 });
Now when you visit each of the three domains, they should show something different. Great. Let’s build something in the domains to see how they can work together.
Building a simple API for the blog
The first thing we want to build is an API to power our blog. To keep it simple, we will add three endpoints. The first will be to show all the posts available, the second to show a single post, and the final one will be to create a post.
Setting up a database connection
The first thing we want to set up is a database connection. We will be using SQLite so the connection is easier. Create a database.sqlite file in your projects database directory. Open your .env file and add replace the following keys:
1DB_CONNECTION=mysql 2 DB_HOST=127.0.0.1 3 DB_PORT=3306 4 DB_DATABASE=homestead 5 DB_USERNAME=homestead 6 DB_PASSWORD=secret
With:
1DB_CONNECTION=sqlite 2 DB_DATABASE=/full/path/to/database.sqlite
Setting up migration and seed data
Next, let’s create a migration, model, and controller for the Post resource. Run the command below to do this:
1$ php artisan make:model Post -mr

Tip: The
-mrflag stands for migration and resource controller. This means that in addition to creating a model, the command will also create a migration and resource controller.
Open the Post class in the app directory and replace the contents with the following code:
1<?php 2 namespace App; 3 4 use Illuminate\Database\Eloquent\Model; 5 6 class Post extends Model 7 { 8 protected $fillable = ['title', 'content']; 9 }
Open the *_create_posts_table.php file that was created in the database/migrations directory and replace the up method with the following:
1public function up() 2 { 3 Schema::create('posts', function (Blueprint $table) { 4 $table->increments('id'); 5 $table->string('title'); 6 $table->text('content'); 7 $table->timestamps(); 8 }); 9 }
Next, let’s create a model factory. Model factories make it easy for us to seed large test data for testing. Run the command below to create a model factory for our Post resource:
1$ php artisan make:factory PostFactory
Open the PostFactory file in the database/factories directory and replace the contents with the following:
1<?php 2 use App\Post; 3 use Faker\Generator as Faker; 4 5 $factory->define(Post::class, function (Faker $faker) { 6 return [ 7 'title' => $faker->sentence(), 8 'content' => $faker->paragraphs(10, true) 9 ]; 10 });
Now create a database seeder using the command below:
1$ php artisan make:seeder PostsTableSeeder
Open the PostsTableSeeder class in the database/seeds directory and replace the run method with the following:
1public function run() 2 { 3 factory(\App\Post::class, 10)->create(); 4 }
In the code above, we instruct the model factory to generate 10 sample posts whenever the seeder is run.
Next, open the DatabaseSeeder file in the database/seeds directory and replace the run class with the following:
1public function run() 2 { 3 $this->call(PostsTableSeeder::class); 4 }
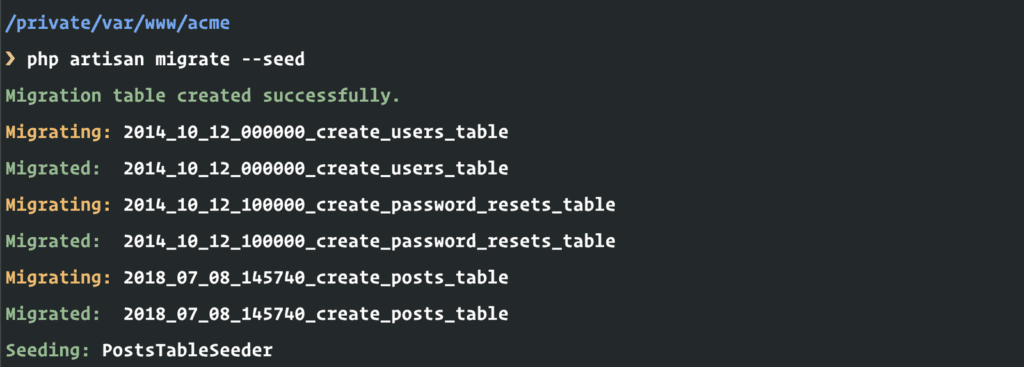
Now let’s run our migration and seed some sample data into the database:
1$ php artisan migrate --seed
Let’s create our endpoints.
Creating our endpoints
Open the PostController and replace the index, store, and show methods with the following:
1public function index(Post $post) 2 { 3 return response()->json($post->paginate()->toArray()); 4 } 5 6 public function store(Request $request, Post $post) 7 { 8 $data = $request->validate([ 9 'title' => 'required|string|between:1,50', 10 'content' => 'required|string|between:10,5000', 11 ]); 12 13 return response()->json($post->create($data)->toArray()); 14 } 15 16 public function show(Post $post) 17 { 18 return response()->json($post->toArray()); 19 }
Then open the routes/api.php file and replace the contents with the following:
1<?php 2 3 Route::get('/posts/{post}', 'PostController@show'); 4 Route::get('/posts', 'PostController@index'); 5 Route::post('/posts', 'PostController@create');
At this point, we have created the API endpoints to show all posts, show one post, and create a post.
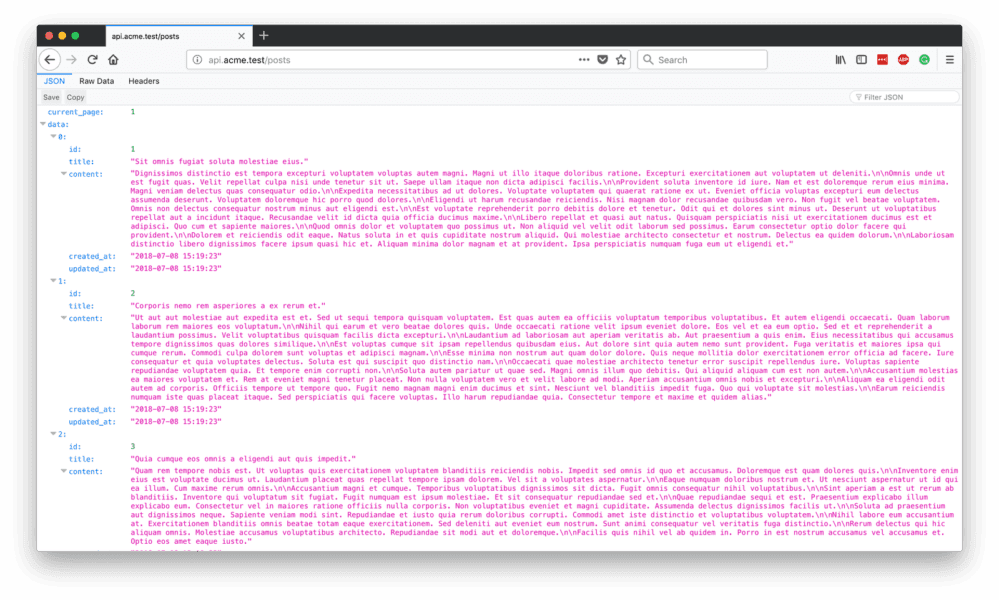
If you visit the API endpoint, http://api.acme.test/posts you should see all the posts displayed:
Building a simple web app
Now that we have a working API, let’s build a web app that will consume the data. The web app will simply display all the posts available using the API.
Open the routes/web.php file and replace the contents with the following:
1<?php 2 3 Route::view('/', 'web.index');
Next, create a web directory in resources/views, and in there create an index.blade.php file. Inside the new file paste the following:
1<!doctype html> 2 <html lang="en"> 3 <head> 4 <meta charset="utf-8"> 5 <meta name="viewport" content="width=device-width, initial-scale=1, shrink-to-fit=no"> 6 <title>Blog Template for Bootstrap</title> 7 <link href="https://stackpath.bootstrapcdn.com/bootstrap/4.1.1/css/bootstrap.min.css" rel="stylesheet"> 8 <link href="https://fonts.googleapis.com/css?family=Playfair+Display:700,900" rel="stylesheet"> 9 <link href="{{ asset('css/blog.css') }}" rel="stylesheet"> 10 </head> 11 <body> 12 <div class="container"> 13 <header class="blog-header py-3"> 14 <div class="row flex-nowrap justify-content-between align-items-center"> 15 <div class="col-4 pt-1"> 16 <a class="text-muted" href="#">Subscribe</a> 17 </div> 18 <div class="col-4 text-center"> 19 <a class="blog-header-logo text-dark" href="#">Large</a> 20 </div> 21 <div class="col-4 d-flex justify-content-end align-items-center"> 22 <a class="text-muted" href="#"> 23 <svg xmlns="http://www.w3.org/2000/svg" width="20" height="20" viewBox="0 0 24 24" fill="none" stroke="currentColor" stroke-width="2" stroke-linecap="round" stroke-linejoin="round" class="mx-3"><circle cx="10.5" cy="10.5" r="7.5"></circle><line x1="21" y1="21" x2="15.8" y2="15.8"></line></svg> 24 </a> 25 <a class="btn btn-sm btn-outline-secondary" href="#">Sign up</a> 26 </div> 27 </div> 28 </header> 29 <div class="nav-scroller py-1 mb-2"> 30 <nav class="nav d-flex justify-content-between"> 31 <a class="p-2 text-muted" href="#">World</a> 32 <a class="p-2 text-muted" href="#">U.S.</a> 33 <a class="p-2 text-muted" href="#">Technology</a> 34 <a class="p-2 text-muted" href="#">Design</a> 35 <a class="p-2 text-muted" href="#">Culture</a> 36 <a class="p-2 text-muted" href="#">Business</a> 37 <a class="p-2 text-muted" href="#">Politics</a> 38 <a class="p-2 text-muted" href="#">Opinion</a> 39 <a class="p-2 text-muted" href="#">Science</a> 40 <a class="p-2 text-muted" href="#">Health</a> 41 <a class="p-2 text-muted" href="#">Style</a> 42 <a class="p-2 text-muted" href="#">Travel</a> 43 </nav> 44 </div> 45 <div class="jumbotron p-3 p-md-5 text-white rounded bg-dark"> 46 <div class="col-md-6 px-0"> 47 <h1 class="display-4 font-italic">Title of a longer featured blog post</h1> 48 <p class="lead my-3">Multiple lines of text that form the lede, informing new readers quickly and efficiently about what's most interesting in this post's contents.</p> 49 <p class="lead mb-0"><a href="#" class="text-white font-weight-bold">Continue reading...</a></p> 50 </div> 51 </div> 52 </div> 53 54 <main role="main" class="container" id="app"> 55 <div class="row"> 56 <div class="col-md-8 blog-main"> 57 <h3 class="pb-3 mb-4 font-italic border-bottom"> 58 From the Firehose 59 </h3> 60 <div class="blog-post" v-for="post in posts"> 61 <h2 class="blog-post-title">@{{ post.title }}</h2> 62 <p class="blog-post-meta">January 1, 2014 by <a href="#">Neo</a></p> 63 <p>@{{ post.content }}</p> 64 </div> 65 </div> 66 <aside class="col-md-4 blog-sidebar"> 67 <div class="p-3 mb-3 bg-light rounded"> 68 <h4 class="font-italic">About</h4> 69 <p class="mb-0">Etiam porta <em>sem malesuada magna</em> mollis euismod. Cras mattis consectetur purus sit amet fermentum. Aenean lacinia bibendum nulla sed consectetur.</p> 70 </div> 71 <div class="p-3"> 72 <h4 class="font-italic">Archives</h4> 73 <ol class="list-unstyled mb-0"> 74 <li><a href="#">March 2018</a></li> 75 <li><a href="#">February 2018</a></li> 76 </ol> 77 </div> 78 </aside> 79 </div> 80 </main> 81 <footer class="blog-footer"> 82 <p>Blog template built for <a href="https://getbootstrap.com/">Bootstrap</a> by <a href="https://twitter.com/mdo">@mdo</a>.</p> 83 <p> 84 <a href="#">Back to top</a> 85 </p> 86 </footer> 87 <script src="https://cdnjs.cloudflare.com/ajax/libs/axios/0.18.0/axios.min.js"></script> 88 <script src="https://cdn.jsdelivr.net/npm/vue@2.5.16/dist/vue.js"></script> 89 <script> 90 new Vue({ 91 el: '#app', 92 data: { 93 posts: [] 94 }, 95 created() { 96 axios.get('http://api.acme.test/posts').then(res => this.posts = res.data.data) 97 } 98 }) 99 </script> 100 </body> 101 </html>
In the HTML above, we fetched the posts using Axios and displayed them using Vue. We referenced a blog.css file, so let’s create that. In the public/css directory, create a new blog.css file and paste in the following:
1.blog-header { 2 line-height: 1; 3 border-bottom: 1px solid #e5e5e5; 4 } 5 .blog-header-logo { 6 font-family: "Playfair Display", Georgia, "Times New Roman", serif; 7 font-size: 2.25rem; 8 } 9 .blog-header-logo:hover { 10 text-decoration: none; 11 } 12 h1, h2, h3, h4, h5, h6 { 13 font-family: "Playfair Display", Georgia, "Times New Roman", serif; 14 } 15 .display-4 { 16 font-size: 2.5rem; 17 } 18 @media (min-width: 768px) { 19 .display-4 { 20 font-size: 3rem; 21 } 22 } 23 .nav-scroller { 24 position: relative; 25 z-index: 2; 26 height: 2.75rem; 27 overflow-y: hidden; 28 } 29 .nav-scroller .nav { 30 display: -ms-flexbox; 31 display: flex; 32 -ms-flex-wrap: nowrap; 33 flex-wrap: nowrap; 34 padding-bottom: 1rem; 35 margin-top: -1px; 36 overflow-x: auto; 37 text-align: center; 38 white-space: nowrap; 39 -webkit-overflow-scrolling: touch; 40 } 41 .nav-scroller .nav-link { 42 padding-top: .75rem; 43 padding-bottom: .75rem; 44 font-size: .875rem; 45 } 46 .card-img-right { 47 height: 100%; 48 border-radius: 0 3px 3px 0; 49 } 50 .flex-auto { 51 -ms-flex: 0 0 auto; 52 flex: 0 0 auto; 53 } 54 .h-250 { height: 250px; } 55 @media (min-width: 768px) { 56 .h-md-250 { height: 250px; } 57 } 58 .border-top { border-top: 1px solid #e5e5e5; } 59 .border-bottom { border-bottom: 1px solid #e5e5e5; } 60 .box-shadow { box-shadow: 0 .25rem .75rem rgba(0, 0, 0, .05); } 61 .blog-title { 62 margin-bottom: 0; 63 font-size: 2rem; 64 font-weight: 400; 65 } 66 .blog-description { 67 font-size: 1.1rem; 68 color: #999; 69 } 70 @media (min-width: 40em) { 71 .blog-title { 72 font-size: 3.5rem; 73 } 74 } 75 .blog-post { 76 margin-bottom: 4rem; 77 } 78 .blog-post-title { 79 margin-bottom: .25rem; 80 font-size: 2.5rem; 81 } 82 .blog-post-meta { 83 margin-bottom: 1.25rem; 84 color: #999; 85 } 86 .blog-footer { 87 padding: 2.5rem 0; 88 color: #999; 89 text-align: center; 90 background-color: #f9f9f9; 91 border-top: .05rem solid #e5e5e5; 92 } 93 .blog-footer p:last-child { 94 margin-bottom: 0; 95 }
If you attempt to preview the application right now you’ll get a CORS error. This happens because we are trying to fetch data from the api.acme.test domain from the acme.test domain. The request will, therefore, be rejected because we have not specified we want to share resources across these domains.
Handling CORS error in a Laravel application
To allow resource sharing from this subdomain, we will need to install a Laravel package. Open the terminal and run the following command:
1$ composer require barryvdh/laravel-cors
This will install the this Laravel CORS package. Open the app/Http/Kernel.php file and update the middlewareGroups property as seen below:
1protected $middlewareGroups = [ 2 // [...] 3 4 'api' => [ 5 \Barryvdh\Cors\HandleCors::class, 6 7 // [...] 8 ], 9 ];
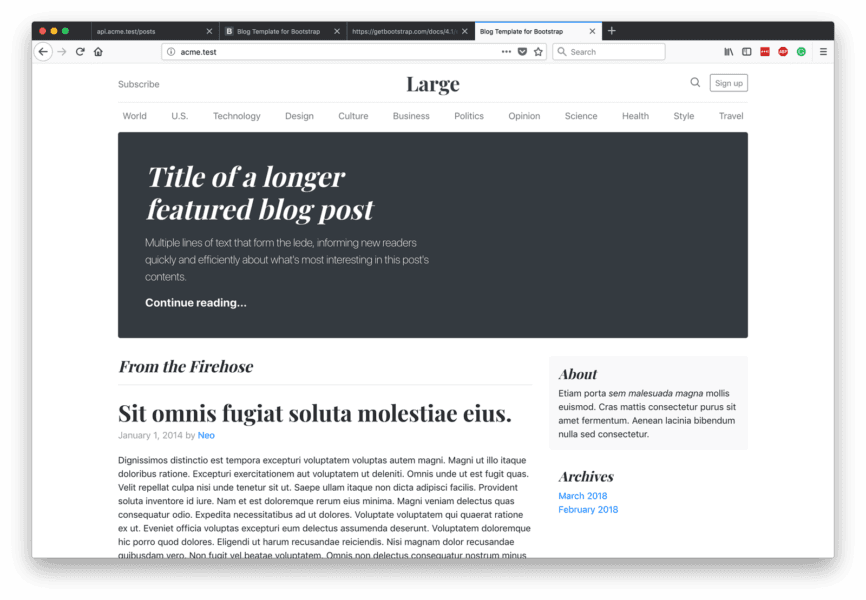
Now, you can visit the web app URL http://acme.test. This should display the blog posts fetched from the API:
Building a simple admin dashboard
The last piece of the application is the admin dashboard, which will be at http://admin.acme.test. Open the routes/admin.php file and replace the contents with the following:
1<?php 2 3 Route::view('/', 'admin.index');
Next, create a new admin directory in the resources/views directory and in there create a new index.blade.php file with the following content:
1<!DOCTYPE html> 2 <html lang="en"> 3 <head> 4 <meta charset="UTF-8"> 5 <meta name="viewport" content="width=device-width, initial-scale=1.0"> 6 <meta http-equiv="X-UA-Compatible" content="ie=edge"> 7 <link href="https://stackpath.bootstrapcdn.com/bootstrap/4.1.1/css/bootstrap.min.css" rel="stylesheet"> 8 <title>Admin</title> 9 </head> 10 <body> 11 <div id="app"> 12 <div class="container"> 13 <div class="alert alert-success" role="alert" v-show="success" style="display: none"> 14 Post added successfully. 15 </div> 16 <form action="" class="" v-on:submit.prevent="savePost"> 17 <div class="form-group"> 18 <label for="title">Post Title</label> 19 <input type="text" class="form-control" v-model="title"> 20 </div> 21 <div class="form-group"> 22 <label for="title">Post Content</label> 23 <textarea type="text" class="form-control" v-model="content"></textarea> 24 </div> 25 <input type="submit" value="Save Post" class="btn btn-primary"> 26 </form> 27 </div> 28 </div> 29 <script src="https://cdnjs.cloudflare.com/ajax/libs/axios/0.18.0/axios.min.js"></script> 30 <script src="https://cdn.jsdelivr.net/npm/vue@2.5.16/dist/vue.js"></script> 31 <script> 32 new Vue({ 33 el: '#app', 34 data: { 35 title: "", 36 content: "", 37 success: false, 38 }, 39 methods: { 40 savePost: function () { 41 axios.post('http://api.acme.test/posts', {title: this.title, content: this.content}).then(res => { 42 this.success = true 43 this.title = this.content = '' 44 window.setTimeout(() => this.success = false, 3000) 45 }) 46 } 47 } 48 }) 49 </script> 50 </body> 51 </html>
In the HTML above, we have a form where we can enter the title and content of the post. When the post is submitted, we use Axios to send the request to the API. Since we have already added CORS support to the API earlier, we do not need to do so again and the request should work just fine.
If you visit the admin URL http://admin.acme.test you should see the admin panel:
Bonus: making the domain configurable for all environments
Right now, we hardcoded the domain into our code, which means if we wanted to work in development and production we would have to change the domain from the RouteServiceProvider every time.
To alleviate this issue, open the .env file and add a new key called APP_BASE_DOMAIN as seen below:
1APP_BASE_DOMAIN=acme.test
Next, open the config/app.php and add a new key to the config file as seen below:
1<?php 2 3 return [ 4 5 'base_domain' => env('APP_BASE_DOMAIN'), 6 7 // [...] 8 9 ];
Now open the RouteServiceProvider and add the method below to the class:
1private function baseDomain(string $subdomain = ''): string 2 { 3 if (strlen($subdomain) > 0) { 4 $subdomain = "{$subdomain}."; 5 } 6 7 return $subdomain . config('app.base_domain'); 8 }
Next, replace the hardcoded subdomain text in the class methods with calls to the method we just added as seen below:
1protected function mapWebRoutes() 2 { 3 Route::domain($this->baseDomain()) 4 ->middleware('web') 5 ->namespace($this->namespace) 6 ->group(base_path('routes/web.php')); 7 } 8 9 protected function mapAdminRoutes() 10 { 11 Route::domain($this->baseDomain('admin')) 12 ->middleware('web') 13 ->namespace($this->namespace) 14 ->group(base_path('routes/admin.php')); 15 } 16 17 protected function mapApiRoutes() 18 { 19 Route::domain($this->baseDomain('api')) 20 ->middleware('api') 21 ->namespace($this->namespace) 22 ->group(base_path('routes/api.php')); 23 }
Now we can easily change the domain without having to modify the code.
Conclusion
In this article, we have seen how to use one Laravel codebase to handle multiple applications with ease. The source code to the application built in this article is available on GitHub.


© 2024 Pusher Ltd. All rights reserved.
Pusher Limited is a company registered in England and Wales (No. 07489873) whose registered office is at MessageBird UK Limited, 3 More London Riverside, 4th Floor, London, United Kingdom, SE1 2AQ.