- Products

- Developers
- User stories
- Blog
- Pricing

Using interface builder within teams

This article looks at some of the challenges encountered when using Interface Builder in a team. It then presents some ways to reduce merge conflicts and make collaboration easier.
Introduction
Introduction
Interface Builder (IB) has been available on iOS for several years now. It’s often the center of debates when teams set out on new projects. Should you use programmatic layout (PL) or IB? There are good reasons to choose either approach. We’re going to look at some of the reasons why you might choose one over the other. We will then consider how best to use interface builder within a team.
The debate
IB allows you to build out your UI using a graphical interface. This makes it easier to visualize your interface as you build your app. Storyboards allow you to plan out and visualize user flows and how different view controllers interact with one another. They also allow you to write less code. You can shorten the length of your classes by not having to instantiate views and add programmatic constraints.
The primary disadvantage to IB is merge conflicts when working within teams. The source code behind the graphical interface that IB uses is XML. If you’re not familiar with this then merge conflicts can often be difficult to solve. Teams often steer away from using IB because of this issue. Merge conflicts are never nice and they can slow down your development. Teams like to avoid them wherever possible. We’re going to walk through a simple yet effective way of avoiding as many of these conflicts as possible. This might make you and your team think again about using IB.
There are a lot more pros and cons of using IB over PL. We won’t go into more detail on them in this post, as they often come down to personal opinions.
Using IB in teams
Storyboards
Storyboards are where teams will come across the majority of their merge conflicts when working with IB. This is because often people will use one storyboard to layout their entire app. Whilst this is great if you want to see the entire layout in one section, it can become complex very quickly. A storyboard is one large file with all the views in, this makes it difficult for team members to work on different views without causing conflicts.
Before iOS9 if we wanted to use many storyboards we would have to write it within the code of the view controller (VC) like this:
1let storyboard = UIStoryboard(name: "SecondaryStoryboard", bundle: Bundle.main) 2 let viewController = storyboard.instantiateInitialViewController() 3 4 if let viewController = viewController { 5 self.present(viewController, animated: true, completion: nil) 6 }
We can now use storyboards to reference another storyboard. There are a couple of ways to do this, although they both use the same storyboard referencing object.
Refactoring storyboards
This is a great approach for when you already have complex storyboards, or are heading in that direction. It’s also the simplest and quickest way.

This method creates a new storyboard whilst:
- Adding your highlighted VCs to the new storyboard.
- Replacing your highlighted VCs with a storyboard reference.
Everything works as it did before, your segues will act the same and your VCs will behave the same. The one thing that changes is where your graphical interface for views sits within your codebase. Separating out your VCs into new storyboards reduces complexity. It also means that you are less likely to be working on the same views as your team members therefor less conflicts.
Using storyboard references for new features
If you’re about to do a new feature that will have many VCs. You don’t want to add this straight into an existing storyboard as this is when they will start to get out of control. Storyboard references will help here.
First you need to create a new storyboard for your feature:
- File → New → File
- In the user interface section select storyboard.
- Select Next, name your storyboard and press Create.
Within the new storyboard add your VCs as if it’s your Main.storyboard. This includes selecting a VC to be your initial VC for the new storyboard.
Once you have created your new storyboard, you will need to reference it. As discussed this can be done via code. Although since iOS9 we can do this within the original storyboard.
- Go to your original storyboard.
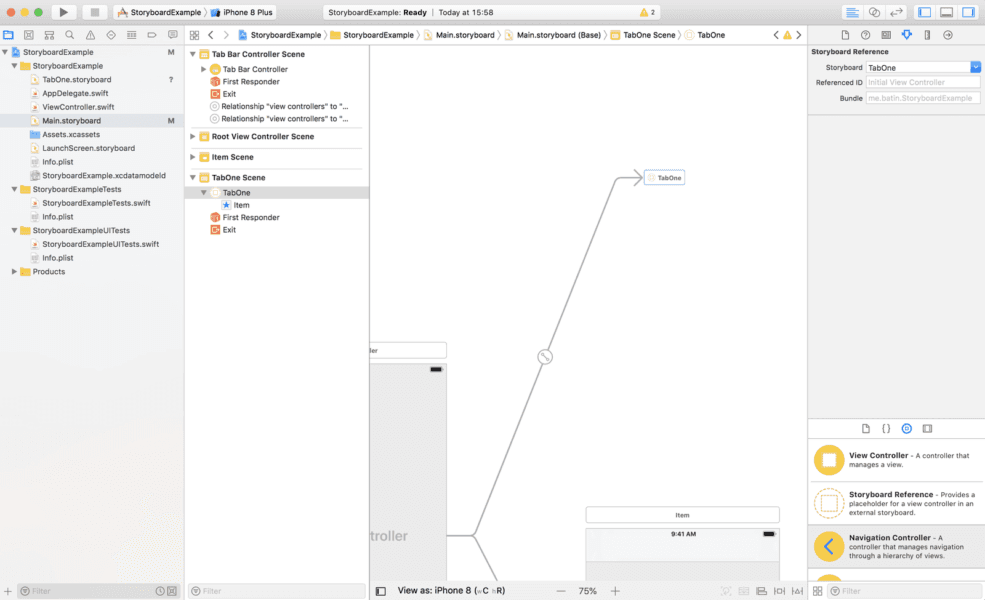
- Add a Storyboard Reference object.
- Create a segue to this reference.
- Select the reference object and in the attributes inspector, select the storyboard that it should refer to.
This method will segue to the initial view controller of your new storyboard. Treat the reference object as if it’s your first VC of that scene when selecting the type of segue you would like to perform such as Show or Show Detail and so on.
Instantiate specific view controllers using references
You might want to instantiate specific VCs using storyboard references that aren’t your initial view controllers. This is simple to do:
- Give the view controller you want to instantiate a storyboard ID.
- From the attributes inspector of the storyboard reference, set the reference ID to be the storyboard ID.
This is a great method if you don’t always want to use the same view controller as the initial view controller. You could great many storyboard references pointing to different VCs within the same storyboard. Then using segue identifiers to determine which storyboard reference to use.
Conclusion
Whilst storyboard referencing won’t solve all your conflicts it’s a good start. Abstracting your VCs into many storyboards means you are less likely to be working in the same IB as your colleagues. This in turn means you are less likely to come across accidental conflicts. Storyboard referencing isn’t new to iOS but it’s much easier now that you don’t have to write any code to do it.
Further to storyboard referencing you can also maximize your use of nibs so that even more layout is abstracted away from other layouts.
Merge conflicts are still going to happen. If you get your abstraction correct you will reduce these conflicts. Remember that interface builder has lots of advantages and merge conflicts shouldn’t be the reason you can’t use them within your team.


© 2024 Pusher Ltd. All rights reserved.
Pusher Limited is a company registered in England and Wales (No. 07489873) whose registered office is at MessageBird UK Limited, 3 More London Riverside, 4th Floor, London, United Kingdom, SE1 2AQ.