- Products

- Developers
- User stories
- Blog
- Pricing

Improve User Experience with a Real-time Progress Bar
This article is part of our series of tutorials ‘Building Realtime Applications’, updated on a regular basis.
Introduction
This article is part of our series of tutorials ‘Building Realtime Applications’, updated on a regular basis.
When I browse the web, there’s nothing less helpful than a progress bar that doesn’t give me any feedback on what’s actually happening. This usually happens when the application is working on a task that needs some time to process, like a data/file import or provisioning an account.
This usually leaves me, the poor user, wondering if something went wrong with the app. Should I wait 5 more minutes before I refresh the page? Did I do something wrong? As a user, this is a rather frustrating experience.
To cope with this problem and improve the user experience in your app, you should use a real-time progress bar. Luckily for you, Pusher makes it incredibly easy for your to build one!
The Problem
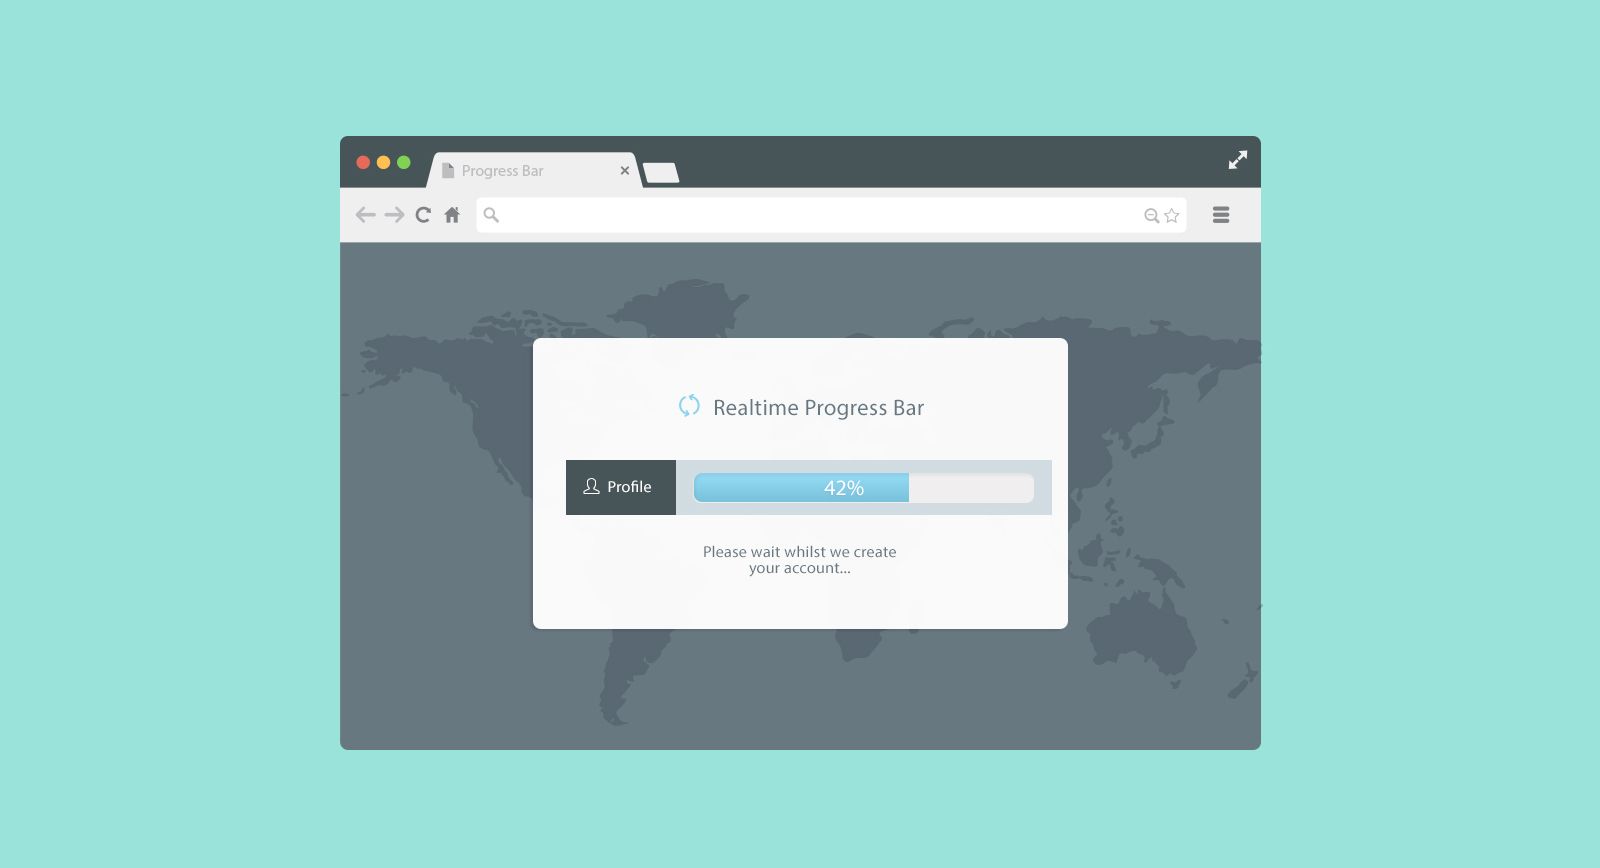
For this demo, we’ll use the all too common problem of creating an account and the app needs to provision the account with some kind of data. You can really use this logic everywhere in your app to improve the user experience.
Before going forward, check out end product of this tutorial. All of the code is available on Github.

As Easy As 1, 2, 3
To keep it short and sweet, I’ll be using Sinatra for the server side logic but this will work with any kind of server side framework or language. Also, make sure to have a Pusher account handy – it is free, after all!
Setting things up on the server side is pretty trivial; you’ll need your Pusher app keys, secret (keep it that way!) and ID to instantiate Pusher on the server.
The key thing to notice in the server code below is that we are using Pusher.trigger to communicate our message and progress to the client through the pusher_channel we provided. Use this throughout your background tasks to communicate to your user and improve his/her experience. Finally, you need to trigger an event on that channel, in our case we just have one that we name update.
In our example, each account creation process needs its own channel because you don’t want to send the messages to everyone currently creating accounts. Don’t worry about creating a lot of channels: Pusher provides unlimited channels on all plans.
There are multiple ways of creating unique channels for each user. You can generate a unique string when rendering the template, use the Unique User Identifier of the metrics tool you are using (Mixpanel, Kissmetrics, Google Analytics, etc) or just generate it client side with Javascript and submit it with the form.
1... 2 3# Post endpoint that creates account with real-time magic 4post '/create_account_with_realtime' do 5 name = params[:name] 6 uid = params[:uid] 7 pusher_channel = "signup_process_#{uid}" 8 fake_background_job(name, pusher_channel) 9end 10 11def fake_background_job(name, pusher_channel) # Faking a background job 12 Pusher.trigger(pusher_channel, 'update', {message: "Starting provisioning your account #{name}", progress: 30 }) 13 sleep(3) 14 Pusher.trigger(pusher_channel, 'update', {message: "Sorry #{name}, It's taking a bit of time...", progress: 30 }) 15 sleep(2) 16 Pusher.trigger(pusher_channel, 'update', {message: "almost there, adding the demo data...", progress: 60 }) 17 sleep(4) 18 Pusher.trigger(pusher_channel, 'update', {message: "Polishing your new account...", progress: 90 }) 19 sleep(3) 20 Pusher.trigger(pusher_channel, 'update', {message: "Everything is ready for you #{name}! did it feels like 12 seconds?", progress: 100 }) 21end
Wiring It Up
Now that we have everything sorted out on the backend, we just need to wire everything up on the client side
(JS – html). Simply add the Pusher library in your view by adding
<script src="http://js.pusher.com/2.1/pusher.min.js"> in the <head>.
The main HTML components we will be interacting with are:
1<div class="progress progress-striped active hide"> 2 <div class="progress-bar progress-bar-info" id='realtime-progress-bar' role="progressbar"style="width: 0%"></div> 3</div> 4<p class="messages"></p>
To finish the job, we just need to sprinkle some Javascript and Jquery on top of it.
Instantiate Pusher and subscribe to the unique channel
1var uID = Math.floor((Math.random()*100)+1) // this unique ID will be sent through the form to the server. As stated above, there's a lot of way to do this. 2var pusher = new Pusher('<Pusher App API Key>') // Change it to your Pusher APP Key 3var channel = pusher.subscribe('signup_process_'+uID) // The Channel you want to subscribe to
Bind to the
1channel.bind('update', function(data) { 2 // data = {message: "Hello you", progress: 40} 3})
Update the DOM with the message and progress data
In the bind callback, you can manipulate the data you sent from the server (remember the Pusher.trigger?) and update the DOM with it.
1var messageBox = $('#create-account-form-with-realtime').children('.messages') 2var progressBar = $('#realtime-progress-bar') 3 4progressBar.width(data.progress+"%") 5messageBox.html(data.message) 6 7// The process is complete: do whatever you want now, maybe redirect them to their newly created account? 8if (data.progress == 100) { 9 messageBox.html('Was it better with this process?') 10}
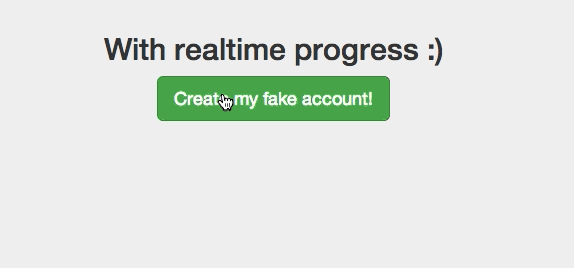
That’s all you need!
Well that was easy, right?
Going Forward
The code and example used here are pretty simple. I usually use real-time progress bars hand in hand with background task processors like Sidekiq or Kue to inform users how things are going. For extra long jobs, always use fallback emails to tell them the job is completed. If you have any questions or feedback, contact us on Twitter or leave a comment below!
For more about building realtime applications, check out our tutorials library, updated on a regular basis.


© 2024 Pusher Ltd. All rights reserved.
Pusher Limited is a company registered in England and Wales (No. 07489873) whose registered office is at MessageBird UK Limited, 3 More London Riverside, 4th Floor, London, United Kingdom, SE1 2AQ.