- Products

- Developers
- User stories
- Blog
- Pricing

Implicit routing and server rendering for React apps using Next.js

This brief tutorial explains the advantages of server-side rendering for web apps. It demonstrates how to achieve this in React by building a simple example with NextJS.
Introduction
Server rendering is a term that describes the process of rendering all or some of your client content on your server as well. It has some advantages which we will discuss. Server rendering is one of the trickiest assignments we get as developers working with UI libraries and frameworks. React being a UI library is not an exception. We will discuss the impact of server rendering and how we can achieve it for React-based apps.
What is sever rendering?
These modern UI libraries like React use some sort of abstract DOM that is created with JavaScript. In React, we refer to it as the virtual DOM. Virtual DOM makes it faster to run updates on the UI and minimizes re-rendering by syncing with the actual DOM with only what has changed.
This method contrasts with the old way of doing things where we have a server send HTML content, which is transformed to a DOM tree and we manipulate with JavaScript (jQuery) if needed. This method is brittle and does not support declarative states, whereas modern libraries provide a robust solution and support state management.
The problem is, since these modern libraries DOM creation is based on JavaScript (and not sent from the server), you end up with something like this:
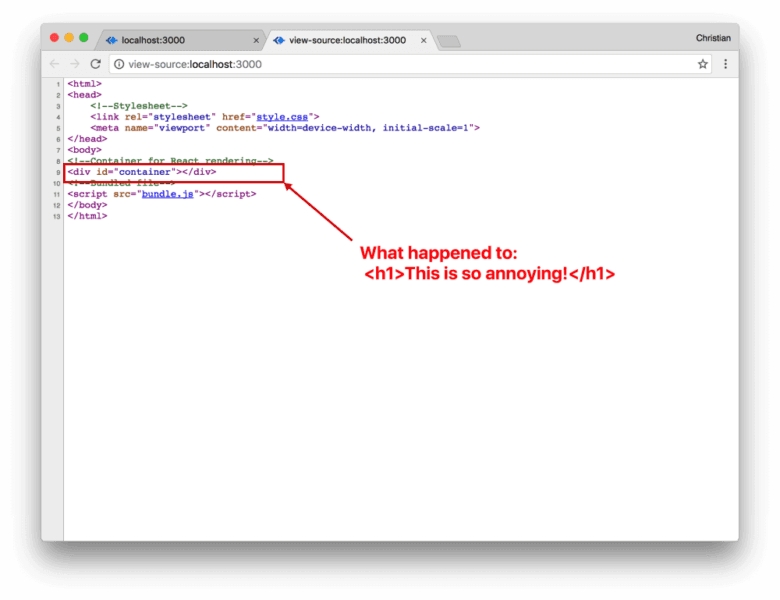
Even though you had the following content in the browser:

Here are some of the issues with this situation.
SEO and discoverability
Let’s say you deploy your website and expect search engines to crawl it and index your content. Crawlers are not screen readers, they ask the server for your HTML and work with it. When that’s the case, the server doesn’t send enough information to be indexed. It sends something like the bare HTML in the image above.
We know how important SEO is for commercial websites. You need to be found. Not just being found, you need Google to rank you high enough that a googler’s first choice becomes your product. If you don’t render on the server, your content won’t be indexed and no body will find you with a search engine. Bad news.
First Meaningful Paint (FMP)
Before anything is rendered on your React app screen, all the assets need to be downloaded and parsed including JavaScript which creates the DOM. This causes a longer wait time even after the assets have been downloaded.
First Meaningful Paint is a term that describes when the first meaningful content is shown on the screen. When all the JavaScript need to be processed before showing something meaningful, then our First Meaningful Paint goal suffers.
What we can do is serve the HTML and CSS content which is faster then process the JavaScript while the users have something to digest.
Accessibility
Accessibility should be considered when building any software, to ensure no-one is prevented from using it. Some users need assistance to use our websites and sometimes this assistance doesn’t come in human form, it comes as bots.
In that case, these bots need to crawl our website and interpret it in the best possible way. This is a crucial process and client rendering makes it harder for the bots. Rendering on the server helps the bots to easily crawl since we provide them raw HTML content.
Planning ahead
It’s harder to implement server rendering on existing projects and you might have experienced this if you have rendered an existing project \on a server. For this reason, server rendering has to be included in your planning process as early as the first day. Should we render on the server or not? Who are our users and how do they find us? If we are rendering on the server, are we rendering the entire app or just few pages? These are valid questions you should be brainstorming with your team as early as possible. Preferably, thing about this before writing any code since it will affect your choice of tools.
Speaking of tools, if you plan early, you might want to pick tools that kill two birds with one stone for you. Next.js is a React-based tool that automatically renders your app on the sever. No extra installations or setting up of server rendering libraries is needed.
Setting up Next.js
To set up a Next.js project you need to have Node and npm installed on your machine. Create a new Node project with npm:
1npm init -y
This will generate a package.json file with default configuration which is fine to start with:
1{ 2 "name": "next-first-step", 3 "version": "1.0.0", 4 "main": "index.js", 5 "license": "MIT" 6 }
Next install Next.js in the new project with npm:
1npm install --save next
Next is a React tool therefore it needs React to work. In that case, install the React and React DOM libraries:
1npm install --save react react-dom
We need a script to start the app with. Add the following to the scripts section in the package.json file:
1"scripts": { 2 "dev": "next" 3 },
Running a Next.js app
We have a script that can start the app. Let’s test that out:
1npm run dev
You will get an error that looks like the following:
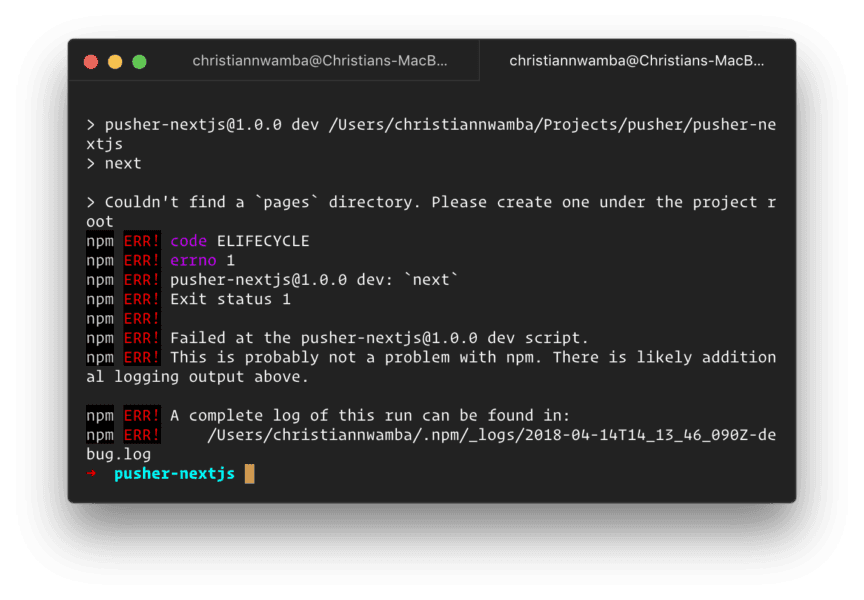
The error is complaining about you not having a pages directory in the project folder. Apart from out of the box server side rendering that Next offers, it also offers implicit routing. The pages directory stores .js files that export React components. Each of these files are mapped to a route using their names.
Let’s create this pages folder and run again:
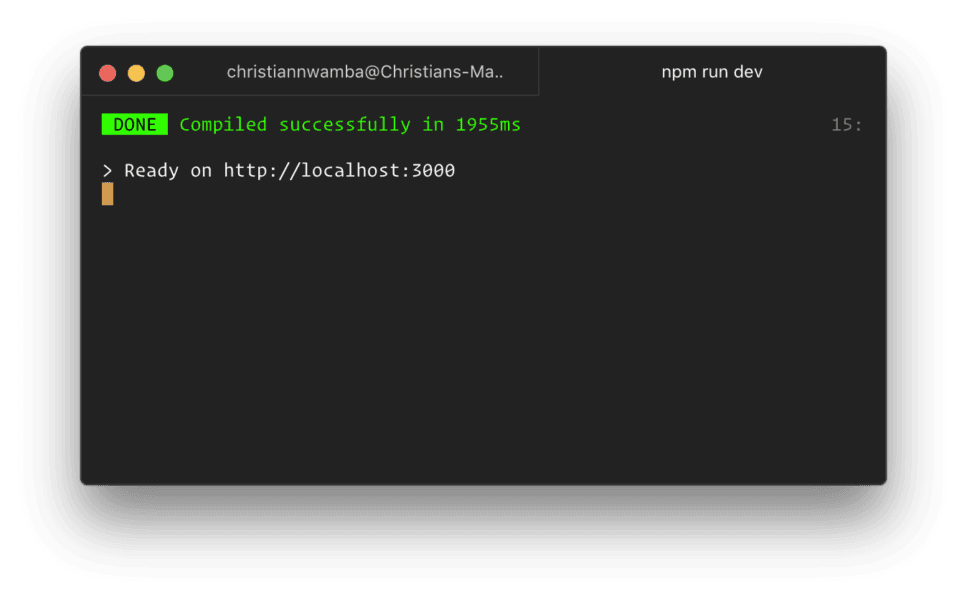
This time the app runs fine and is open at port 3000 in the localhost. Let’s visit the page and see what we get:
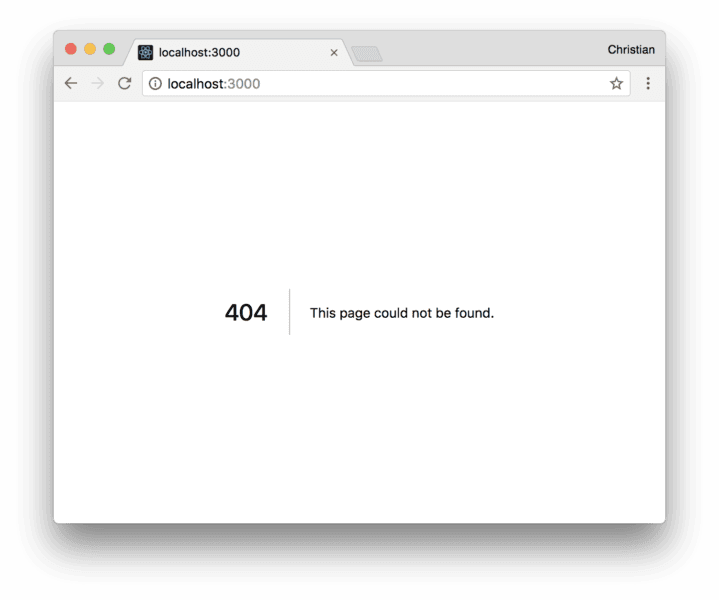
As you might have expected, we get a 404 because there’s nothing in the pages folder. Add an index.js file with the following content:
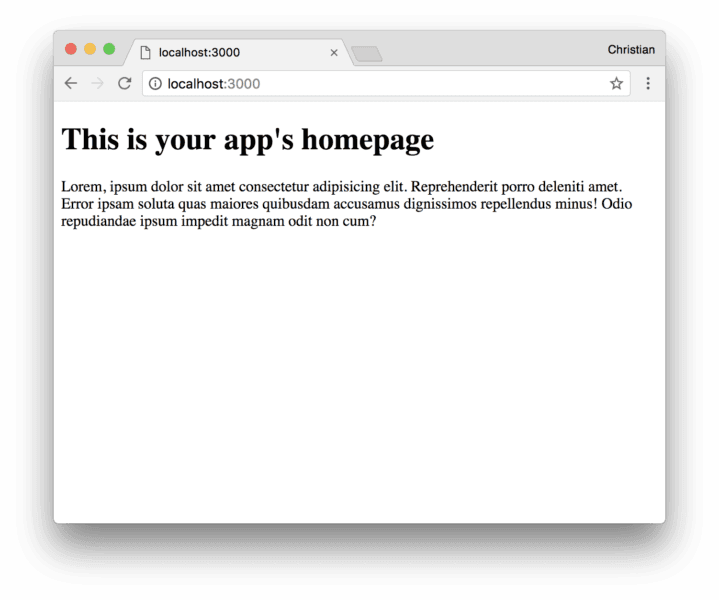
1// ./pages/index.js 2 import React from 'react'; 3 const Index = () => ( 4 <div> 5 <h1>This is your app's homepage</h1> 6 <p>Lorem, ipsum dolor sit amet consectetur adipisicing elit. Reprehenderit porro deleniti amet. Error ipsam soluta quas maiores quibusdam accusamus dignissimos repellendus minus! Odio repudiandae ipsum impedit magnam odit non cum?</p> 7 </div> 8 ) 9 10 export default Index;
Now reload the page:
Implicit routing
Routing in Next.js does not require configuration just like you saw in the previous example. When you create a JS file in the pages folder, it gets automatically mapped to a route. For example if we have a file named about.js, it gets mapped to /about. The only exception is index.js which maps to /.
To show an about page, add about.js in the pages folder:
1// ./pages/about.js 2 import React from 'react'; 3 const About = () => ( 4 <div> 5 <h1>This is your app's about page</h1> 6 <p>Lorem, ipsum dolor sit amet consectetur adipisicing elit. Reprehenderit porro deleniti amet. Error ipsam soluta quas maiores quibusdam accusamus dignissimos repellendus minus! Odio repudiandae ipsum impedit magnam odit non cum?</p> 7 </div> 8 ) 9 export default About;
Visit /about and you should see the following:

You can learn more about routing here.
Implicit server rendering
Now to the exciting part. Everything we have built is rendered on the server so far. We can confirm this by viewing the page source of our app again to reveal the content:

Conclusion
There is more you can do with Next.js. Parameterized routing, route queries, API calls, server rendered styling with styled JSX, and more. You can use the official guide to get started. Next.js is fast out of the box so you don’t have to worry about performance while setting up a project. Lastly, most use-cases you can think of have already been made as an example. You can clone the official repository and peruse the examples.


© 2024 Pusher Ltd. All rights reserved.
Pusher Limited is a company registered in England and Wales (No. 07489873) whose registered office is at MessageBird UK Limited, 3 More London Riverside, 4th Floor, London, United Kingdom, SE1 2AQ.