- Products

- Developers
- User stories
- Blog
- Pricing

Build a fullstack GraphQL app with Prisma, Apollo and Vue
In this tutorial, I will be showing you how to build a full stack GraphQL app using what I call the PAV stack (Prisma, Apollo, Vue).
Introduction
In this tutorial, I will be showing you how to build a full stack GraphQL app using what I call the PAV stack (Prisma, Apollo, Vue).
Prerequisites
This tutorial assumes the following:
- Node.js and NPM installed on your computer
- The Vue CLI installed on your computer
- Basic knowledge of GraphQL
- Basic knowledge of JavaScript and Vue.js
What we’ll be building
We’ll be building techies, which is a minimalistic meetup clone. Users will be able to post tech meetups and indicate interest in attending meetups. A demo of the app is shown below:
What is Prisma?
Prisma is a real-time GraphQL database layer that turns your database into a GraphQL API, which you can either use to build your own GraphQL server or connect to it directly from the frontend. The Prisma GraphQL API provides powerful abstractions and building blocks to develop flexible, scalable GraphQL backends.
Below are some of the reasons to use Prisma:
- Type-safe API that can be used from frontend and backend, including filters, aggregations, and transactions.
- Data modeling with declarative SDL (Schema Definition Language). Prisma migrates your underlying database automatically.
- Blazing fast queries using Prisma’s query engine
- Real-time API using GraphQL Subscriptions.
- Advanced API composition using GraphQL Bindings and schema stitching.
- Works with all frontend frameworks like React, Vue.js, Angular.
With Prisma introduced, we can start building our app. This tutorial will be divided into two sections: building the server with Prisma and building the frontend with Apollo client and Vue. We’ll start with building the server.
Building the server
We need to install the Prisma CLI, which we’ll use to create our server. Run the command below to install the CLI:
1$ npm install -g prisma
Because Prisma uses graphql-cli under the hood to create the server, we need to also install the graphql-cli:
1$ npm install -g graphql-cli
With both of them installed, let’s create a new directory called techies and change to the directory:
1// create new directory 2 $ mkdir techies 3 // change to directory 4 $ cd techies
Now, let’s create our server using the Prisma CLI:
1$ prisma init server
Select GraphQL server/full-stack boilerplate (recommended) from the prompt, then select the node-advanced GraphQL server boilerplate as the foundation for our server. When prompted to choose the cluster you want to deploy to, select one of the public cluster (prisma-eu1 or prisma-us1). This will deploy our server and output the GraphQL database endpoints like below:
1HTTP: https://eu1.prisma.sh/public-sprinklebow-263/server/dev 2 WS: wss://eu1.prisma.sh/public-sprinklebow-263/server/dev
We are only concerned with the HTTP endpoint, as we won’t be covering GraphQL subscriptions in this tutorial.
We should now have a GraphQL server in a server directory with two type definitions (Post and User) which can be found in server/database/datamodel.graphql. The server/database/datamodel.graphql file contains the data model that we define for our server written in SDL. We also have authentication already configured because we chose the node-advanced GraphQL server boilerplate.
Defining the app schema
Now, let’s define the types our app will have. Update server/database/datamodel.graphql as below:
1# server/database/datamodel.graphql 2 3 type Meetup { 4 id: ID! @unique 5 organizer: User! @relation(name: "UserEvents") 6 title: String! 7 description: String! 8 location: String! 9 date: DateTime! 10 attendees: [User!]! @relation(name: "EventAttendees") 11 } 12 type User { 13 id: ID! @unique 14 email: String! @unique 15 password: String! 16 name: String! 17 myMeetups: [Meetup!]! @relation(name: "UserEvents") 18 meetupsAttending: [Meetup!]! @relation(name: "EventAttendees") 19 }
We define a new type called Meetup with some fields, then we update the User type to contain additional fields. We also define some relationships between the two types. A user can create many meetups, and a meetup can only be organized by a user. Hence the organizer and myMeetups fields on Meetup and User respectively. In the same vein, a meetup can have any number of attendees, and a user can attend any number of meetups. Hence the attendees and meetupsAttending fields on Meetup and User respectively.
While the server/database/datamodel.graphql file contains the data model that we define for our server, the server/src/schema.graphql file defines our application schema. It contains the GraphQL API that we want to expose to our frontend applications. So we need to update the server/src/schema.graphql as well:
1# server/src/schema.graphql 2 3 # The line below MUST be included 4 # import Meetup from "./generated/prisma.graphql" 5 6 type Query { 7 meetups: [Meetup!]! 8 meetup(id: ID!): Meetup! 9 me: User! 10 } 11 12 type Mutation { 13 signup(email: String!, password: String!, name: String!): AuthPayload! 14 login(email: String!, password: String!): AuthPayload! 15 createMeetup(title: String!, description: String!, date: DateTime!, location: String!): Meetup! 16 attending(id: ID!): Meetup! 17 notAttending(id: ID!): Meetup! 18 } 19 20 type AuthPayload { 21 token: String! 22 user: User! 23 } 24 25 type User { 26 id: ID! 27 email: String! 28 name: String! 29 myMeetups: [Meetup!]! 30 meetupsAttending: [Meetup!]! 31 }
NOTE: It is important to include
# import Meetup from "./generated/prisma.graphql"at the top of the file.
Here, we define the queries we want to be performed on the server. These queries include: fetching all meetups, fetching a single meetup by its ID and fetching the authenticated user. Also, we define mutations for user sign up and log in, creating a new meetup, attending and not attending a meetup. Then we define the AuthPayload type, which contains token and user fields. Lastly, we define the User type.
Next, let’s deploy our Prisma database service:
1$ cd server 2 $ prisma deploy
This will update the Prisma GraphQL API (server/src/generated/prisma.graphql) that was generated initially to reflect the changes we made above.
Defining resolvers
Resolvers are defined inside the resolvers directory. Open server/src/resolvers/Query.js and update as below:
1// server/src/resolvers/Query.js 2 3 const { getUserId } = require('../utils') 4 5 const Query = { 6 meetups (parent, args, ctx, info) { 7 return ctx.db.query.meetups({ orderBy: 'date_DESC' }, info) 8 }, 9 meetup (parent, { id }, ctx, info) { 10 return ctx.db.query.meetup({ where: { id } }, info) 11 }, 12 me (parent, args, ctx, info) { 13 const id = getUserId(ctx) 14 return ctx.db.query.user({ where: { id } }, info) 15 } 16 } 17 18 module.exports = { Query }
Here, we define resolvers for the queries we defined earlier on. We fetch all meetups that have been created and order them by their dates in a descending order. Then we fetch a meetup matching the supplied meetup ID. Lastly, using a helper getUserId function, which expects an Authorization header containing the authentication token (JWT) for the user. Then using the user ID gotten from the function, we fetch the authenticated user.
Next, let’s define the resolvers for our mutations. Rename server/src/resolvers/Mutation/post.js to server/src/resolvers/Mutation/meetup.js and update it as below:
1// server/src/resolvers/Mutation/meetup.js 2 3 const { getUserId } = require('../../utils') 4 5 const meetup = { 6 async createMeetup ( 7 parent, 8 { title, description, date, location }, 9 ctx, 10 info 11 ) { 12 const userId = getUserId(ctx) 13 return ctx.db.mutation.createMeetup( 14 { 15 data: { 16 title, 17 description, 18 date, 19 location, 20 organizer: { 21 connect: { 22 id: userId 23 } 24 } 25 } 26 }, 27 info 28 ) 29 }, 30 async attending (parent, { id }, ctx, info) { 31 const userId = getUserId(ctx) 32 const meetupExists = await ctx.db.exists.Meetup({ 33 id 34 }) 35 if (!meetupExists) { 36 throw new Error('Sorry, meetup not found!') 37 } 38 return ctx.db.mutation.updateMeetup( 39 { 40 where: { 41 id 42 }, 43 data: { 44 attendees: { 45 connect: { 46 id: userId 47 } 48 } 49 } 50 }, 51 info 52 ) 53 }, 54 async notAttending (parent, { id }, ctx, info) { 55 console.log('here') 56 const userId = getUserId(ctx) 57 const meetupExists = await ctx.db.exists.Meetup({ 58 id 59 }) 60 if (!meetupExists) { 61 throw new Error('Sorry, meetup not found!') 62 } 63 return ctx.db.mutation.updateMeetup( 64 { 65 where: { 66 id 67 }, 68 data: { 69 attendees: { 70 disconnect: { 71 id: userId 72 } 73 } 74 } 75 }, 76 info 77 ) 78 } 79 } 80 81 module.exports = { meetup }
The createMeetup mutation accepts the details of creating a new meetup. Because of the relationship we defined between a meetup and a user, we can use a connect argument to associate or connect a meetup with an organizer (the authenticated user), we create a new meetup and return the newly created meetup. The attending mutation accepts the ID of a meetup, then we check if the meetup exists, and throw an error if it doesn’t exist. If it does exist, we simply update the particular meetup by adding the authenticated user as an attendee. Again, we make use of the connect argument made available due to the relationship we already defined. Lastly, the notAttending mutation is simply the inverse of the attending mutation. Here, we make use of the disconnect argument, which removes the authenticated user as an attendee of the meetup.
Finally, let’s update server/src/resolvers/index.js as below:
1// server/src/resolvers/index.js 2 3 const { Query } = require('./Query') 4 const { auth } = require('./Mutation/auth') 5 const { meetup } = require('./Mutation/meetup') 6 const { AuthPayload } = require('./AuthPayload') 7 8 module.exports = { 9 Query, 10 Mutation: { 11 ...auth, 12 ...meetup 13 }, 14 AuthPayload 15 }
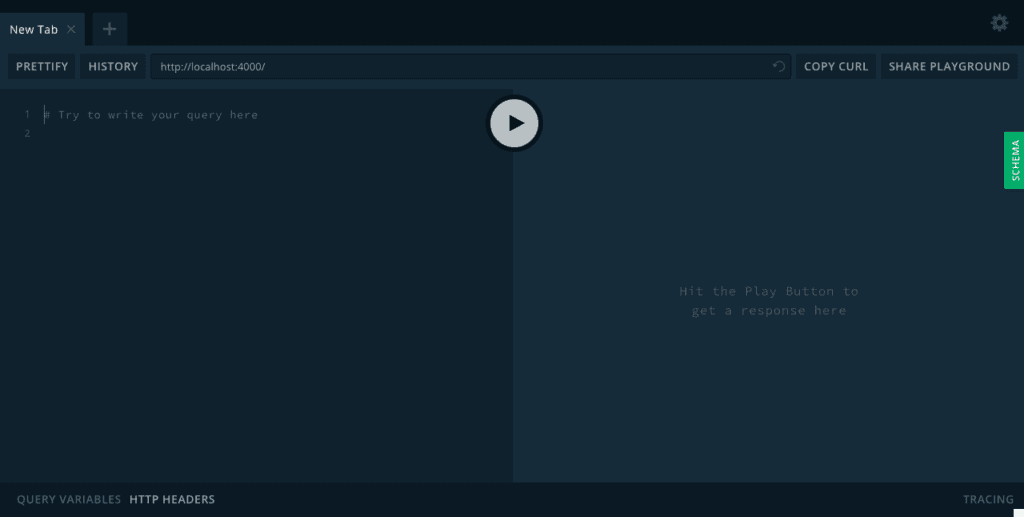
Now, we can start the server and open it in Playground:
1$ npm run dev
The server should be running on http://localhost:4000. We’ll leave the server running.
Building the frontend
Now, let’s start building the frontend. For this, we’ll make use of the Vue CLI. In a new terminal window or tab, change to the project root directory (that is, techies) and run the command below:
1$ cd .. 2 $ vue init webpack frontend
Select Y to use Vue router. This will create a new Vue app inside a frontend directory and install its dependencies.
Setting up Vue Apollo
Vue Apollo is an Apollo/GraphQL integration for Vue.js. We need to install it along with it necessary packages as well as the packages needed for our app:
1$ cd frontend 2 $ npm install vue-apollo graphql apollo-client apollo-link apollo-link-http apollo-link-context apollo-cache-inmemory graphql-tag vue-moment
While those are being installed, let’s quickly go over each package:
- vue-apollo: an Apollo/GraphQL integration for Vue.js.
- graphql: a reference implementation of GraphQL for JavaScript.
- apollo-client: a fully-featured, production-ready caching GraphQL client for every server or UI framework.
- apollo-link: a standard interface for modifying control flow of GraphQL requests and fetching GraphQL results.
- apollo-link-context: used to easily set a context on your operation, which is used by other links further down the chain.
- apollo-link-http: used to get GraphQL results over a network using HTTP fetch.
- apollo-cache-inmemory: cache implementation for Apollo Client 2.0.
- graphql-tag: a JavaScript template literal tag that parses GraphQL queries.
- vue-moment: handy Moment.js filters for your Vue.js project.
Next, let’s set up the Vue Apollo plugin. Open src/main.js and update it as below:
1// src/main.js 2 3 import Vue from 'vue' 4 import { ApolloClient } from 'apollo-client' 5 import { HttpLink } from 'apollo-link-http' 6 import { setContext } from 'apollo-link-context' 7 import { InMemoryCache } from 'apollo-cache-inmemory' 8 import VueApollo from 'vue-apollo' 9 import App from './App' 10 import router from './router' 11 12 Vue.config.productionTip = false 13 14 // install the vue-momnet plugin 15 Vue.use(require('vue-moment')) 16 17 const httpLink = new HttpLink({ uri: 'http://localhost:4000/' }) 18 19 const httpLinkAuth = setContext((_, { headers }) => { 20 // get the authentication token from localstorage if it exists 21 const token = localStorage.getItem('USER_TOKEN') 22 23 // return the headers to the context so httpLink can read them 24 return { 25 headers: { 26 ...headers, 27 Authorization: token ? `Bearer ${token}` : '' 28 } 29 } 30 }) 31 32 // create the apollo client 33 const apolloClient = new ApolloClient({ 34 link: httpLinkAuth.concat(httpLink), 35 cache: new InMemoryCache() 36 }) 37 38 // install the vue plugin 39 Vue.use(VueApollo) 40 41 const apolloProvider = new VueApollo({ 42 defaultClient: apolloClient 43 }) 44 45 /* eslint-disable no-new */ 46 new Vue({ 47 el: '#app', 48 router, 49 provide: apolloProvider.provide(), 50 components: { App }, 51 template: '<App/>' 52 })
Here, we create a new instance of httpLink with the URL ( http://localhost:4000/) of our GraphQL server. Then we make use of the setContext object to create an httpLinkAuth that gets the user token from local storage and return the headers, which contain the Authorization header. Next, we create an Apollo client using the httpLink and httpLinkAuth created above and specify we want an in-memory cache. Then we install the Vue Apollo plugin, and we create a new instance of the Vue Apollo plugin using the apolloClient created as our default client. Lastly, we make use of the apolloProvider object by adding it in our Vue instance, the same way we would use Vue router.
You will notice we also install the vue-moment plugin.
Adding Semantic UI
Since this tutorial is not about designs, we’ll be using Semantic UI to quickly prototype of the app. Open index.html and update as below:
1// index.html 2 3 <!DOCTYPE html> 4 <html> 5 <head> 6 <meta charset="utf-8"> 7 <meta name="viewport" content="width=device-width,initial-scale=1.0"> 8 <title>Techies - A tech meetup</title> 9 <link rel="stylesheet" href="https://cdnjs.cloudflare.com/ajax/libs/semantic-ui/2.3.1/semantic.min.css"> 10 </head> 11 <body> 12 <div id="app"></div> 13 <!-- built files will be auto injected --> 14 </body> 15 </html>
We pull Semantic UI in from a CDN. Now, we can start using Semantic UI in our app. Open src/App.vue and update as below:
1// src/App.vue 2 3 <template> 4 <div id="app"> 5 <nav class="ui borderless menu"> 6 <div class="ui container"> 7 <div class="header item"> 8 <h1> 9 <router-link class="navbar-item" to="/">Techies</router-link> 10 </h1> 11 </div> 12 <div class="right menu"> 13 <router-link class="ui item" to="/create">Create a Meetup</router-link> 14 </div> 15 </div> 16 </nav> 17 <div style="padding-top: 30px; padding-bottom: 30px;"> 18 <router-view/> 19 </div> 20 </div> 21 </template> 22 23 <script> 24 export default { 25 name: 'App' 26 } 27 </script> 28 29 <style> 30 body { 31 background-color: #f9f9f9; 32 } 33 </style>
We define a navbar containing the app title and a link to create a new meetup. Also, we set the background color for our app.
User sign up
We’ll create a SignUp component that will handle user sign up. Within the src/components directory, rename HelloWorld.vue to SignUp.vue and update it content as below:
1// src/components/SignUp.vue 2 3 <template> 4 <div class="ui stackable three column centered grid container"> 5 <div class="column"> 6 <h3 class="ui horizontal divider header">Sign Up</h3> 7 <form class="ui form" method="POST" @submit.prevent="signup"> 8 <div class="field"> 9 <label>Name</label> 10 <input type="text" v-model="name" required> 11 </div> 12 <div class="field"> 13 <label>Email address</label> 14 <input type="email" v-model="email" required> 15 </div> 16 <div class="field"> 17 <label>Password</label> 18 <input type="password" v-model="password" required> 19 </div> 20 <button class="fluid ui primary button">Sign Up</button> 21 </form> 22 <div class="ui divider"></div> 23 <div class="ui column grid"> 24 <div class="center aligned column"> 25 Already got an account? <router-link to="/login">Log In</router-link> 26 </div> 27 </div> 28 </div> 29 </div> 30 </template> 31 32 <script> 33 import { SIGNUP_MUTATION } from '@/graphql/mutations' 34 35 export default { 36 name: 'SignUp', 37 data () { 38 return { 39 name: '', 40 email: '', 41 password: '' 42 } 43 }, 44 methods: { 45 signup () { 46 this.$apollo 47 .mutate({ 48 mutation: SIGNUP_MUTATION, 49 variables: { 50 name: this.name, 51 email: this.email, 52 password: this.password 53 } 54 }) 55 .then(response => { 56 localStorage.setItem('USER_TOKEN', response.data.signup.token) 57 // redirect to login page 58 this.$router.replace('/') 59 }) 60 .catch(error => console.error(error)) 61 } 62 } 63 } 64 </script>
This renders a simple form that collect basic details about a user and upon submission a signup method is called. Within the signup method, we make use of a mutate method available on this.$apollo (from the Vue Apollo plugin). We use the SIGNUP_MUTATION mutation (which we’ll create shortly) and pass along the necessary variables. Once the signup process is successful, which means a user has been created, we save the user token to localstorage and redirect the user to the homepage. If there was an error, we catch and log the error to the console.
Next, let’s create the SIGNUP_MUTATION mutation. Create a new folder called graphql within the src directory. Then within the newly created folder, create a new mutations.js file and paste the code below in it:
1// src/graphql/mutations.js 2 3 import gql from 'graphql-tag' 4 5 export const SIGNUP_MUTATION = gql` 6 mutation SignupMutation($email: String!, $password: String!, $name: String!) { 7 signup(email: $email, password: $password, name: $name) { 8 token 9 } 10 } 11 `
This is the GraphQL mutation that will handle creating new users on our GraphQL server. It takes the username, email, and password of a user. These variables will be passed from the SignUp component.
To wrap up user sign up, let’s add it the /signup route. Open src/router/index.js and update it as below:
1// src/router/index.js 2 3 import Vue from 'vue' 4 import Router from 'vue-router' 5 import SignUp from '@/components/SignUp' 6 7 Vue.use(Router) 8 9 export default new Router({ 10 mode: 'history', 11 linkActiveClass: 'active', 12 routes: [ 13 { 14 path: '/signup', 15 name: 'SignUp', 16 component: SignUp 17 } 18 ] 19 })
In addition to defining the signup route, we also set the router mode to history (which will get rid of the hash in the URL) and set the linkActiveClass property.
User log in
Let’s add the ability for users to log in. Within src/components, create a new LogIn.vue file and paste the code below in it:
1// src/components/LogIn.vue 2 3 <template> 4 <div class="ui stackable three column centered grid container"> 5 <div class="column"> 6 <h3 class="ui horizontal divider header">Log In</h3> 7 <form class="ui form" method="POST" @submit.prevent="login"> 8 <div class="field"> 9 <label>Email address</label> 10 <input type="email" v-model="email" required> 11 </div> 12 <div class="field"> 13 <label>Password</label> 14 <input type="password" v-model="password" required> 15 </div> 16 <button class="fluid ui primary button">Log In</button> 17 </form> 18 <div class="ui divider"></div> 19 <div class="ui column grid"> 20 <div class="center aligned column"> 21 Don't have an account? <router-link to="/signup">Sign Up</router-link> 22 </div> 23 </div> 24 </div> 25 </div> 26 </template> 27 28 <script> 29 import { LOGIN_MUTATION } from '@/graphql/mutations' 30 31 export default { 32 name: 'LogIn', 33 data () { 34 return { 35 email: '', 36 password: '' 37 } 38 }, 39 methods: { 40 login () { 41 this.$apollo 42 .mutate({ 43 mutation: LOGIN_MUTATION, 44 variables: { 45 email: this.email, 46 password: this.password 47 } 48 }) 49 .then(response => { 50 localStorage.setItem('USER_TOKEN', response.data.login.token) 51 52 this.$router.replace('/') 53 }) 54 .catch(error => console.error(error)) 55 } 56 } 57 } 58 </script>
This is similar to what we did with user sign up. It renders a form that accepts the user email and password, and upon submission, a login method is called. We use the LOGIN_MUTATION mutation. Once the login process is successful, we save the user token gotten from our GraphQL server to localstorage and redirect the user.
Next, let’s create the LOGIN_MUTATION mutation. Paste the code below inside src/graphql/mutations.js:
1// src/graphql/mutations.js 2 3 export const LOGIN_MUTATION = gql` 4 mutation LoginMutation($email: String!, $password: String!) { 5 login(email: $email, password: $password) { 6 token 7 } 8 } 9 `
Lastly, let’s add the /login route. Add the code below to src/router/index.js:
1// src/router/index.js 2 3 import LogIn from '@/components/LogIn' 4 5 // add these inside the `routes` array 6 { 7 path: '/login', 8 name: 'LogIn', 9 component: LogIn 10 },
Creating a menu component
This menu will serve as navigation for our app and it will be used across multiple pages. So let’s create a dedicate component for it. Within src/components, create a new Menu.vue file and paste the code below in it:
1// src/components/Menu.vue 2 3 <template> 4 <div class="ui vertical menu"> 5 <router-link class="item" exact to="/">All Meetups</router-link> 6 <template v-if="isAuthenticated"> 7 <router-link class="item" exact to="/my-meetups">My Meetups</router-link> 8 <router-link class="item" exact to="/meetups-going">I'm going</router-link> 9 <a class="ui item" @click="logout">Logout</a> 10 </template> 11 </div> 12 </template> 13 14 <script> 15 export default { 16 name: 'Menu', 17 data () { 18 return { 19 isAuthenticated: !!localStorage.getItem('USER_TOKEN') 20 } 21 }, 22 methods: { 23 logout () { 24 localStorage.removeItem('USER_TOKEN') 25 this.$router.replace('/login') 26 } 27 } 28 } 29 </script>
This renders some links depending on whether a user is logged in or not. If logged in, the user will be shown additional links to see meetups the user has created and meetups the user is attending and a link to log out. To determine whether a user is logged in or not, we define a isAuthenticated data, which either returns true or false depending on if there is a USER_TOKEN in localstorage. Lastly, we define a logout method, which simply removes the user token from localstorage and redirect the user to the login page.
Displaying all meetups
On the app homepage, we’ll display all meetups that have been created. For this, we’ll create a new MeetupList component. But before we do just that, let’s create a Meetup component and paste the code below in it:
1// src/components/Meetup.vue 2 3 <template> 4 <div class="ui divided items"> 5 <div 6 class="item" 7 v-for="(meetup, index) in meetups" 8 :key="index" 9 > 10 <div class="content"> 11 <router-link class="header" :to="`${meetup.id}`"> 12 {{ meetup.title }} 13 </router-link> 14 <div class="meta" v-if="meetup.organizer"> 15 Organized by <strong>{{ meetup.organizer.name }}</strong> 16 </div> 17 <div class="description"> 18 <span> 19 <i class="calendar icon"></i> {{ meetup.date | moment("dddd, MMMM Do YYYY, hA") }} 20 </span> 21 <span> 22 <i class="map marker alternate icon"></i> {{ meetup.location }} 23 </span> 24 </div> 25 <div class="extra"> 26 <i class="thumbs up icon"></i> {{ (meetup.attendees && meetup.attendees.length <= 1) 27 ? `${meetup.attendees.length} attendee going` 28 : `${meetup.attendees.length} attendees going` }} 29 </div> 30 </div> 31 </div> 32 </div> 33 </template> 34 35 <script> 36 export default { 37 name: 'Meetup', 38 props: ['meetups'] 39 } 40 </script>
This component will represent a singular meetup on a list of meetups. It accepts an array of meetups as props. So we loop through the array of meetups and display each of them in a list with an anchor to viewing them individually. If there is an organizer object on the meetup, we display the meetup organizer. We use the vue-moment plugin we installed earlier to format the meetup date. Lastly, the number of people attending an individual meetup.
Back to displaying all meetups, let’s put the Meetup component to use. Create a new MeetupList component and paste the code below in it:
1// src/components/MeetupList.vue 2 3 <template> 4 <div class="ui stackable relaxed grid container"> 5 <div class="twelve wide column"> 6 <h2 class="ui header">All Meetups</h2> 7 <div class="ui segment"> 8 <div v-if="$apollo.loading">Loading...</div> 9 <Meetup :meetups="meetups"/> 10 </div> 11 </div> 12 <div class="four wide column"> 13 <Menu/> 14 </div> 15 </div> 16 </template> 17 18 <script> 19 import { MEETUPS_QUERY } from '@/graphql/queries' 20 import Menu from '@/components/Menu' 21 import Meetup from '@/components/Meetup' 22 23 export default { 24 name: 'MeetupList', 25 components: { Menu, Meetup }, 26 data () { 27 return { 28 meetups: [] 29 } 30 }, 31 apollo: { 32 meetups: { 33 query: MEETUPS_QUERY 34 } 35 } 36 } 37 </script>
In addition to the Meetup component, this meetup also makes use of the Menu component. We define a meetups data, which will be populated once the data is gotten from our GraphQL server. Then within the apollo object, we define the GraphQL query to fetch all meetups. This makes use of the MEETUPS_QUERY query. Once meetups is populated with data from our GraphQL server, we pass it as props to the Meetup component. You’ll also notice, we have a loader (in this case, just a text), which will be displayed while data is being fetched from the server.
NOTE: The name of our data (
meetupsin this case) must be the same name used in our GraphQL query (meetupsin this case) as defined on the GraphQL server.
Next, let’s create the MEETUPS_QUERY query. Within the src/graphql directory, create a new queries.js file and paste the code below in it:
1// src/graphql/queries.js 2 3 import gql from 'graphql-tag' 4 5 export const MEETUPS_QUERY = gql` 6 query MeetupsQuery { 7 meetups { 8 id 9 title 10 date 11 location 12 organizer { 13 name 14 } 15 attendees { 16 id 17 } 18 } 19 } 20 `
This GraphQL query fetches all the meetups that have been created on our GraphQL server.
Lastly, let’s add the / (home) route. Add the code below to src/router/index.js:
1// src/router/index.js 2 3 import MeetupList from '@/components/MeetupList' 4 5 // add these inside the `routes` array 6 { 7 path: '/', 8 name: 'MeetupList', 9 component: MeetupList 10 },
Creating a new meetup
Users should be able to create meetups. Within src/components, create a new NewMeetup.vue file and paste the code below in it:
1// src/components/NewMeetup.vue 2 3 <template> 4 <div class="ui stackable two column centered grid container"> 5 <div class="column"> 6 <h3 class="ui horizontal divider header">Create Meetup</h3> 7 <form class="ui form" method="POST" @submit.prevent="createMeetup"> 8 <div class="field"> 9 <label>Title</label> 10 <input type="text" v-model="title" required> 11 </div> 12 <div class="field"> 13 <label>Location</label> 14 <input type="text" v-model="location" required> 15 </div> 16 <div class="field"> 17 <label>Date</label> 18 <input type="datetime-local" v-model="date" required> 19 </div> 20 <div class="field"> 21 <label>Description</label> 22 <textarea v-model="description" rows="10"></textarea> 23 </div> 24 <button class="ui primary button">Create Meetup</button> 25 </form> 26 </div> 27 </div> 28 </template> 29 30 <script> 31 import { CREATE_MEETUP_MUTATION } from '@/graphql/mutations' 32 import { MEETUPS_QUERY } from '@/graphql/queries' 33 34 export default { 35 name: 'NewMeetup', 36 data () { 37 return { 38 title: '', 39 description: '', 40 date: '', 41 location: '' 42 } 43 }, 44 methods: { 45 createMeetup () { 46 this.$apollo 47 .mutate({ 48 mutation: CREATE_MEETUP_MUTATION, 49 variables: { 50 title: this.title, 51 location: this.location, 52 date: this.date, 53 description: this.description 54 }, 55 update: (store, { data: { createMeetup } }) => { 56 // read data from cache for this query 57 const data = store.readQuery({ query: MEETUPS_QUERY }) 58 // add the new meetup from this mutation to existing meetups 59 data.meetups.push(createMeetup) 60 // write data back to the cache 61 store.writeQuery({ query: MEETUPS_QUERY, data }) 62 } 63 }) 64 .then(response => { 65 // redirect to home 66 this.$router.replace('/') 67 }) 68 .catch(error => console.error(error)) 69 } 70 } 71 } 72 </script>
This component renders a form for adding a new meetup. Once the form is submitted, the createMeetup method will be called. It uses the CREATE_MEETUP_MUTATION mutation passing to it the necessary variables. Because of Apollo client caches (in memory in our case) its queries, we need a way to update the cache whenever we perform mutations. Hence the need for the update function, which we use to update the store by adding the newly added meetup to the cache. First, we fetch the data from the cache matching our query (MEETUPS_QUERY), then we add the new meetup to the meetups array. Lastly, we write the new data back to the cache. Once the meetup is added successfully, we redirect the user to the homepage.
Next, let’s create the CREATE_MEETUP_MUTATION mutation. Paste the code below inside src/graphql/mutations.js:
1// src/graphql/mutations.js 2 3 export const CREATE_MEETUP_MUTATION = gql` 4 mutation CreateMeetupMutation( 5 $title: String! 6 $location: String! 7 $date: DateTime! 8 $description: String! 9 ) { 10 createMeetup( 11 title: $title 12 location: $location 13 date: $date 14 description: $description 15 ) { 16 id 17 title 18 date 19 location 20 organizer { 21 name 22 } 23 attendees { 24 id 25 } 26 } 27 } 28 `
Recall from our server implementation, the only authenticated user can create a new meetup. So we need a way to implement this on the frontend. Open src/main.js and add the code below to it:
1// src/main.js 2 3 router.beforeEach((to, from, next) => { 4 if (to.matched.some(record => record.meta.requiresAuth)) { 5 localStorage.getItem('USER_TOKEN') ? next() : next('/login') 6 } else { 7 next() 8 } 9 })
This checks if any of our routes have a meta object with requiresAuth set to true. If found, we check if there is a USER_TOKEN in localstorage, if not found we redirect the user to the login page. Otherwise, we allow the user to continue as intended.
Lastly, let’s add the /create route. Add the code below to src/router/index.js:
1// src/router/index.js 2 3 import NewMeetup from '@/components/NewMeetup' 4 5 // add these inside the `routes` array 6 { 7 path: '/create', 8 name: 'NewMeetup', 9 component: NewMeetup, 10 meta: { requiresAuth: true } 11 },
Here, we add the meta object with requiresAuth set to true to the route.
Displaying user meetups
Now, let’s allow users to view the meetups they created. Create a new MyMeetups component and paste the code below in it:
1// src/components/MyMeetups.vue 2 3 <template> 4 <div class="ui stackable relaxed grid container"> 5 <div class="twelve wide column"> 6 <h2 class="ui header">My Meetups</h2> 7 <div class="ui segment"> 8 <div v-if="$apollo.loading">Loading...</div> 9 <Meetup :meetups="me.myMeetups"/> 10 </div> 11 </div> 12 <div class="four wide column"> 13 <Menu/> 14 </div> 15 </div> 16 </template> 17 18 <script> 19 import { ME_QUERY } from '@/graphql/queries' 20 import Menu from '@/components/Menu' 21 import Meetup from '@/components/Meetup' 22 23 export default { 24 name: 'MyMeetups', 25 components: { Menu, Meetup }, 26 data () { 27 return { 28 me: [] 29 } 30 }, 31 apollo: { 32 me: { 33 query: ME_QUERY 34 } 35 } 36 } 37 </script>
This is pretty straightforward as it is similar to the MeetupList component. But instead uses the ME_QUERY query, which is used to fetch the details of the authenticated user. Then we pass the user meetups to the Meetup component using me.myMeetups.
Next, let’s create the ME_QUERY query. Paste the code below inside src/graphql/queries.js:
1// src/graphql/queries.js 2 3 export const ME_QUERY = gql` 4 query MeQuery { 5 me { 6 id 7 name 8 myMeetups { 9 id 10 title 11 date 12 location 13 attendees { 14 id 15 } 16 } 17 meetupsAttending { 18 id 19 title 20 date 21 location 22 organizer { 23 name 24 } 25 attendees { 26 id 27 } 28 } 29 } 30 } 31 `
This GraphQL query is used to fetch the details of the authenticated user along with the meetups the user has created and the meetup the user is attending.
Lastly, let’s add the /my-meetups route. Add the code below to src/router/index.js:
1// src/router/index.js 2 3 import MyMeetups from '@/components/MyMeetups' 4 5 // add these inside the `routes` array 6 { 7 path: '/my-meetups', 8 name: 'MyMeetups', 9 component: MyMeetups 10 },
Displaying attending meetups
For viewing meetups that a user is attending, let’s create a new MeetupsAttending component and paste the code below in it:
1// src/components/MeetupsAttending.vue 2 3 <template> 4 <div class="ui stackable relaxed grid container"> 5 <div class="twelve wide column"> 6 <h2 class="ui header">Meetups I'm Going</h2> 7 <div class="ui segment"> 8 <div v-if="$apollo.loading">Loading...</div> 9 <Meetup :meetups="me.meetupsAttending"/> 10 </div> 11 </div> 12 <div class="four wide column"> 13 <Menu/> 14 </div> 15 </div> 16 </template> 17 18 <script> 19 import { ME_QUERY } from '@/graphql/queries' 20 import Menu from '@/components/Menu' 21 import Meetup from '@/components/Meetup' 22 23 export default { 24 name: 'MeetupsAttending', 25 components: { Menu, Meetup }, 26 data () { 27 return { 28 me: [] 29 } 30 }, 31 apollo: { 32 me: { 33 query: ME_QUERY 34 } 35 } 36 } 37 </script>
This is similar to the MyMeetups component, but instead, we pass the meetups a user is attending to the Meetup component.
Next, let’s add the /meetups-going route. Add the code below to src/router/index.js:
1// src/router/index.js 2 3 import MeetupsAttending from '@/components/MeetupsAttending' 4 5 // add these inside the `routes` array 6 { 7 path: '/meetups-going', 8 name: 'MeetupsAttending', 9 component: MeetupsAttending 10 },
Displaying a single meetup
So far we have been able to see a list of meetups. Now, let’s allow viewing of a single meetup. Create a new SingleMeetup and paste the code below in it:
1// src/components/SingleMeetup.vue 2 3 <template> 4 <div class="ui stackable relaxed grid container"> 5 <div class="twelve wide column"> 6 <div class="ui segment"> 7 <h1 class="ui dividing header"> 8 {{ meetup.title }} 9 <div class="sub header">Organized by {{ meetup.organizer.name }}</div> 10 </h1> 11 <div class="description"> 12 <h3 class="ui header">Details</h3> 13 <p>{{ meetup.description }}</p> 14 <p> 15 <span> 16 <i class="calendar icon"></i> {{ meetup.date | moment("dddd, MMMM Do YYYY, hA") }} 17 </span> 18 <span> 19 <i class="map marker alternate icon"></i> {{ meetup.location }} 20 </span> 21 </p> 22 </div> 23 <template v-if="isAuthenticated"> 24 <h3 class="ui header">Are you going?</h3> 25 <button class="ui icon primary button" v-if="attending" @click="notAttendingMeetup" title="I'm not going"> 26 <i class="large thumbs down outline icon"></i> 27 </button> 28 <button class="ui icon button" v-else @click="attendingMeetup" title="I'm going"> 29 <i class="large thumbs up outline icon"></i> 30 </button> 31 </template> 32 <h3 class="ui header"> 33 Attendees {{ `(${meetup.attendees.length})` }} 34 </h3> 35 <div class="ui bulleted list"> 36 <div 37 class="item" 38 v-for="(attendee, index) in meetup.attendees" 39 :key="index" 40 >{{ attendee.name }}</div> 41 </div> 42 </div> 43 </div> 44 <div class="four wide column"> 45 <Menu/> 46 </div> 47 </div> 48 </template> 49 <script> 50 import { MEETUP_QUERY, ME_QUERY } from '@/graphql/queries' 51 import { 52 ATTENDING_MEETUP_MUTATION, 53 NOT_ATTENDING_MEETUP_MUTATION 54 } from '@/graphql/mutations' 55 import Menu from '@/components/Menu' 56 57 export default { 58 name: 'SingleMeetup', 59 components: { Menu }, 60 data () { 61 return { 62 meetup: {}, 63 me: {}, 64 isAuthenticated: !!localStorage.getItem('USER_TOKEN') 65 } 66 }, 67 computed: { 68 attending () { 69 return this.meetup.attendees.some(item => { 70 return item.id === this.me.id 71 }) 72 } 73 }, 74 apollo: { 75 meetup: { 76 query: MEETUP_QUERY, 77 variables () { 78 return { 79 id: this.$route.params.id 80 } 81 } 82 }, 83 me: { 84 query: ME_QUERY 85 } 86 }, 87 methods: { 88 attendingMeetup () { 89 this.$apollo 90 .mutate({ 91 mutation: ATTENDING_MEETUP_MUTATION, 92 variables: { 93 id: this.$route.params.id 94 } 95 }) 96 .then(response => { 97 this.meetup = response.data.attending 98 }) 99 .catch(error => console.error(error)) 100 }, 101 notAttendingMeetup () { 102 this.$apollo 103 .mutate({ 104 mutation: NOT_ATTENDING_MEETUP_MUTATION, 105 variables: { 106 id: this.$route.params.id 107 } 108 }) 109 .then(response => { 110 this.meetup = response.data.notAttending 111 }) 112 .catch(error => console.error(error)) 113 } 114 } 115 } 116 </script>
This component displays the details of a meetup along with it attendees. This makes use of the MEETUP_QUERY query, which accepts the ID of the meetup we want to view. The ID is gotten from the route params. We need a way to pass this ID to our query. To do this, we make use of reactive parameters by defining a variables function that returns an object containing the ID.
Also, we fetch the details of the authenticated user, which we use in the attending computed property to determine if a user has already indicated interest in attending the meetup or not. We then use the attending computed property to display the appropriate button. That is, if a user has already indicated interest, we display a button to cancel that, which calls a notAttendingMeetup method. Otherwise, we display a button to indicate the interest in attending by calling a attendingMeetup method. We make sure only authenticated users can see the buttons.
The attendingMeetup method makes use of the ATTENDING_MEETUP_MUTATION mutation, which simply adds the authenticated user to the meetups’ list of attendees. If the addition is successful, we update the meetup data with that gotten from this mutation.
The notAttendingMeetup method makes use of the NOT_ATTENDING_MEETUP_MUTATION mutation, which simply does the inverse of the attendingMeetup method.
Next, let’s create the MEETUP_QUERY query. Paste the code below inside src/graphql/queries.js:
1// src/graphql/queries.js 2 3 export const MEETUP_QUERY = gql` 4 query MeetupQuery($id: ID!) { 5 meetup(id: $id) { 6 id 7 title 8 description 9 date 10 location 11 organizer { 12 name 13 } 14 attendees { 15 id 16 name 17 } 18 } 19 } 20 `
This GraphQL query fetches a single meetup by it ID. It takes the ID of the meetup to be fetched as an argument.
Let’s also create ATTENDING_MEETUP_MUTATION and NOT_ATTENDING_MEETUP_MUTATION mutations. Paste the code below inside src/graphql/mutations.js:
1// src/graphql/mutations.js 2 3 export const ATTENDING_MEETUP_MUTATION = gql` 4 mutation AttendingMeetupMutation($id: ID!) { 5 attending(id: $id) { 6 id 7 title 8 description 9 date 10 location 11 organizer { 12 name 13 } 14 attendees { 15 id 16 name 17 } 18 } 19 } 20 ` 21 22 export const NOT_ATTENDING_MEETUP_MUTATION = gql` 23 mutation AttendingMeetupMutation($id: ID!) { 24 notAttending(id: $id) { 25 id 26 title 27 description 28 date 29 location 30 organizer { 31 name 32 } 33 attendees { 34 id 35 name 36 } 37 } 38 } 39 `
Lastly, let’s add the /meetups-going route. Add the code below to src/router/index.js:
1// src/router/index.js 2 3 import SingleMeetup from '@/components/SingleMeetup' 4 5 // add these inside the `routes` array 6 { 7 path: '/:id', 8 name: 'SingleMeetup', 9 component: SingleMeetup 10 },
NOTE: This route should be the last route in the routes.
Let’s see our app in action
It’s time to see our app in action. Make sure the server is still running or run the command below to start the server:
1$ cd server 2 $ npm run dev
Also, let’s get the frontend started as well:
1$ cd frontend 2 $ npm run dev
The frontend should be running on http://localhost:8080.
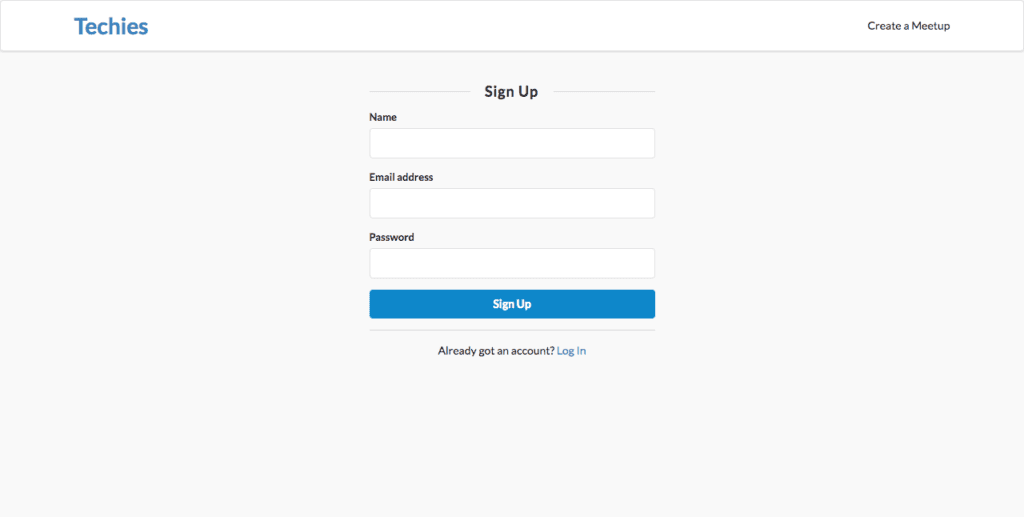
When we visit the /signup route, we should see the sign up form as in the image below:
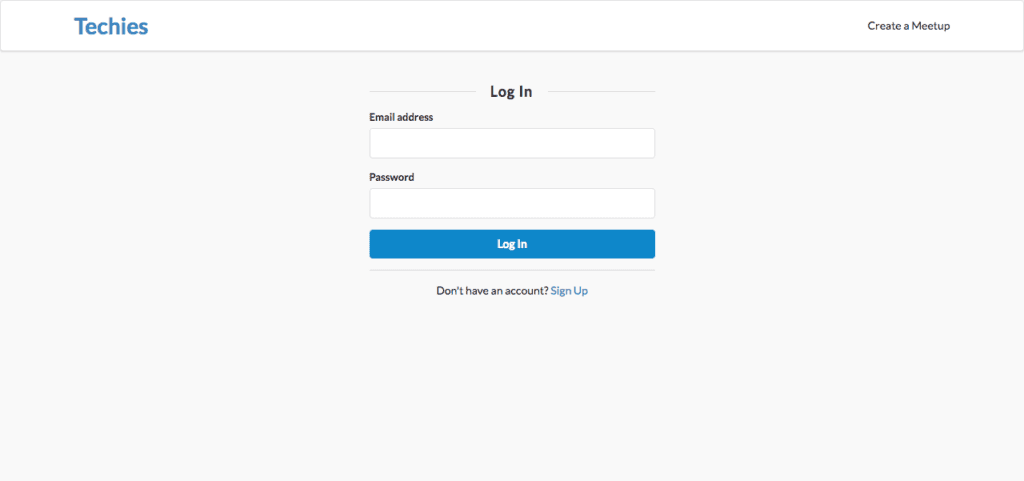
Similarly, when we visit the /login route, we should see the log in form as in the image below:
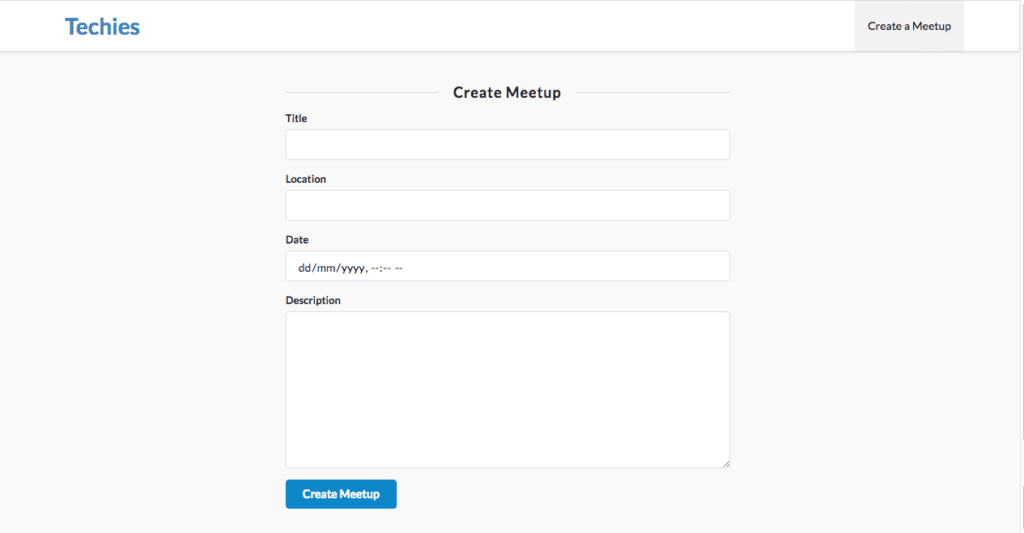
Clicking the Create a Meetup link without being logged in, will redirect us to the log in form. Once we are logged in, we should see the meetup creation form as below:
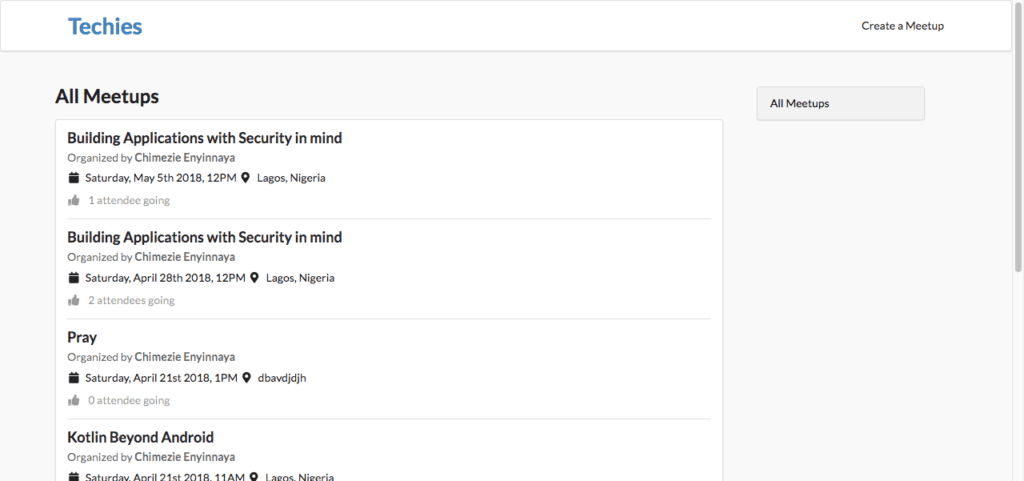
Having created some meetups, the homepage (/ route)_ should now contain all the meetups that have been created:
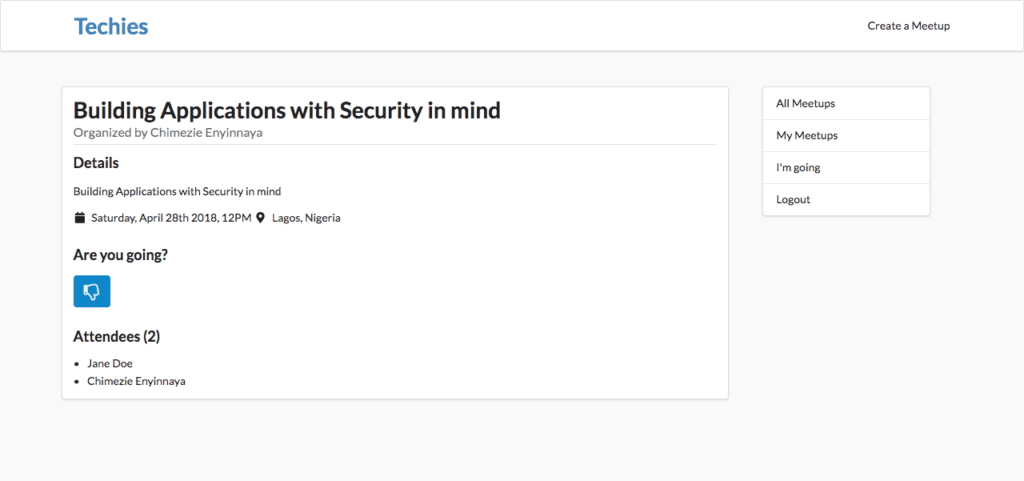
We can view a particular meetup by clicking on the title of the meetup from the meetups list:
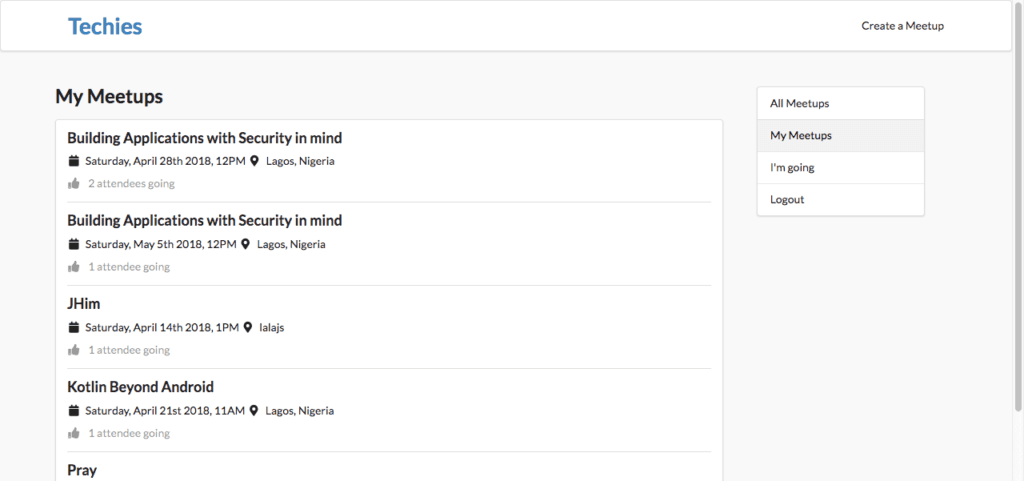
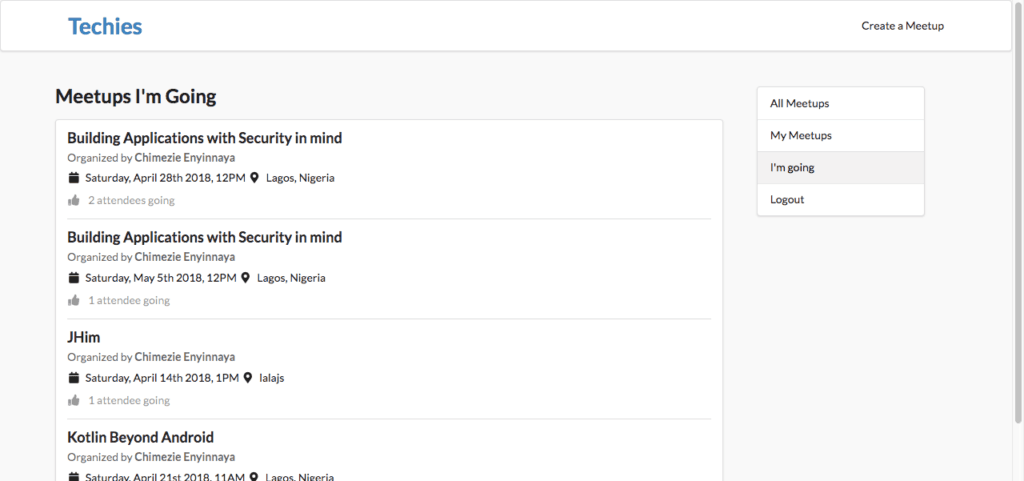
Also, logged in users will be able to view their meetups and the meetups they are attending.
Conclusion
In this tutorial, we looked at what Prisma is, and we also saw how to build a fullstack GraphQL app using Prisma, Apollo, and Vue. The complete code for this tutorial is available on GitHub. To learn more about Prisma, check out the Prisma docs.


© 2024 Pusher Ltd. All rights reserved.
Pusher Limited is a company registered in England and Wales (No. 07489873) whose registered office is at MessageBird UK Limited, 3 More London Riverside, 4th Floor, London, United Kingdom, SE1 2AQ.