- Products

- Developers
- User stories
- Blog
- Pricing

How to build a Facebook Messenger chatbot with Node.js and Dialogflow
Build a simple chatbot for Facebook messenger. Users will be able to message your Facebook page, and receive automated responses from the bot. Small talk is provided by Dialogflow. The app runs on a lightweight Node server.
Introduction
In this tutorial, I will describe how you can build a Facebook Messenger chatbot that incorporates NLP with Dialogflow and deploy it to Facebook. You can find the entire source code of the application on this GitHub repository.
Many chatbots leverage Natural Language Processing (NLP) to interpret the intent of a customer’s input, allowing the bot to give an accurate response. Implementing NLP in your bot can be pretty difficult, but there are several platforms that make it much easier.
Of these platforms, Dialogflow (formerly known as Api.ai) and Wit.ai are the most popular today. They both provide several NLP functions that parse user input and match them to the right response without any coding.
Prerequisites
Before you continue, you need to have Node.js and npm installed. No prior experience with building chatbots is necessary, but you need a basic understanding of JavaScript to be able to complete this tutorial
Set up your webhook server
The first step to creating a Messenger bot is to create a server that will be provided as a webhook when setting up the bot. The webhook provides the core of your chatbot experience as it is how your bot gets notified of the various interactions and events that happen, including when someone sends a message.
To get started, create a new directory for the bot we will build. Call it sample-bot or whatever you like. Inside the newly created directory, run the following command in the terminal to initialize the project with a package.json file.
1npm init
Fill out the necessary information in the prompt that follows, then create an src folder at the root of your project directory.
Next, we’ll setup Express as our web server and body-parser to parse incoming request bodies. We need to install them as dependencies first:
1npm install body-parser express
Once the installation is complete, create an index.js file in the src directory and paste in the following code to setup Express on port 5000. You can choose another port if 5000 is already in use on your machine.
1const express = require('express'); 2 const bodyParser = require('body-parser'); 3 4 const app = express(); 5 6 app.use(bodyParser.json()); 7 app.use(bodyParser.urlencoded({ extended: true })); 8 9 app.listen(5000, () => console.log('Express server is listening on port 5000'));
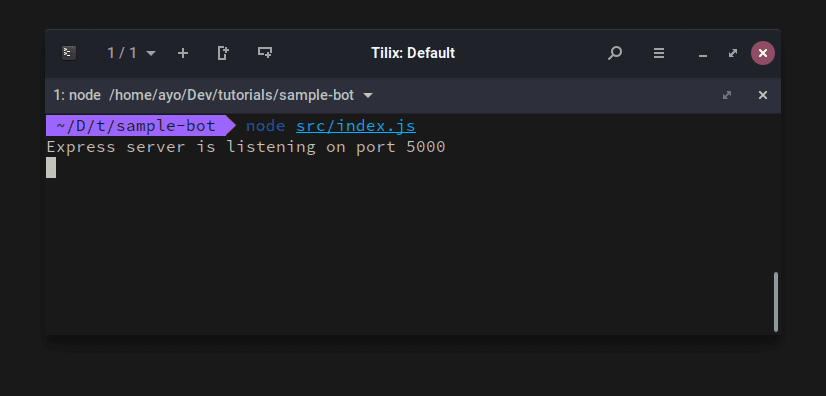
Save the file and run node src/index.js from the root of your project directory to start the server.
If your code is correct, and the dependencies are installed properly, you should see the following message printed out in your terminal.
Set up Facebook verification endpoint
When setting up a webhook for your chatbot, Facebook requires a verification step to ensure that the webhook is authentic and working before accepting the webhook. This is how it works:
- You will create a token which is simply a random string of your choosing and hardcode it to your webhook.
- You will provide this token when subscribing your webhook to receive events for your bot
- Facebook sends a
GETrequest to your webhook with the token you provided in the previous step in thehub.verifyparameter of the request. - Your webhook will verify that the token is correct and send the appropriate response back to Facebook.
- Finally, Messenger will subscribe the webhook to the bot.
Create a file called verify-webhook.js in the src directory and paste in the following code:
1const verifyWebhook = (req, res) => { 2 let VERIFY_TOKEN = 'pusher-bot'; 3 4 let mode = req.query['hub.mode']; 5 let token = req.query['hub.verify_token']; 6 let challenge = req.query['hub.challenge']; 7 8 if (mode && token === VERIFY_TOKEN) { 9 res.status(200).send(challenge); 10 } else { 11 res.sendStatus(403); 12 } 13 }; 14 15 module.exports = verifyWebhook;
Note that the token is set to pusher-bot in this example. You can set it to anything you like, but make sure to take note of it as you will need it later when setting up your app on Facebook Messenger.
Next, set up the endpoint that will receive events from the Facebook messenger. Add the following code to your index.js file:
1const verifyWebhook = require('./verify-webhook'); 2 3 app.get('/', verifyWebhook);
Now you need to stop your server with CTRL-C and restart it once again with node src/index.js.
Expose your server to the web
Your server is running on localhost which means that it’s only accessible on your machine. However, Facebook requires that your server must be web accessible. HTTPS support is also a hard requirement for every webhook server.
We can use ngrok to expose your localhost server to the world, which means anyone will be able to access it even though it’s running locally on your machine.
You can visit the ngrok website to find out how to install and setup ngrok on your computer.
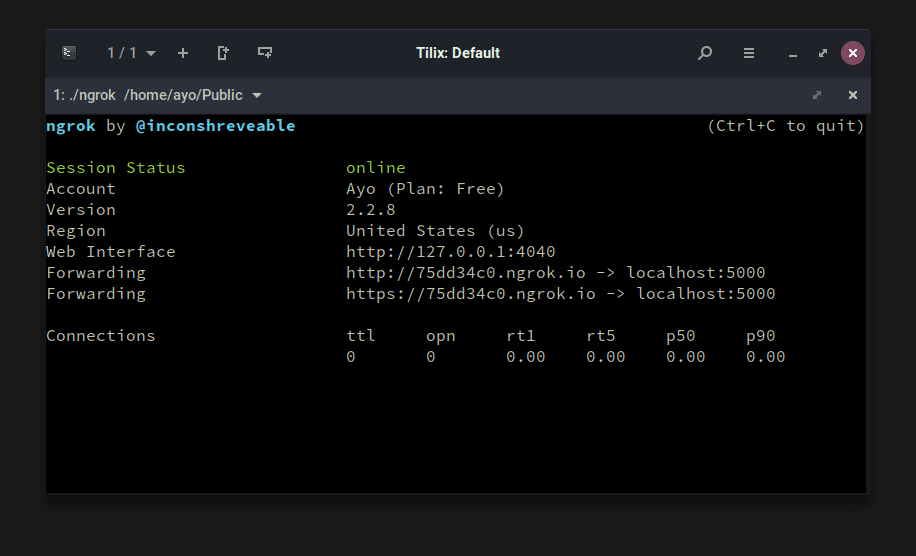
Once you have ngrok installed, start an HTTP tunnel on port 5000 by running the following command in a separate terminal session:
1./ngrok http 5000
If your webhook server is listening on another port, make sure to provide the correct port when starting the HTTP tunnel. You will be given a couple of URLs but you only need the last one which is HTTPS enabled.
Set up a Facebook application
To create a Messenger Chatbot, you need two things: a public Facebook Page and a Facebook application that is connected to your page.
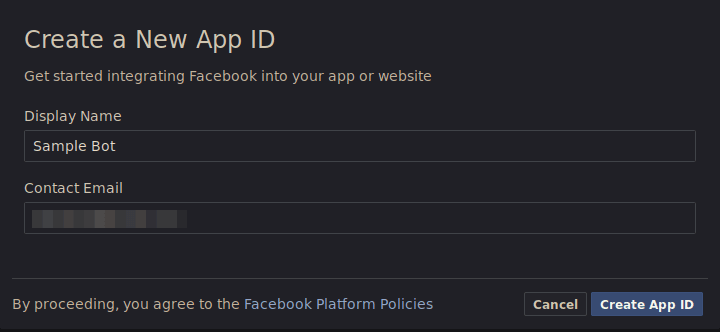
To create a page, go here and fill in the required fields. You can name your page anything you want. In this case, my page name is ‘Sample Bot’. Once you’ve created the page, go ahead and create an application for your bot here.
Once done, you should be redirected to the dashboard of the app you just created. Next, you need to add a product to your app. Scroll down the page a bit and find the Messenger option then click the Set Up button. This will redirect you to the Messenger Platform.
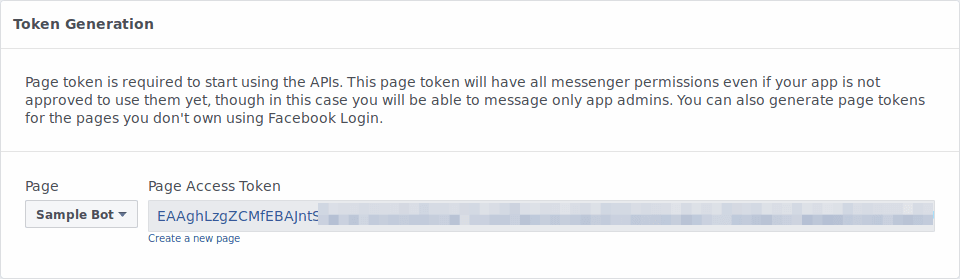
Once there, locate the “Token Generation” section and connect your app to a Facebook Page. This will generate a Page Access token that we will make use of later.
Next, head to the Webhooks section and click on Setup Webhooks. A popup window will appear with a form that you need to fill.
In the Callback URL field, add the URL that was provided by ngrok in the previous step (the HTTPS version). Add the token you created in verify-webhook.js in the verify token field (‘pusher-bot’ in my case) then select messages and messaging_postbacks under Subscription Fields.
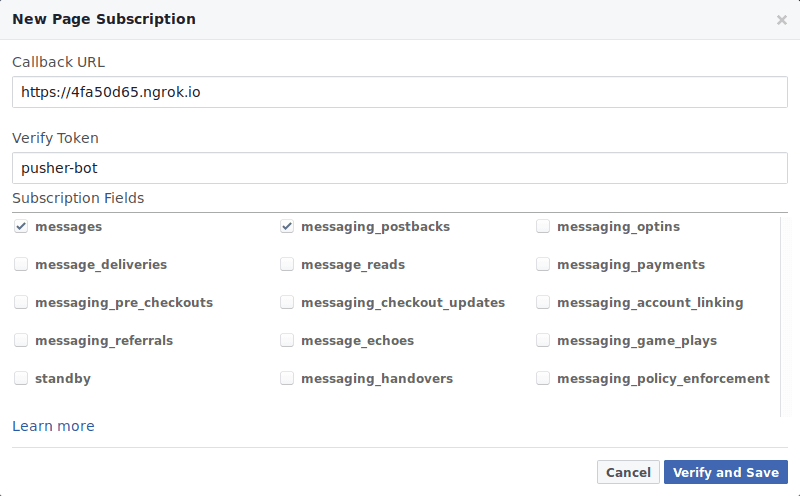
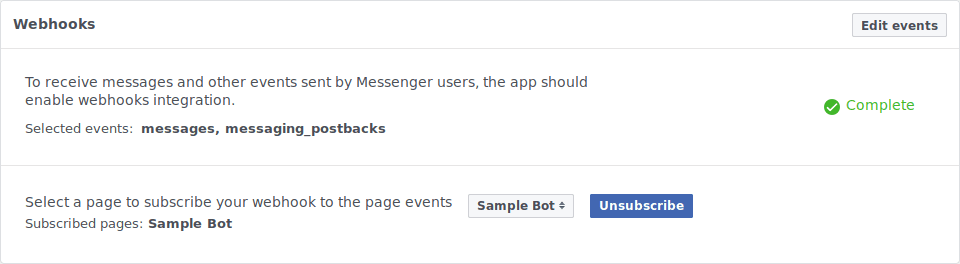
Hit Verify and Save. This will verify that the provided token matches the one in your code and save your webhook. Next, you need to subscribe your page to receive webhook events as shown below.
Set up Dialogflow integration
Head over to the Dialogflow website and sign up for a free account.
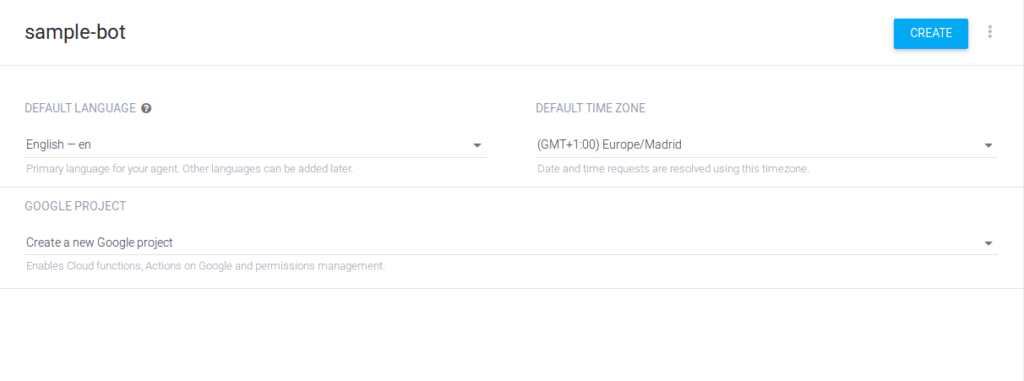
Click on the Create Agent button. Give your agent a name and fill in the remaining fields, then hit the C****REATE button. Dialogflow should redirect you to the main page of the agent.
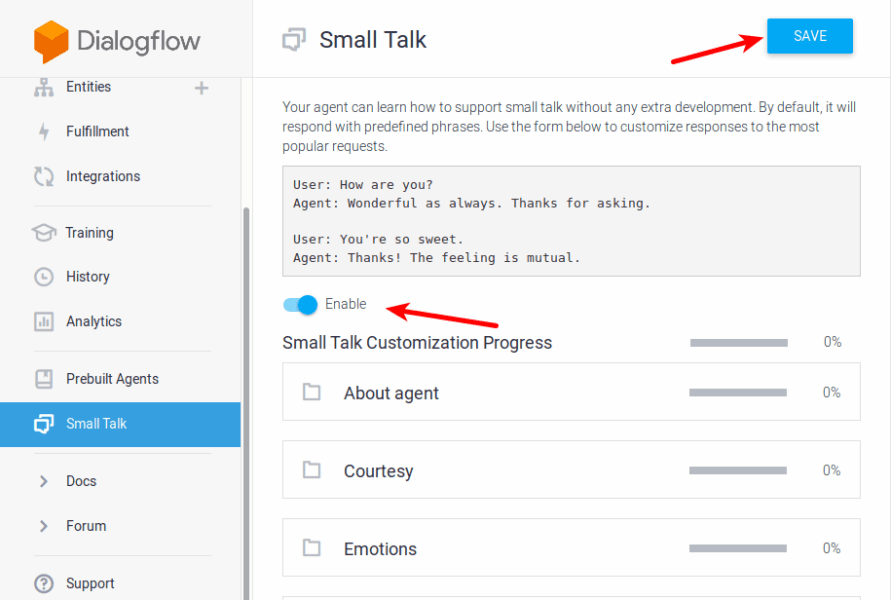
Dialogflow has a feature that gives your bot the ability to have simple conversations with users without writing any code. On the sidebar of the page, click the Small Talk option and enable it for your bot.
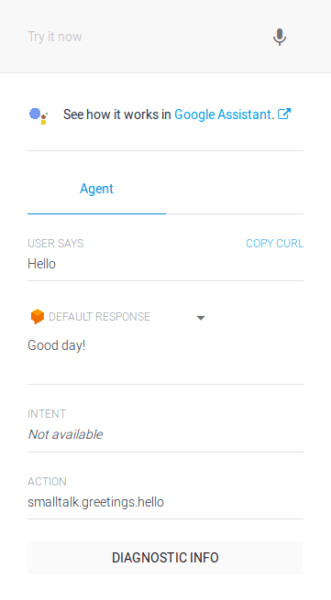
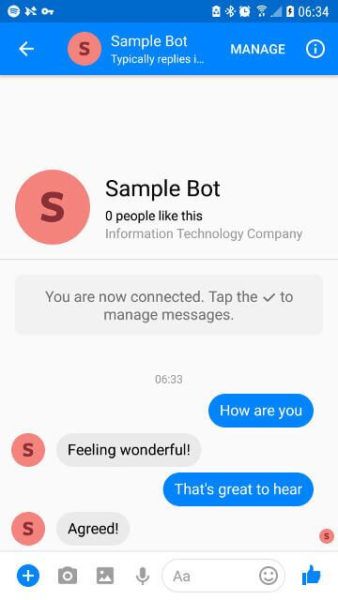
On the right-hand side, you have a console where you can try out your bot. Type a message (such as “Hello”) and hit Enter. You should see a response.
Setting up authentication
Before you can integrate Dialogflow with your bot, you need to set up authentication first.
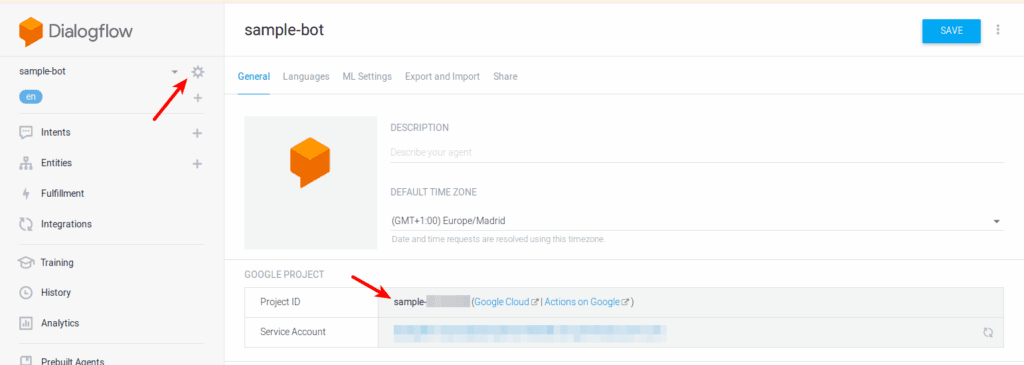
To do this, go to your agent’s settings. Under Google Project, click on the service account name. This will open your Google Cloud Platform service account’s page.

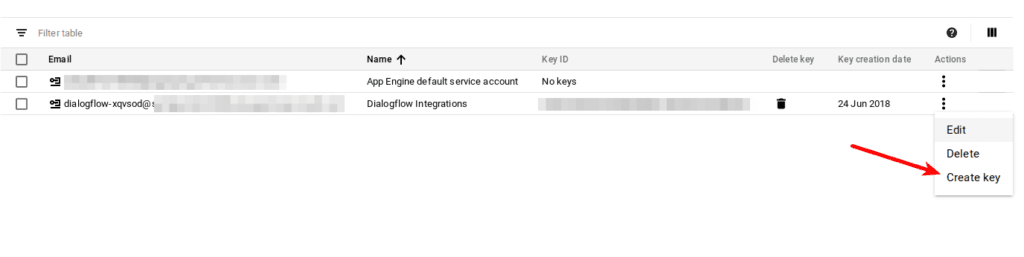
You should see a Dialogflow Integration service account in the list of accounts. Click on the three dots menu on the right and select Create Key. Leave the file format as JSON and click Create. This will download a JSON file to your computer.
You can open the JSON file with your favorite text editor. You only need two of the values: private_key and client_email. Store these values as environmental variables before proceeding.
You can use the dotenv package to load environmental variables from a .env file into process.env.
1npm install --save dotenv
And add the following line at the top of index.js
1require('dotenv').config({ path: 'variables.env' });
Then create a variables.env file in the root of your project directory. You should add this file to your .gitignore so that you do not commit it to your repository by accident. Here’s how your variables.env file should look like:
1FACEBOOK_ACCESS_TOKEN=EAAghLzgZCMfEBAJntS... 2 DIALOGFLOW_PRIVATE_KEY="-----BEGIN PRIVATE KEY-----\n<KEY>\n-----END PRIVATE KEY-----\n" 3 DIALOGFLOW_CLIENT_EMAIL=foo@<PROJECT_ID>.iam.gserviceaccount.com
Remember the Page Access Token received from Facebook earlier? Don’t forget to add it to your variables.env file as shown above.
The next step is to use this feature in your messenger bot. Dialogflow provides an SDK for Node.js which you can add to your project by running the following command:
1npm install --save dialogflow
Also, grab node-fetch so that we can use that to send requests to the Facebook API:
1npm install --save node-fetch
Next, create a file called process-message.js in your src directory and paste in the following contents:
1const fetch = require('node-fetch'); 2 3 // You can find your project ID in your Dialogflow agent settings 4 const projectId = ''; //https://dialogflow.com/docs/agents#settings 5 const sessionId = '123456'; 6 const languageCode = 'en-US'; 7 8 const dialogflow = require('dialogflow'); 9 10 const config = { 11 credentials: { 12 private_key: process.env.DIALOGFLOW_PRIVATE_KEY, 13 client_email: process.env.DIALOGFLOW_CLIENT_EMAIL 14 } 15 }; 16 17 const sessionClient = new dialogflow.SessionsClient(config); 18 19 const sessionPath = sessionClient.sessionPath(projectId, sessionId); 20 21 // Remember the Page Access Token you got from Facebook earlier? 22 // Don't forget to add it to your `variables.env` file. 23 const { FACEBOOK_ACCESS_TOKEN } = process.env; 24 25 const sendTextMessage = (userId, text) => { 26 return fetch( 27 `https://graph.facebook.com/v2.6/me/messages?access_token=${FACEBOOK_ACCESS_TOKEN}`, 28 { 29 headers: { 30 'Content-Type': 'application/json', 31 }, 32 method: 'POST', 33 body: JSON.stringify({ 34 messaging_type: 'RESPONSE', 35 recipient: { 36 id: userId, 37 }, 38 message: { 39 text, 40 }, 41 }), 42 } 43 ); 44 } 45 46 module.exports = (event) => { 47 const userId = event.sender.id; 48 const message = event.message.text; 49 50 const request = { 51 session: sessionPath, 52 queryInput: { 53 text: { 54 text: message, 55 languageCode: languageCode, 56 }, 57 }, 58 }; 59 60 sessionClient 61 .detectIntent(request) 62 .then(responses => { 63 const result = responses[0].queryResult; 64 return sendTextMessage(userId, result.fulfillmentText); 65 }) 66 .catch(err => { 67 console.error('ERROR:', err); 68 }); 69 }
Note: find your agent’s project ID in the Dialogflow settings and enter it as the value of projectId above.
If you look at the code in process-message.js, you will see that we passed the text message received from Facebook Messenger to Dialogflow. We can then extract the matching response from Dialogflow and send the result back to Messenger.
To receive message events from Facebook, you need to add the following to your index.js file:
1const messageWebhook = require('./message-webhook'); 2 3 app.post('/', messageWebhook);
Go ahead and create the message-webhook.js file in your src folder then paste in the following code:
1const processMessage = require('./process-message'); 2 3 module.exports = (req, res) => { 4 if (req.body.object === 'page') { 5 req.body.entry.forEach(entry => { 6 entry.messaging.forEach(event => { 7 if (event.message && event.message.text) { 8 processMessage(event); 9 } 10 }); 11 }); 12 13 res.status(200).end(); 14 } 15 };
Now you can go ahead and test your bot! You can send simple messages like “What’s up?”, or “How are you” and you will get replies from the bot. These responses are from the Small Talk feature we enabled above.
Create your own chatbot intents
Your bot’s ability to make small talk is all well and good, but that’s probably not what your customers want. To add functionality to your bot, you need to create intents. You can read more about intents on the Dialogflow website, but the gist of it is that it helps you map a user’s request with the appropriate response.
To see this in action, let’s create an intent that gives the bot the ability to respond to sample requests about Pusher.
To start, locate the ‘Intents’ option on the left and click ‘Create Intent’. You need to give your intent a name. I’ll call mine ‘about-pusher’.

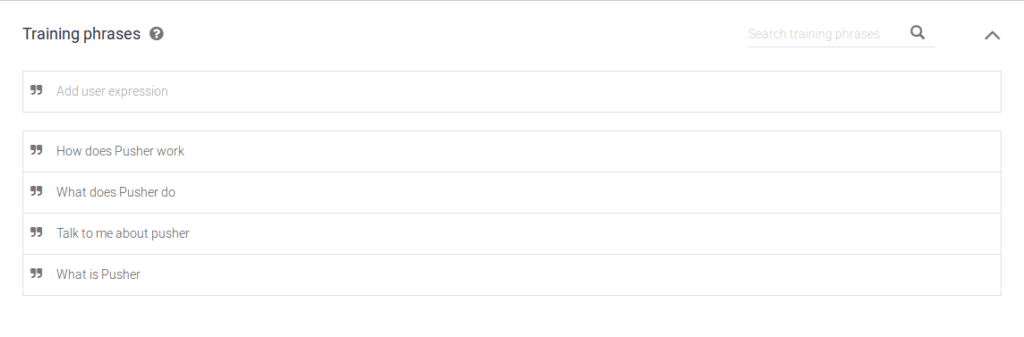
Now under Training phrases, you need to provide examples of how users may express their request in natural language. The more examples you provide, the more accurate your bot becomes at matching the request with the correct intent.
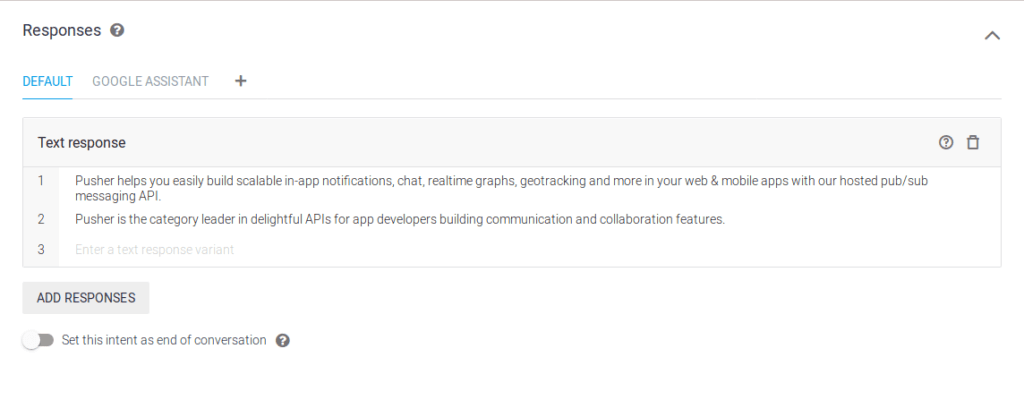
Once you have populated the training phrases, you need some responses. These are the replies that will be sent to your bot when this intent is matched. You can hit the Save button at the top of the page after adding a few responses.
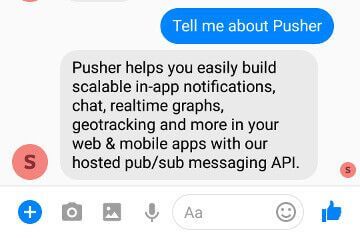
Finally, try it out in Messenger. It should work just fine.
Conclusion
You have now learned how to create a Facebook Messenger chatbot that incorporates Natural Language Processing. It was easy, wasn’t it? We covered a simple use case for NLP, but you can add as much functionality as you want with entities and custom integrations.
Thanks for reading! Remember that you can find the source code of this app in this GitHub repository.


© 2024 Pusher Ltd. All rights reserved.
Pusher Limited is a company registered in England and Wales (No. 07489873) whose registered office is at MessageBird UK Limited, 3 More London Riverside, 4th Floor, London, United Kingdom, SE1 2AQ.