- Products

- Developers
- User stories
- Blog
- Pricing

Build an Activity Feed on Android with Pusher
In this tutorial, we are going to build an activity feed on Android with Pusher. In this tutorial, using Pusher, we are going to build a feed as an Android app to monitor the activity of a Node.js REST API.
Introduction
We’d like to track and visualize our applications in a central place. Feeds are great for this! Let’s build an Android app with an activity feed showing the temperature of your home.
In this tutorial, using Pusher, we are going to build a feed as an Android app to monitor the activity of a Node.js REST API. Every time an endpoint of the API is hit, it will publish an event with some information (let’s say temperatures) to a channel. This event will be received in realtime, on all the connected Android devices.
This is how our final Android app will look like:
The app is simple, but this tutorial assumes a basic knowledge of how to make Android apps. If you need it, the source code of the final version of the application is available on Github.
For the back-end, we will be using Node.js with Express to create a simple REST API. A basic knowledge of Node/Express is required to understand the code, but we won’t be using a database or anything special so you can replace this stack with the one you’re most comfortable with. The source code of this part is also available on Github.
So let’s get started!
Setting up Pusher
Create a free account at <https://pusher.com/signup\>.
When you first log in, you’ll be asked to enter some configuration options:

Enter a name, choose Android as your front-end tech, and Node.js as your back-end tech. This will give you some sample code to get you started:
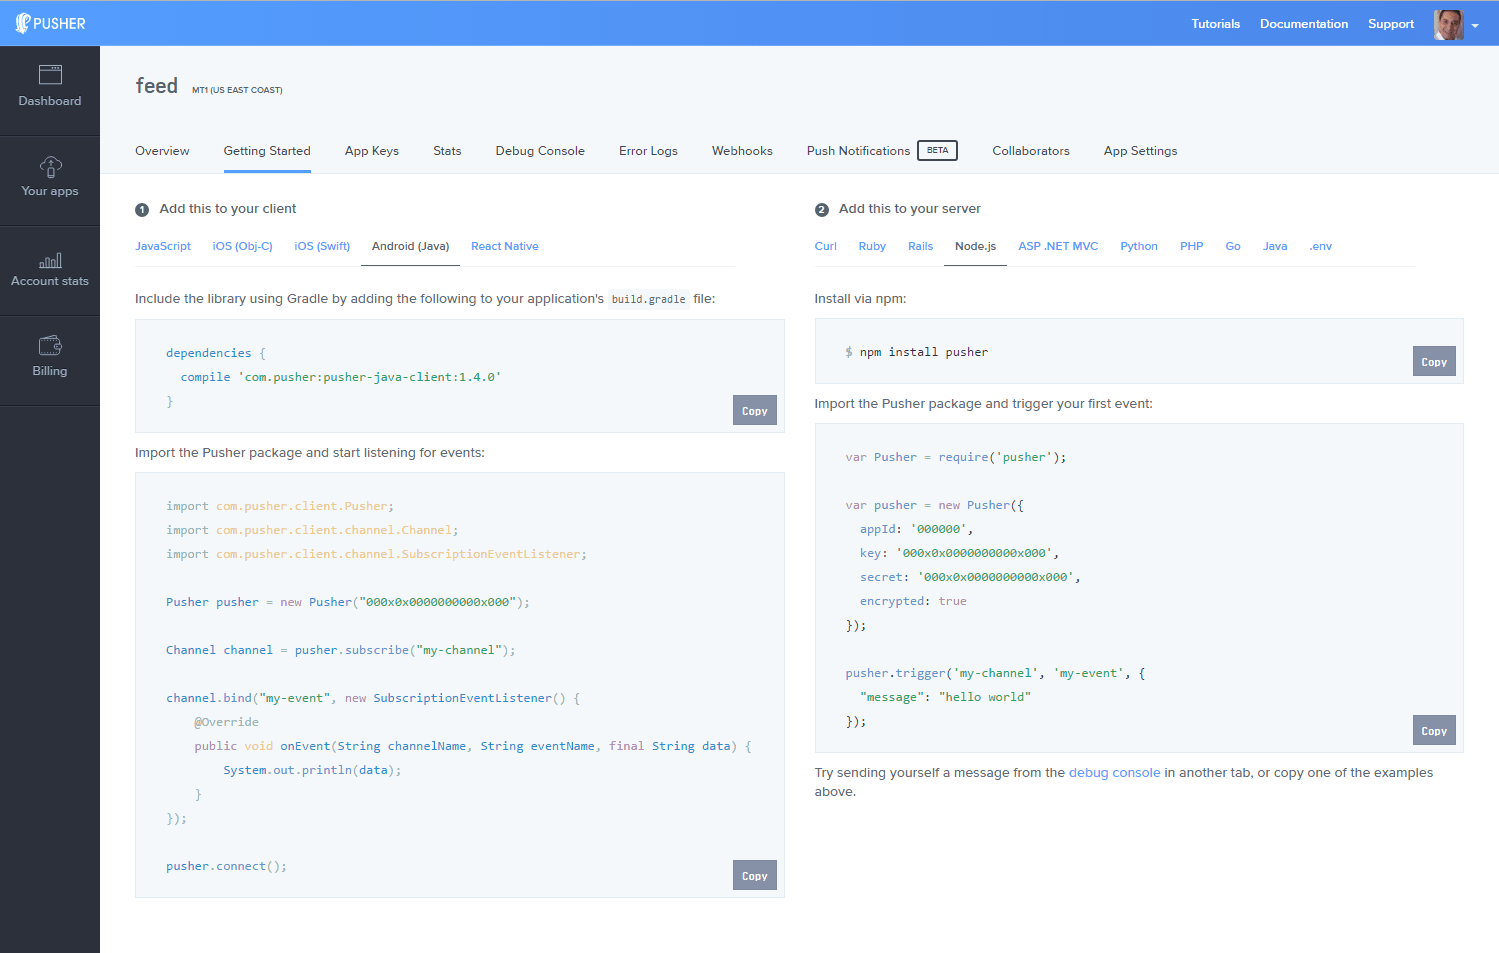
But don’t worry, this won’t lock you into this specific set of technologies, you can always change them. With Pusher, you can use any combination of libraries.
Then go to the App Keys tab to copy your App ID, Key, and Secret credentials, we’ll need them later.
The Node server
First, let’s create a default package.json configuration file with:
npm init -y
We’ll need Express, Pusher, and other dependencies, let’s add them with:
npm install --save express body-parser pusher
In case a future version of a dependency breaks the code, here’s the dependencies section on the package.json file:
1{ 2 ... 3 "dependencies": { 4 "body-parser": "1.16.0", 5 "express": "4.14.1", 6 "pusher": "1.5.1" 7 } 8}
Next, create a server.js file. First, let’s require the modules we’re going to need:
1var express = require('express'); 2var bodyParser = require('body-parser'); 3var crypto = require('crypto'); 4var Pusher = require('pusher');
Then, configure the Express object:
1var app = express(); 2app.use(bodyParser.json()); 3app.use(bodyParser.urlencoded({ extended: true }));
Next, the Pusher object is created by passing the configuration object with the ID, key, and the secret for the app created in the Pusher Dashboard:
1var pusher = new Pusher({ 2 appId : process.env.PUSHER_APP_ID, 3 key : process.env.PUSHER_APP_KEY, 4 secret : process.env.PUSHER_APP_SECRET, 5 encrypted : true, 6});
Pusher will be used to publish any events that happen in our application. These events have a channel, which allows events to relate to a particular topic, an event-name used to identify the type of the event, and a payload, which you can attach any additional information to the message.
We are going to publish an event to a Pusher channel when an endpoint of our API is called to create/update/delete a record, and send the information as an attachment so we can show it in an activity feed.
Here’s the definition of our API’s REST endpoints. Notice how an ID for the record is created using the first four characters of the hex string generated by crypto.randomBytes(16) (to avoid using an external library):
1app.post('/api', function (req, res) { 2 var event = { 3 data: req.body.data, 4 id: crypto.randomBytes(16).toString('hex').substring(0, 4), 5 }; 6 7 // Do something with the data... 8 9 // Publish event to the Pusher channel 10 pusher.trigger(channel, 'created', event); 11 12 res.status(200).json(event); 13}); 14 15app.route('/api/:id') 16 // PUT endpoint to update a record 17 .put(function (req, res) { 18 var event = { 19 data: req.body.data, 20 id: req.params.id, 21 }; 22 23 // Do something with the data... 24 25 // Publish event to the Pusher channel 26 pusher.trigger(channel, 'updated', event); 27 28 res.status(200).json(event); 29 }) 30 31 // DELETE endpoint to delete a record 32 .delete(function (req, res) { 33 var event = { 34 id: req.params.id, 35 }; 36 37 // Do something with the data... 38 39 // Publish event to the Pusher channel 40 pusher.trigger(channel, 'deleted', event); 41 42 res.status(200).json(event); 43 });
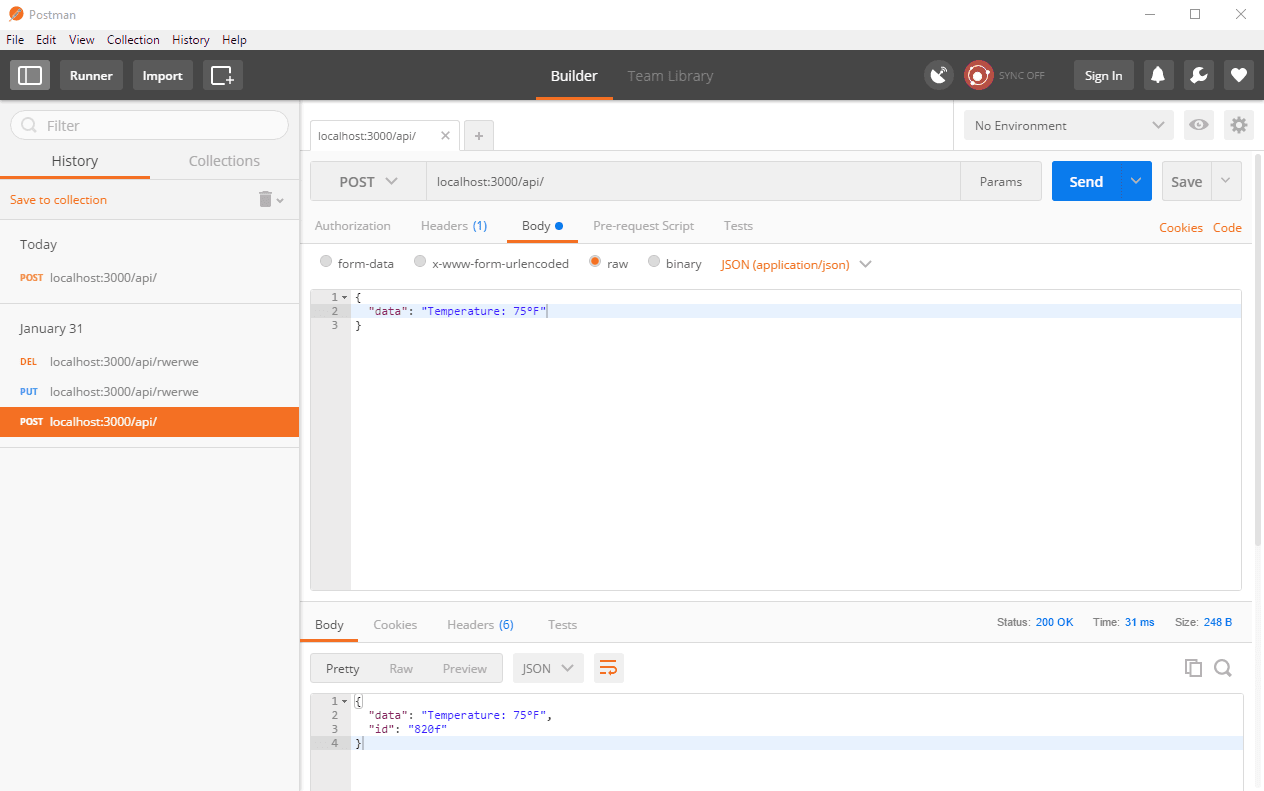
This way, a POST request like this:
1{ 2 "data": "Temperature: 75°F" 3}
Will return something like the following:
1{ 2 "data": "Temperature: 75°F", 3 "id": "d2t6" 4}
We start the server with:
1app.listen(3000, function () { 2 console.log('Node server running on port 3000'); 3});
And that’s all. To run the server, execute the following command passing your Pusher credentials:
PUSHER_APP_ID=XXXXXX PUSHER_APP_KEY=XXXXXX PUSHER_APP_SECRET=XXXXXX node server.js
The Android app
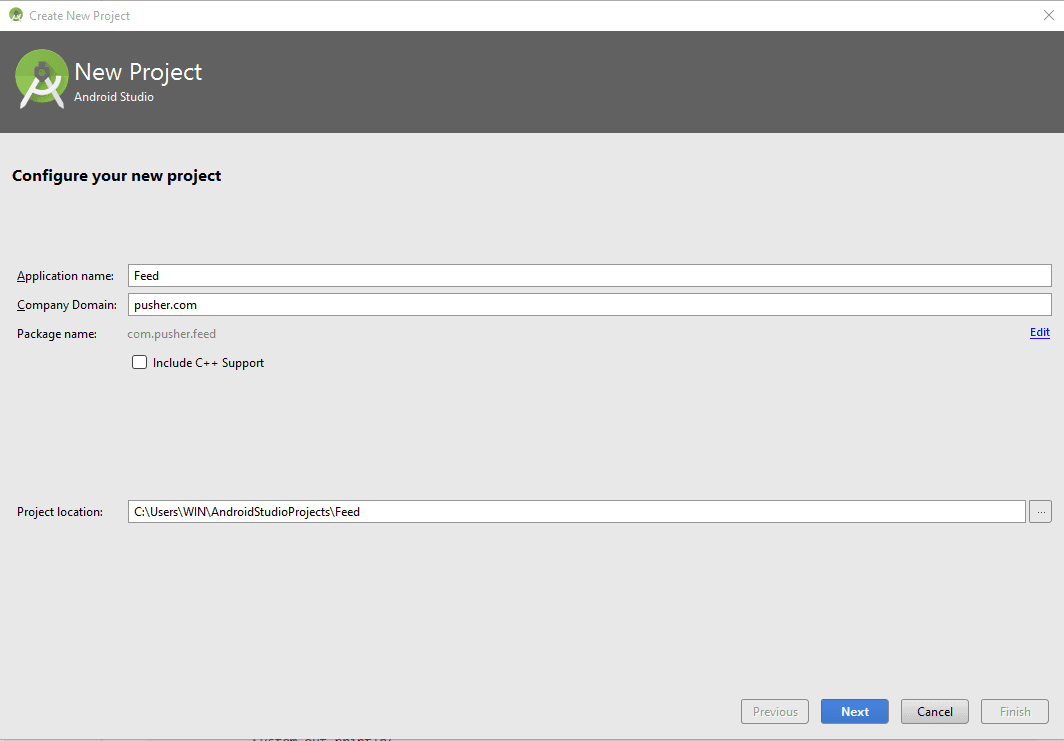
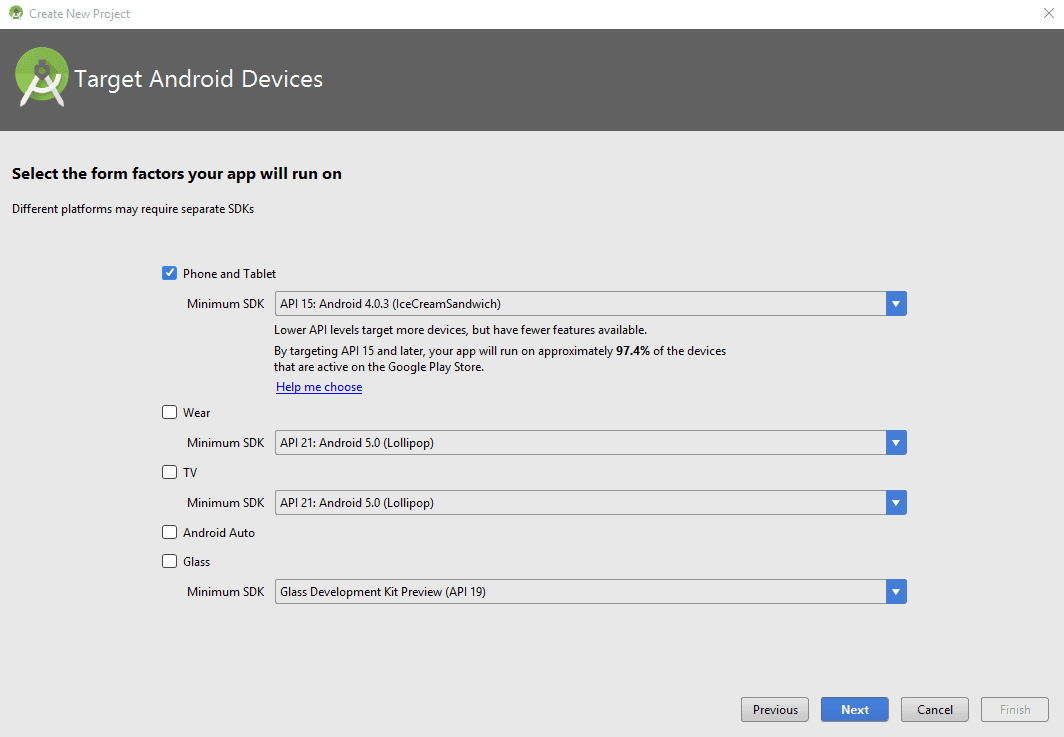
Open Android Studio and create a new project:
We’re not going to use anything special, so we can safely support a low API level:
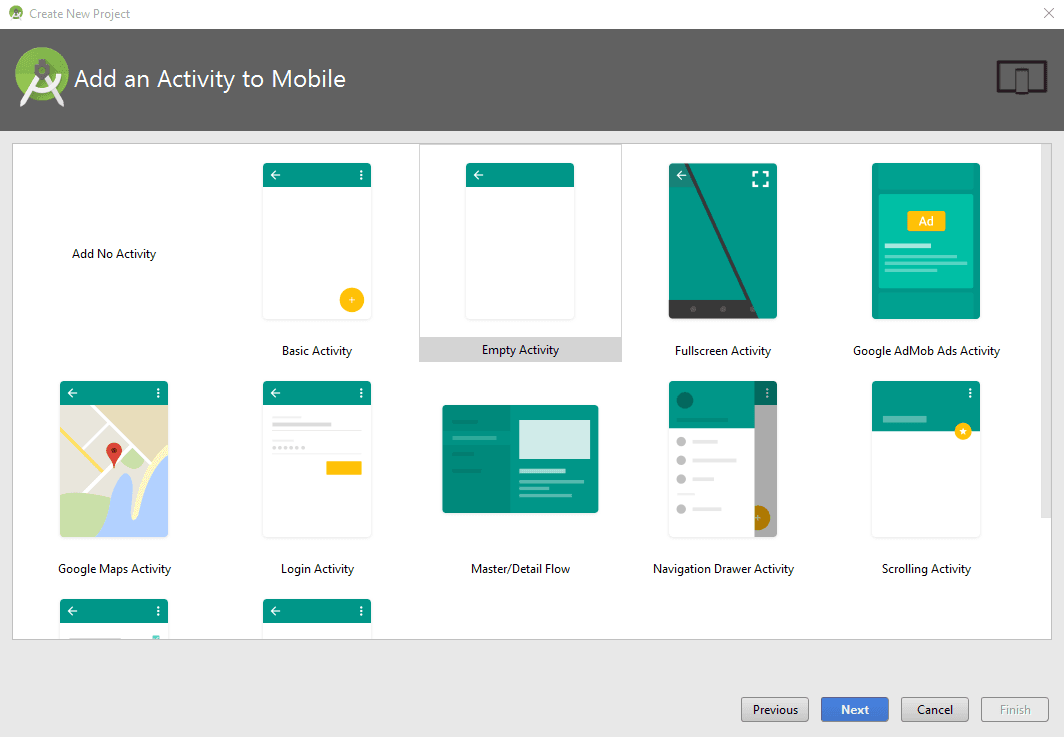
Next, create an initial empty activity:
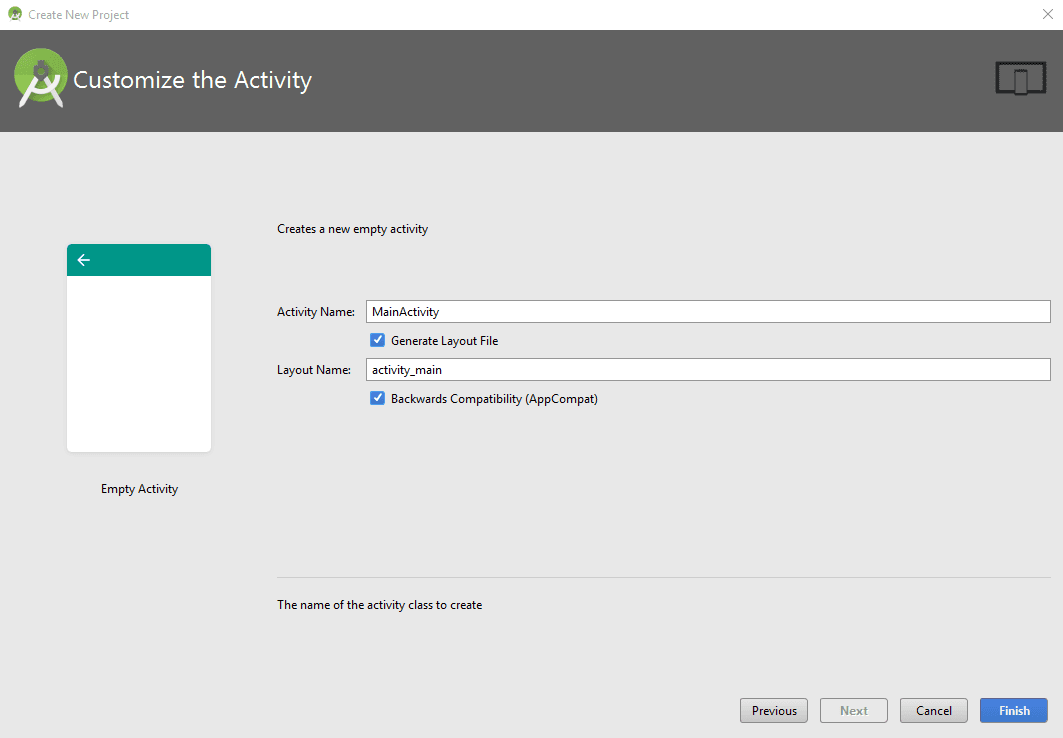
And use the default name of MainActivity with backward compatibility:
Once everything is set up, let’s install the project dependencies. In the dependencies section of the build.gradle file of your application module add:
1dependencies { 2 ... 3 compile 'com.pusher:pusher-java-client:1.4.0' 4 compile 'com.android.support:recyclerview-v7:25.1.1' 5 compile 'com.android.support:cardview-v7:25.1.1' 6 compile 'com.github.curioustechizen.android-ago:library:1.3.2' 7 compile 'com.google.code.gson:gson:2.4' 8 ... 9}
At the time of this writing, the latest SDK version is 25, so that’s my target SDK version.
We’re going to use the RecyclerView and CardView components from the Support Library, so make sure you have it installed (in Tools -> Android -> SDK Manager -> SDK Tools tab the Android Support Repository must be installed).
Sync the Gradle project so the modules can be installed and the project built.
Before we forget (I always do), let’s add the INTERNET permission to the AndroidManifest.xml file. This is required so we can connect to Pusher and get the events in realtime:
1<?xml version="1.0" encoding="utf-8"?> 2<manifest xmlns:android="http://schemas.android.com/apk/res/android" 3 package="com.pusher.feed"> 4 5 <uses-permission android:name="android.permission.INTERNET" /> 6 7 <application 8 ... 9 </application> 10 11</manifest>
If you want to modify the style of the app, in the res/values folder, modify the colors.xml file so it looks like this:
1<?xml version="1.0" encoding="utf-8"?> 2 3<resources> 4 <color name="primary">#03A9F4</color> 5 <color name="primary_dark">#0288D1</color> 6 <color name="primary_light">#B3E5FC</color> 7 <color name="accent">#FF4081</color> 8 <color name="primary_text">#212121</color> 9 <color name="secondary_text">#757575</color> 10 <color name="icons">#FFFFFF</color> 11 <color name="divider">#BDBDBD</color> 12</resources>
As well as the styles.xml file to match these color definitions:
1<resources> 2 3 <!-- Base application theme. --> 4 <style name="AppTheme" parent="Theme.AppCompat.Light.DarkActionBar"> 5 <!-- Customize your theme here. --> 6 <item name="colorPrimary">@color/primary</item> 7 <item name="colorPrimaryDark">@color/primary_dark</item> 8 <item name="colorAccent">@color/accent</item> 9 </style> 10 11</resources>
Now, modify the layout file activity_main.xml so it looks like this:
1<?xml version="1.0" encoding="utf-8"?> 2<RelativeLayout xmlns:android="http://schemas.android.com/apk/res/android" 3 xmlns:tools="http://schemas.android.com/tools" 4 android:id="@+id/activity_main" 5 android:layout_width="match_parent" 6 android:layout_height="match_parent" 7 android:paddingBottom="@dimen/activity_vertical_margin" 8 android:paddingLeft="@dimen/activity_horizontal_margin" 9 android:paddingRight="@dimen/activity_horizontal_margin" 10 android:paddingTop="@dimen/activity_vertical_margin" 11 tools:context="com.pusher.feed.MainActivity"> 12 13 <android.support.v7.widget.RecyclerView 14 android:layout_width="match_parent" 15 android:layout_height="match_parent" 16 android:layout_alignParentTop="true" 17 android:layout_alignParentLeft="true" 18 android:layout_alignParentStart="true" 19 android:id="@+id/recycler_view" 20 android:scrollbars="vertical" /> 21</RelativeLayout>
We’re going to use a RecyclerView to display the events, which we’ll store in a list. Each item in this list is displayed in an identical manner, so let’s define another layout file to inflate each item.
Create the file event_row.xml with the following content:
1<?xml version="1.0" encoding="utf-8"?> 2<android.support.v7.widget.CardView xmlns:android="http://schemas.android.com/apk/res/android" 3 xmlns:card_view="http://schemas.android.com/apk/res-auto" 4 android:layout_width="match_parent" 5 android:layout_height="wrap_content" 6 card_view:cardCornerRadius="4dp" 7 card_view:cardElevation="4dp" 8 card_view:cardUseCompatPadding="true" 9 card_view:contentPadding="8dp"> 10 11 <RelativeLayout 12 android:layout_width="match_parent" 13 android:layout_height="match_parent"> 14 15 <TextView 16 android:layout_width="match_parent" 17 android:layout_height="wrap_content" 18 android:textAppearance="?android:attr/textAppearanceLarge" 19 android:text="Event" 20 android:id="@+id/event" 21 android:layout_alignParentTop="true" 22 android:textAlignment="center" /> 23 24 <TextView 25 android:layout_width="match_parent" 26 android:layout_height="wrap_content" 27 android:textAppearance="?android:attr/textAppearanceMedium" 28 android:text="ID" 29 android:id="@+id/id" 30 android:layout_below="@+id/event" 31 android:textAlignment="center" /> 32 33 <com.github.curioustechizen.ago.RelativeTimeTextView 34 android:id="@+id/timestamp" 35 android:layout_width="match_parent" 36 android:layout_height="wrap_content" 37 android:textAppearance="?android:attr/textAppearanceSmall" 38 android:layout_below="@+id/id" 39 android:textAlignment="center" /> 40 41 <TextView 42 android:layout_width="match_parent" 43 android:layout_height="wrap_content" 44 android:text="Data" 45 android:id="@+id/data" 46 android:layout_below="@+id/timestamp" 47 android:textAlignment="center" 48 android:layout_marginTop="8dp" /> 49 </RelativeLayout> 50 51</android.support.v7.widget.CardView>
Here we’re using a CardView to show the information inside a card, with shadows and rounded corners. For each item, we’re going to present:
- A
TextViewfor the name of the event (created, updated, or deleted). - A
TextViewfor the ID of the record (for example, c2d6). - A RelativeTimeTextView, a custom
TextViewthat displays the relative time with respect to the reference point (the moment the event is received), automatically refreshing the text as needed. - A
TextViewfor the data contained in the record (anything the user sends, for example, Temperature: 80°F).
Now, to store the information of each event, let’s create a class, com.pusher.feed.Event:
1public class Event { 2 private String name; 3 private String id; 4 private String data; 5 6 public Event(String name, String eventId, String data) { 7 this.name = name; 8 this.id = eventId; 9 this.data = data; 10 } 11 12 // Getters and setters 13 public String getName() { 14 return name; 15 } 16 17 public void setName(String name) { 18 this.name = name; 19 } 20 21 public String getId() { 22 return id; 23 } 24 25 public String getData() { 26 return data; 27 } 28}
RecyclerView works with an Adapter to manage the items of its data source (in this case a list of Event instances), and a ViewHolder to hold a view representing a single list item, so first create the class com.pusher.feed.EventAdapter with the following code:
1public class EventAdapter extends RecyclerView.Adapter<EventAdapter.EventViewHolder> { 2 private List<Event> items; 3 4 public EventAdapter(List<Event> items) { 5 this.items = items; 6 } 7 8 public void addEvent(Event event) { 9 // Add the event at the beginning of the list 10 items.add(0, event); 11 // Notify the insertion so the view can be refreshed 12 notifyItemInserted(0); 13 } 14 15 @Override 16 public int getItemCount() { 17 return items.size(); 18 } 19 20 @Override 21 public EventViewHolder onCreateViewHolder(ViewGroup viewGroup, int i) { 22 23 } 24 25 @Override 26 public void onBindViewHolder(EventViewHolder viewHolder, int i) { 27 28 } 29}
We initialize the class with a list of Event, provide a method to add Event instances at the beginning of the list (addEvent(Event)) and then notify the insertion so the view can be refreshed, and implement getItemCount so it returns the size of the list.
Then, let’s add the ViewHolder as an inner class, it references the View components for each item in the list:
1public class EventAdapter extends RecyclerView.Adapter<EventAdapter.EventViewHolder> { 2 private ArrayList<Event> items; 3 4 public static class EventViewHolder extends RecyclerView.ViewHolder { 5 // Card fields 6 public TextView event; 7 public TextView id; 8 public RelativeTimeTextView timestamp; 9 public TextView data; 10 11 public EventViewHolder(View v) { 12 super(v); 13 event = (TextView) v.findViewById(R.id.event); 14 id = (TextView) v.findViewById(R.id.id); 15 timestamp = (RelativeTimeTextView) v.findViewById(R.id.timestamp); 16 data = (TextView) v.findViewById(R.id.data); 17 } 18 } 19 20 ... 21}
And implement the methods onCreateViewHolder and onBindViewHolder:
1public class EventAdapter extends RecyclerView.Adapter<EventAdapter.EventViewHolder> { 2 ... 3 4 @Override 5 public EventViewHolder onCreateViewHolder(ViewGroup viewGroup, int i) { 6 View v = LayoutInflater.from(viewGroup.getContext()) 7 .inflate(R.layout.event_row, viewGroup, false); 8 9 return new EventViewHolder(v); 10 } 11 12 @Override 13 public void onBindViewHolder(EventViewHolder viewHolder, int i) { 14 Event event = items.get(i); 15 16 viewHolder.event.setText(event.getName()); 17 viewHolder.id.setText(event.getId()); 18 viewHolder.timestamp.setReferenceTime(System.currentTimeMillis()); 19 viewHolder.data.setText(event.getData()); 20 } 21}
In the onCreateViewHolder method, we inflate the layout with the content of the event_row.xml file we created earlier, and in onBindViewHolder, we set the values of the views with the event in turn. Notice how we set the reference time on RelativeTimeTextView so it can display a text like Just now or 10 minutes ago.
In the class com.pusher.feed.MainActivity, let’s start by defining the private fields we’re going to need:
1public class MainActivity extends AppCompatActivity { 2 private RecyclerView.LayoutManager lManager; 3 private EventAdapter adapter; 4 private Pusher pusher = new Pusher("ENTER_PUSHER_APP_KEY_HERE"); 5 private static final String CHANNEL_NAME = "events_to_be_shown"; 6 7 @Override 8 protected void onCreate(Bundle savedInstanceState) { 9 .... 10 } 11}
RecyclerView works with a LayoutManager to handle the layout and scroll direction of the list. We declare the EventAdapter, the Pusher object and the identifier for the Pusher channel. Remember to replace your Pusher app key, if you still don’t have one, this would be a good time to sign up for a free account and create you app.
Inside the onCreate method, let’s assign a LinearLayoutManager to the RecyclerView and create the EventAdapter with an empty list:
1public class MainActivity extends AppCompatActivity { 2 ... 3 @Override 4 protected void onCreate(Bundle savedInstanceState) { 5 super.onCreate(savedInstanceState); 6 setContentView(R.layout.activity_main); 7 8 // Get the RecyclerView 9 RecyclerView recycler = (RecyclerView) findViewById(R.id.recycler_view); 10 11 // Use LinearLayout as the layout manager 12 lManager = new LinearLayoutManager(this); 13 recycler.setLayoutManager(lManager); 14 15 // Set the custom adapter 16 List<Event> eventList = new ArrayList<>(); 17 adapter = new EventAdapter(eventList); 18 recycler.setAdapter(adapter); 19 } 20}
For the Pusher part, we first subscribe to the channel:
1public class MainActivity extends AppCompatActivity { 2 ... 3 @Override 4 protected void onCreate(Bundle savedInstanceState) { 5 ... 6 7 Channel channel = pusher.subscribe(CHANNEL_NAME); 8}
Then, we create the listener that will be executed when an event arrives:
1public class MainActivity extends AppCompatActivity { 2 ... 3 @Override 4 protected void onCreate(Bundle savedInstanceState) { 5 ... 6 SubscriptionEventListener eventListener = new SubscriptionEventListener() { 7 @Override 8 public void onEvent(String channel, final String event, final String data) { 9 runOnUiThread(new Runnable() { 10 @Override 11 public void run() { 12 System.out.println("Received event with data: " + data); 13 Gson gson = new Gson(); 14 Event evt = gson.fromJson(data, Event.class); 15 evt.setName(event + ":"); 16 adapter.addEvent(evt); 17 ((LinearLayoutManager)lManager).scrollToPositionWithOffset(0, 0); 18 } 19 }); 20 } 21 }; 22 } 23}
Here, the JSON string that we receive is converted to an Event object, the name of the event is set to the name of the event received, and the object is added to the adapter. Finally, we move to the top of the list.
Next, bind the events to this listener and call the connect method on the Pusher object:
1public class MainActivity extends AppCompatActivity { 2 ... 3 @Override 4 protected void onCreate(Bundle savedInstanceState) { 5 ... 6 channel.bind("created", eventListener); 7 channel.bind("updated", eventListener); 8 channel.bind("deleted", eventListener); 9 10 pusher.connect(); 11 } 12}
The connect method can take a listener that can be helpful to debug problems you might have:
1pusher.connect(new ConnectionEventListener() { 2 @Override 3 public void onConnectionStateChange(ConnectionStateChange change) { 4 System.out.println("State changed to " + change.getCurrentState() + 5 " from " + change.getPreviousState()); 6 } 7 8 @Override 9 public void onError(String message, String code, Exception e) { 10 System.out.println("There was a problem connecting!"); 11 e.printStackTrace(); 12 } 13});
Finally, MainActivity also needs to implement the onDestroy() method so we can have the opportunity to unsubscribe from Pusher when the activity is destroyed:
1public class MainActivity extends AppCompatActivity { 2 ... 3 4 @Override 5 public void onDestroy() { 6 super.onDestroy(); 7 pusher.disconnect(); 8 } 9}
And that’s all the code on the Android part. Let’s test it.
Testing the activity feed app
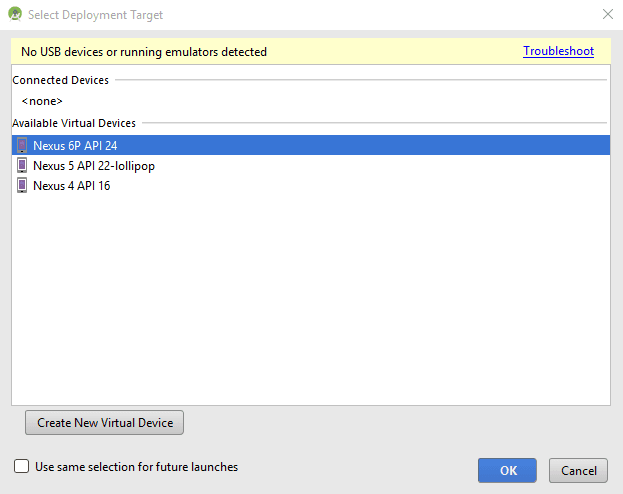
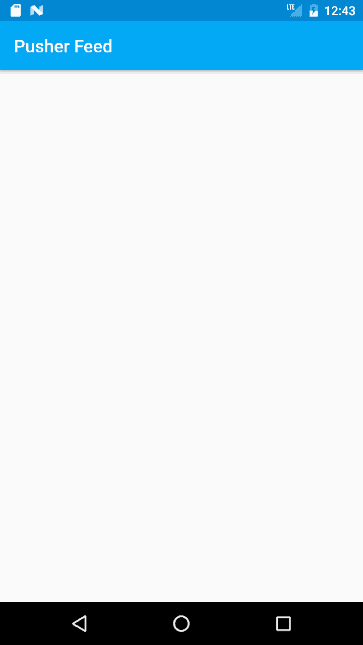
Execute the app, either on a real device or a virtual one:
You’ll be presented with an almost blank screen:
For the back-end, you can use something to call the API endpoints with a JSON payload, like cURL:
1# POST 2curl -H "Content-Type: application/json" -X POST -d '{"data":"Temperature: 80°F"}' http://localhost:3000/api 3# PUT 4curl -H "Content-Type: application/json" -X PUT -d '{"data":"Temperature: 85°F"}' http://localhost:3000/api/aqw3 5# DELETE 6curl -X DELETE http://localhost:3000/api/aqw3 7 8# In Windows, change single quotes to quotation marks and escape the ones inside curly brackets 9curl -H "Content-Type: application/json" -X POST -d "{\"data\":\"Temperature: 80°F\"}" http://localhost:3000/api 10 11# Or use file, for example data.json 12curl -H "Content-Type: application/json" -X POST --data @data.json http://localhost:3000/api
Or use a tool like Postman:
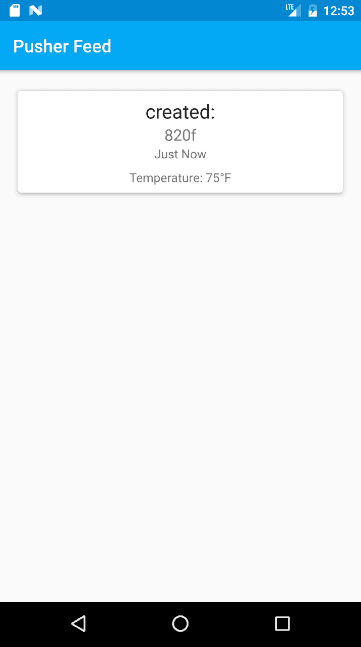
When a request is received on the API side, the event will show up in the app:
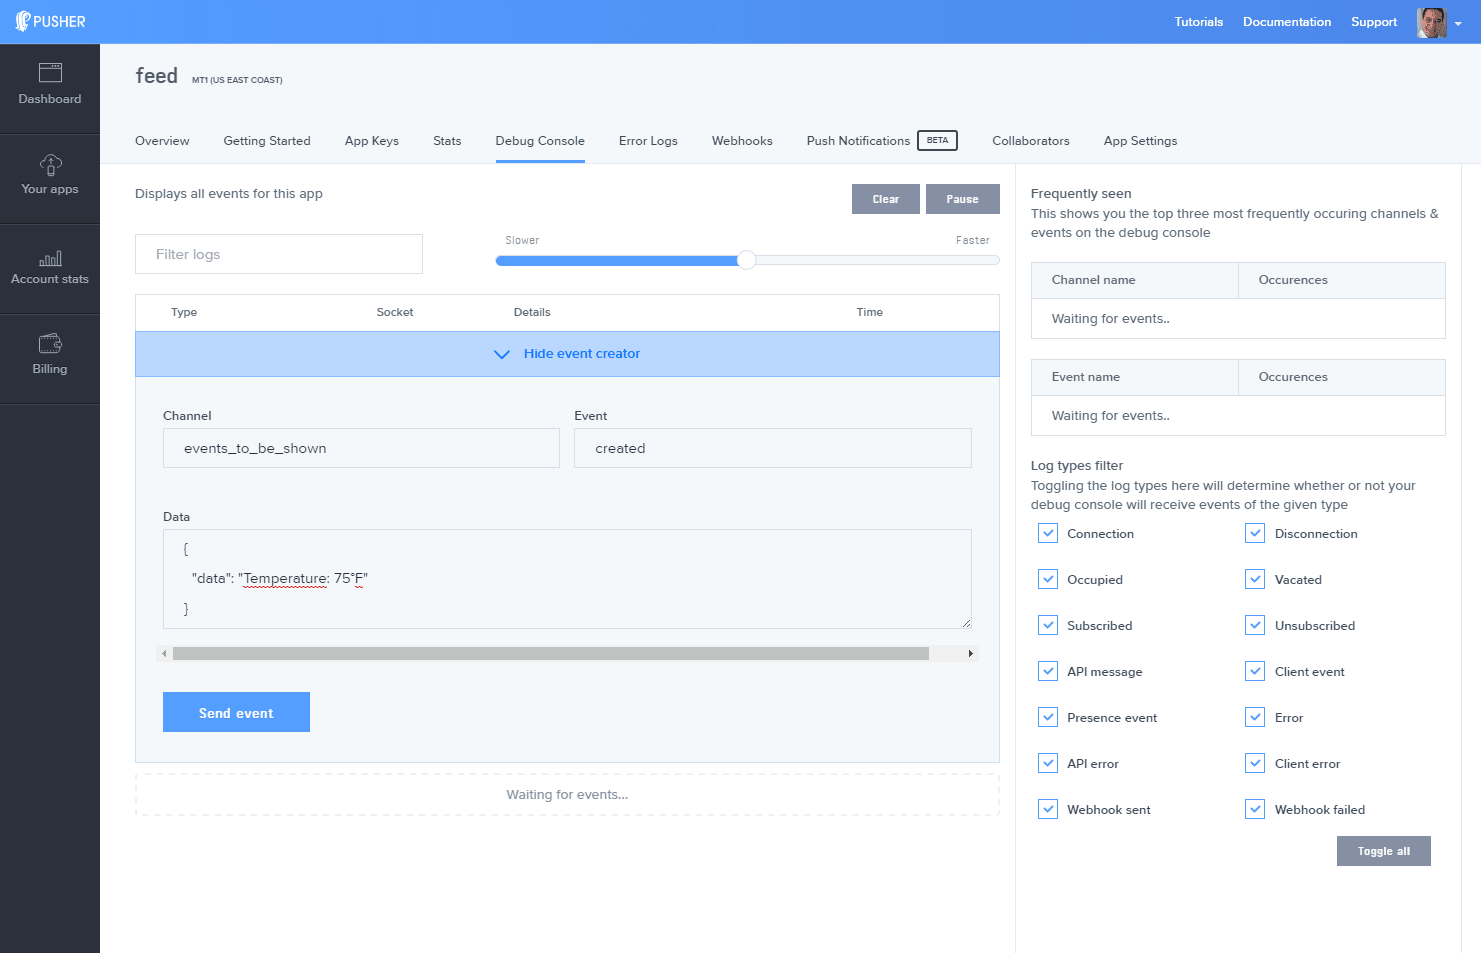
Or if you only want to test the app, you can use the Pusher Debug Console on your dashboard:
Conclusion
You can find the final version of the server here and the final version of the Android app here.
Hopefully, this tutorial has shown you in an easy way how to build an activity feed for Android apps with Pusher. You can improve the app by changing the design, showing more information, or saving it to a database. Remember that your forever free Pusher account includes 100 connections, unlimited channels, 200k daily messages, SSL protection, and there are more features than just Pub/Sub Messaging. Sign up here.
Further reading


© 2024 Pusher Ltd. All rights reserved.
Pusher Limited is a company registered in England and Wales (No. 07489873) whose registered office is at MessageBird UK Limited, 3 More London Riverside, 4th Floor, London, United Kingdom, SE1 2AQ.