- Products

- Developers
- User stories
- Blog
- Pricing

Build An Android Chat App With Pusher
Learn how to build an Android Chat App in 10 minutes. Together we will build a group chat application, leading you through how to use Pusher to send and show realtime messages in your UI.
Introduction
With the new 1.0.0 release of our Android library, we thought we’d create a walkthrough of how to easily build an Android chat app with Pusher. As with our previous tutorial, Making ReactJS Realtime With Websockets, together we will build a group Android chat application, leading you through how to use Pusher to send and show realtime messages in your UI.
Setting Up
Once you’ve set up your application on Android Studio, or your preferred IDE, let’s start with installing Pusher as a dependency. In the build.gradle file of your application module, add:
1repositories { 2 maven { url 'http://clojars.org/repo' } 3} 4 5dependencies { 6 compile 'com.pusher:pusher-java-client:1.0.0', 7 compile 'com.loopj.android:android-async-http:1.4.9', // for our HTTP requests later 8 compile 'com.google.code.gson:gson:2.2.4', // for parsing JSON 9 compile 'com.squareup.picasso:picasso:2.1.1' // for image rendering 10}
Sync the gradle project and Pusher, as long as other modules we’ll need later, should now be installed! Be sure to keep your application credentials to hand when we start adding some realtime magic. You can find your credentials when you create an app after signing up for a free account.
The flow of our app will be like so: the user will input a message in their app, which will send a POST request to our server. In this example, I will use a simple NodeJS server to provide a single API endpoint, for which you can see the code. However, as we have a consistent top-level API across all our server libraries, what is shown here can be easily applied to any other web framework you wish to use.
Once our server receives the POST request, they will trigger a simple Pusher message to all connected clients, which will show the messages in realtime. If you wish to download the demo Android app, you can do so on the Play Store, and this will allow you to chat with our web version to test things out.
If you get stuck at any point, feel free to browse the Android source code here and the NodeJS server code here.
Sending Messages
Client-Side
So to set up, create a new app with an initial blank activity, and use the default name of MainActivity. In activity_main.xml let’s go and create the input bar for our chat messages.
1<RelativeLayout 2 xmlns:android="http://schemas.android.com/apk/res/android" 3 xmlns:tools="http://schemas.android.com/tools" 4 android:layout_width="match_parent" 5 android:layout_height="match_parent" 6 android:orientation="vertical" 7 tools:context=".MainActivity" 8 > 9 10 <LinearLayout 11 android:id="@+id/input_bar" 12 android:layout_width="fill_parent" 13 android:layout_height="75dp" 14 android:layout_alignParentBottom="true" 15 android:background="@color/white" 16 android:orientation="horizontal" > 17 18 <EditText 19 android:id="@+id/message_input" 20 android:layout_weight="0.7" 21 android:layout_width="0dp" 22 android:layout_height="match_parent" 23 android:inputType="text" /> 24 25 <Button 26 android:id="@+id/send_button" 27 android:layout_width="wrap_content" 28 android:layout_height="wrap_content" 29 android:layout_marginTop=5dp" 30 android:layout_marginRight="20dp" 31 android:text="Send"/> 32 33 </LinearLayout> 34 35</RelativeLayout>
This will stick to the bottom of our view, and have an input (i.e. an EditText) for typing messages, and a Button for sending them, which we have given the respective IDs of message_input and send_button.
Now in our MainActivity.java class, let’s set up the listener for pressing the ‘Send’ button.
1public class MainActivity extends ActionBarActivity implements View.OnClickListener { 2 3 EditText messageInput; 4 Button sendButton; 5 6 @Override 7 protected void onCreate(Bundle savedInstanceState) { 8 super.onCreate(savedInstanceState); 9 setContentView(R.layout.activity_main); 10 11 // get our input field by its ID 12 messageInput = (EditText) findViewById(R.id.message_input); 13 14 15 // get our button by its ID 16 sendButton = (Button) findViewById(R.id.send_button); 17 18 // set its click listener 19 sendButton.setOnClickListener(this); 20 }
Now we’ll have to implement the View.onClickListener interface. Here we’ll simply get the text of messageInput and POST it to our server.
1@Override 2 public void onClick(View v) { 3 postMessage(); 4 } 5 6 private void postMessage() { 7 }
In this tutorial, I’ll be using the AsyncHTTPClient library to send messages to our server.
So now, within our MainActivity‘s postMessage method, we’ll get the text of the messageInput, and POST it, along with a username and timestamp. In our example app, we’ve also implemented a LoginActivity to get the user’s Twitter username, but in order to focus on the chat element itself we’re going to skip this. But feel free to browse the source code; it should be fairly straightforward.
Let’s go ahead with creating and sending our request parameters:
1import com.loopj.android.http.AsyncHttpClient; 2import com.loopj.android.http.RequestParams; 3 4 private void postMessage() { 5 6 String text = messageInput.getText().toString(); 7 8 // return if the text is blank 9 if (text.equals("")) { 10 return; 11 } 12 13 14 RequestParams params = new RequestParams(); 15 16 // set our JSON object 17 params.put("text", text); 18 params.put("name", username); 19 params.put("time", new Date().getTime()); 20 21 // create our HTTP client 22 AsyncHttpClient client = new AsyncHttpClient(); 23 24 ... 25 26 }
Set a MESSAGES_ENDPOINT string in MainActivity to point to the URL of your server. Then let’s make it so that when the request is successful, it clears the messageInput, or when it fails it alerts the user that something went wrong:
1client.post(MESSAGES_ENDPOINT, params, new JsonHttpResponseHandler(){ 2 3 @Override 4 public void onSuccess(int statusCode, Header[] headers, JSONObject response) { 5 runOnUiThread(new Runnable() { 6 @Override 7 public void run() { 8 messageInput.setText(""); 9 } 10 }); 11 } 12 13 @Override 14 public void onFailure(int statusCode, Header[] headers, String responseString, Throwable throwable) { 15 Toast.makeText( 16 getApplicationContext(), 17 "Something went wrong :(", 18 Toast.LENGTH_LONG 19 ).show(); 20 } 21});
Sweet – so now the client is set up to send an input to the server, let’s implement our mini-API.
Server-Side
Install NodeJS and Express if you haven’t already. Generate your chat backend with:
1$ express chat-backend 2$ cd chat-backend 3$ npm install
Now install the Pusher Node library with:
1$ npm install pusher --save
Now initialize the Pusher object in your server file with your application credentials:
1var pusher = new Pusher({ 2 appId: "your app id", 3 key: "your app key", 4 secret: "your app secret" 5});
Now create the endpoint that receives JSON from the client. Then we’ll fire a Pusher event called new_message on a channel called messages, passing along the data we received from the client.
1app.post('/messages', function(req, res){ 2 var message = req.body; 3 pusher.trigger('messages', 'new_message', message); 4 res.json({success: 200}); 5});
At this point, you may wish to store messages, or sanitize them with a library such as sanitize-html so that you can display them on a web view. But this should be enough to demonstrate our chat app at work.
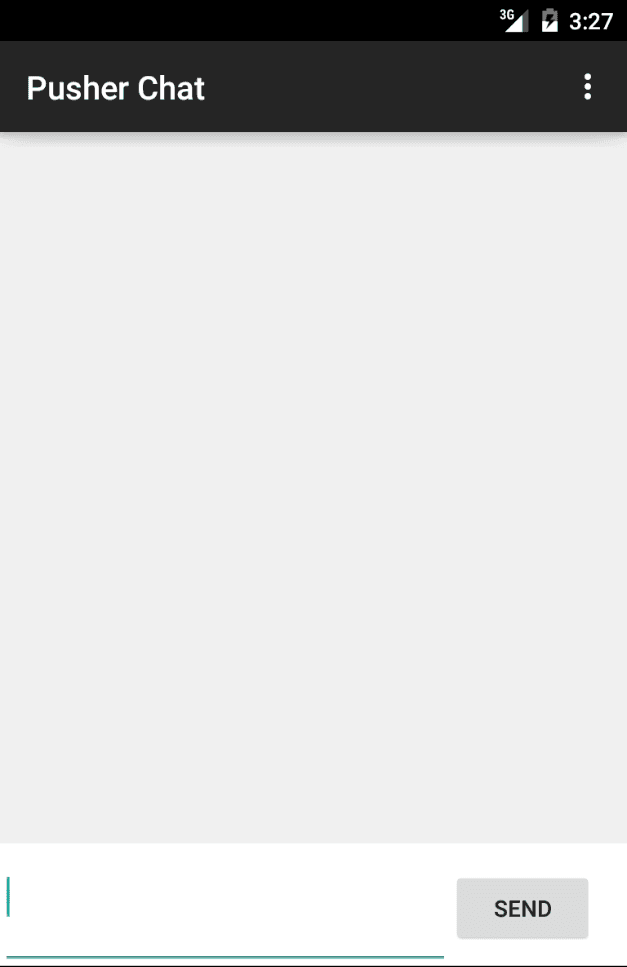
So fire up your server, and run your mobile app either in an emulator or on your device. Meanwhile, open up the Pusher Debug Console for your app on your dashboard. On your emulator or device, you should see an input bar at the bottom of the app. Type in a message and touch the ‘Send’ button, and you should see messages pop up in realtime on your Debug Console. Cool, huh?
Showing Live Android Chat Messages
That might be cool – but it’s not enough. Let’s have our Android client listen for incoming chat messages, and show them in a list.
So in activity_main.xml, add a new ListView as the first child of RelativeLayout and above the LinearLayout that wraps our input bar. Your layout XML should look like so:
1<RelativeLayout 2 xmlns:android="http://schemas.android.com/apk/res/android" 3 xmlns:tools="http://schemas.android.com/tools" 4 android:layout_width="match_parent" 5 android:layout_height="match_parent" 6 android:orientation="vertical" 7 tools:context=".MainActivity" 8 > 9 10 11 <ListView 12 android:layout_marginTop="10dp" 13 android:layout_marginBottom="80dp" 14 android:layout_width="match_parent" 15 android:layout_height="500dp" 16 android:id="@+id/messages_view" 17 android:layout_alignParentTop="true" 18 android:layout_alignParentLeft="true" 19 android:layout_alignParentStart="true" /> 20 21 <LinearLayout 22 android:id="@+id/input_bar" 23 android:layout_width="fill_parent" 24 android:layout_height="75dp" 25 android:layout_alignParentBottom="true" 26 android:background="@color/white" 27 android:orientation="horizontal" > 28 29 <EditText 30 android:id="@+id/message_input" 31 android:layout_weight="0.7" 32 android:layout_width="0dp" 33 android:layout_height="match_parent" 34 android:inputType="text" /> 35 36 <Button 37 android:id="@+id/send_button" 38 android:layout_width="wrap_content" 39 android:layout_height="wrap_content" 40 android:layout_marginTop="20dp" 41 android:layout_marginRight="20dp" 42 android:text="Send"/> 43 44 </LinearLayout> 45 46</RelativeLayout>
In order to display each message within the ListView, we’ll have to create an adapter that turns a list into a set of views. In our MainActivity#onCreate method, let’s bind our ListView to this adapter:
1public class MainActivity extends ActionBarActivity implements View.OnClickListener { 2 3 ... 4 MessageAdapter messageAdapter; 5 6 @Override 7 protected void onCreate(Bundle savedInstanceState) { 8 9 ... 10 11 messageAdapter = new MessageAdapter(this, new ArrayList<Message>()); 12 final ListView messagesView = (ListView) findViewById(R.id.messages_view); 13 messagesView.setAdapter(messageAdapter); 14 }
Our Message.java class which comprises the list is very straightforward:
1public class Message { 2 public String text; 3 public String name; 4 public long time; 5}
Now let’s create our MessageAdapter, which is, as you can see above, initialized with our MainActivity‘s context, and the resource (an ArrayList of Messages):
1public class MessageAdapter extends BaseAdapter { 2 3 Context messageContext; 4 ArrayList<Message> messageList; 5 6 public MessageAdapter(Context context, ArrayList<Message> messages){ 7 messageList = messages; 8 messageContext = context; 9 }
When you extend BaseAdapter, your IDE will ask you to implement getCount, getItem and getItemId, which we can do so:
1@Override 2 public int getCount() { 3 return messageList.size(); 4 } 5 6 @Override 7 public Object getItem(int position) { 8 return messageList.get(position); 9 } 10 11 @Override 12 public long getItemId(int position) { 13 return position; 14 }
Finally we’ll have to implement getView, which is needed to convert an item in the ArrayList of Messages to a view. First, we need to create a MessageViewHolder to encapsulate the views we need to be a part of the message. In this case, we’re going to have a thumbnailImageView – for the user’s Twitter avatar – a senderView to show who sent the message, and a bodyView to show the content of the message. Within our MessageAdapter, add a private nested class:
1private static class MessageViewHolder { 2 public ImageView thumbnailImageView; 3 public TextView senderView; 4 public TextView bodyView; 5 }
We must also describe the layout of our message view. Let’s give the view of our thumbnail an ID of img_thumbnail, the view of the sender and ID of message_sender, and the content of the message an ID of message_sender:
1<?xml version="1.0" encoding="utf-8"?> 2<RelativeLayout xmlns:android="http://schemas.android.com/apk/res/android" 3 android:layout_width="match_parent" android:layout_height="75dp"> 4 5 <ImageView 6 android:id="@+id/img_thumbnail" 7 android:layout_marginLeft="25dp" 8 android:layout_alignParentLeft="true" 9 android:layout_centerVertical="true" 10 android:scaleType="centerInside" 11 android:layout_width="50dp" 12 android:layout_height="50dp" /> 13 14 <TextView 15 android:id="@+id/message_sender" 16 android:layout_marginLeft="25dp" 17 android:layout_toRightOf="@+id/img_thumbnail" 18 android:layout_alignTop="@+id/img_thumbnail" 19 android:layout_width="wrap_content" 20 android:layout_height="wrap_content" /> 21 22 <TextView 23 android:layout_width="wrap_content" 24 android:layout_height="wrap_content" 25 android:id="@+id/message_body" 26 android:layout_below="@+id/message_sender" 27 android:layout_alignLeft="@+id/message_sender" 28 /> 29 30 31</RelativeLayout>
Now that we have a MessageViewHolder to encapsulate the visual elements that comprise a message, and a message layout to inflate those elements into, we can go ahead and implement our MessageAdapter#getView method:
1@Override 2 public View getView(int position, View convertView, ViewGroup parent) { 3 4 MessageViewHolder holder; 5 6 // if there is not already a view created for an item in the Message list. 7 8 if (convertView == null){ 9 LayoutInflater messageInflater = (LayoutInflater) messageContext.getSystemService(Activity.LAYOUT_INFLATER_SERVICE); 10 11 // create a view out of our `message.xml` file 12 convertView = messageInflater.inflate(R.layout.message, null); 13 14 // create a MessageViewHolder 15 holder = new MessageViewHolder(); 16 17 // set the holder's properties to elements in `message.xml` 18 holder.thumbnailImageView = (ImageView) convertView.findViewById(R.id.img_thumbnail); 19 holder.senderView = (TextView) convertView.findViewById(R.id.message_sender); 20 holder.bodyView = (TextView) convertView.findViewById(R.id.message_body); 21 22 // assign the holder to the view we will return 23 convertView.setTag(holder); 24 } else { 25 26 // otherwise fetch an already-created view holder 27 holder = (MessageViewHolder) convertView.getTag(); 28 } 29 30 // get the message from its position in the ArrayList 31 Message message = (Message) getItem(position); 32 33 // set the elements' contents 34 holder.bodyView.setText(message.text); 35 holder.senderView.setText(message.name); 36 37 // fetch the user's Twitter avatar from their username 38 // and place it into the thumbnailImageView. 39 Picasso.with(messageContext). 40 load("https://twitter.com/" + message.name + "/profile_image?size=original"). 41 placeholder(R.mipmap.ic_launcher). 42 into(holder.thumbnailImageView); 43 44 return convertView; 45 46 }
This method will either find or create a MessageViewHolder associated with the convertView at a certain position in the list. When it has done so, it will set the text of the bodyView, senderView, and – as in the demo app linked in our introduction – show the Twitter avatar of the sender.
When we listen for Pusher events we will want to add any new messages to our MessageAdapter. Let’s do so now:
1public void add(Message message){ 2 messageList.add(message); 3 notifyDataSetChanged(); 4 }
This will add the message to the messageList and notifyDataSetChange() will refresh the adapter, showing the new message.
So now we can go back to MainActivity and start listening for Pusher messages:
1@Override 2 protected void onCreate(Bundle savedInstanceState) { 3 4 ... 5 6 // initialize Pusher 7 Pusher pusher = new Pusher("YOUR_APP_KEY"); 8 9 10 // subscribe to our "messages" channel 11 Channel channel = pusher.subscribe("messages"); 12 13 // listen for the "new_message" event 14 channel.bind("new_message", new SubscriptionEventListener() { 15 ... 16 }); 17 18 // connect to the Pusher API 19 pusher.connect(); 20 21 }
So now that we have initialized Pusher, connected to the API, and subscribed to the messages channel, we can now add our SubscriptionEventListener to execute when an event comes in. All we’ll need to do is parse the JSON (in this example I have used the Gson library into a Message object and then add it to the MessageAdapter:
1channel.bind("new_message", new SubscriptionEventListener() { 2 3 @Override 4 public void onEvent(String channelName, String eventName, final String data) { 5 runOnUiThread(new Runnable() { 6 @Override 7 public void run() { 8 Gson gson = new Gson(); 9 Message message = gson.fromJson(data, Message.class); 10 messageAdapter.add(message); 11 12 // have the ListView scroll down to the new message 13 messagesView.setSelection(messageAdapter.getCount() - 1); 14 } 15 16 }); 17 } 18 19});
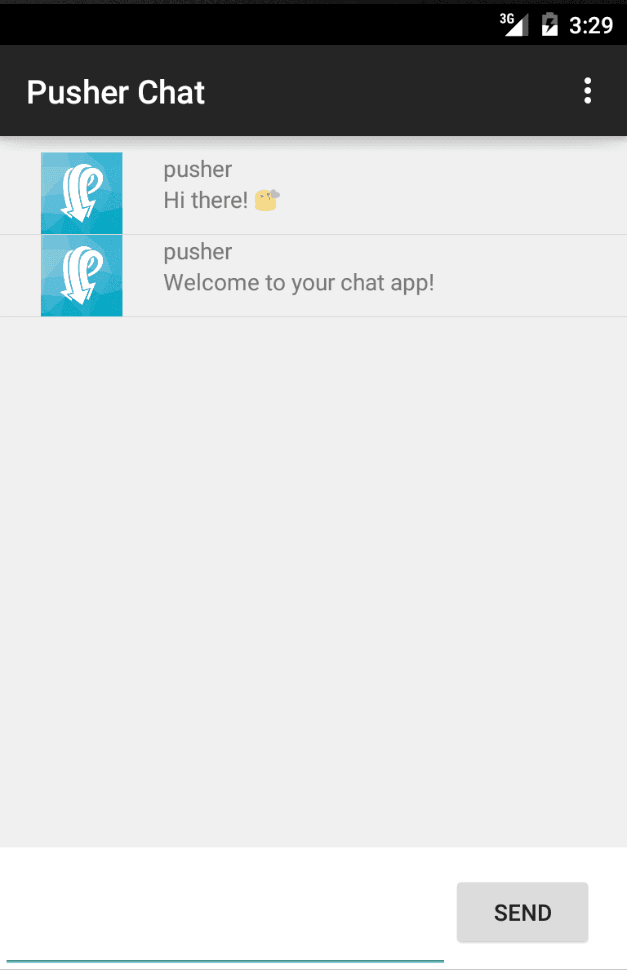
Now that whenever we have a new_message event come in, we can simply add it to our MessageAdapter, and new messages will appear in realtime! Run your app on an emulator or device, and give it a spin. If you encounter any issues, do consult the source code.
Get Pushing
Hopefully you have found this a straightforward example of how to build realtime mobile apps with Pusher. There are many ways you can extend this tutorial for an improved application:
- Use Pusher client events to send messages from one client to another. You could use our webhooks to notify your server when messages are sent, allowing you to persist them in your database.
- Use Pusher presence channels to create live user lists and show who’s online in realtime.
- Use our REST API to determine whether a user is connected to Pusher. If they are, go ahead and send them a message as normal. If not, send them a native push notification leading them back to your app.
Even with such a basic app, hopefully I have shown you how easy and few lines of code it is to drop in Pusher to any Android app. Feel more than free to let us know what you end up building with Pusher and Android!


© 2024 Pusher Ltd. All rights reserved.
Pusher Limited is a company registered in England and Wales (No. 07489873) whose registered office is at MessageBird UK Limited, 3 More London Riverside, 4th Floor, London, United Kingdom, SE1 2AQ.