- Products

- Developers
- User stories
- Blog
- Pricing

Animating a 3D model in AR with ARKit and Mixamo

In this tutorial, learn how to animate a 3D model using ARkit with Mixamo and to integrate the animation into an AR scene using Core Animation and SceneKit.
Introduction
This article is part of ARKit course.
The greatest thing about ARKit is that you can do amazing things without much code or effort. We have learned how to create an AR game with ARKit using SpriteKit (and 2D images) and how to add a 3D model to an AR scene using SceneKit. However, knowing more about 3D animation can help bring your apps to life.
In this tutorial, we’re going to animate a 3D model using Mixamo, a web app that helps us rig and animate 3D models without much knowledge required.
This is how the final app will look:
At the beginning, there’s an idle animation. When we tap on the model, it will start a dancing animation. When the animation finishes, or if we tap on the model again, the idle animation will be played again.
As always, you’ll need:
- A device with an A9 or later processor (iPhone 6s or better, iPhone SE, any iPad Pro, or the 2017 iPad)
- iOS 11
- Xcode 9 beta 5 (or superior)
- A Mixamo account (at the time of this writing, you can use all Mixamo features for free)
- A 3D model of a human
You can find free 3D models on sites like Free3D, Turbosquid, or Sketchfab. For this project, I chose this model of an obese man.
For reference, the source code of this project is on GitHub.
Let’s get started.
Animating a 3D model with Mixamo
Rigging is the process of taking a static 3D model and creating a bone system, scripts, and other things to give the model the ability to move, change expressions and transform. As you’ll see in a moment, Mixamo really simplifies this process for people that don’t have much experience in this area.
Log into your Mixamo account and go to Store. Click on the UPLOAD button:

An upload window to select your file will be shown. Mixamo accepts three file types:
- FBX
- OBJ
- ZIP (in the case of OBJ, to include an MTL file and textures images).
If your model is not in one of those formats, you’ll have to use a program like Blender to perform the conversion (we covered this procedure in the SceneKit tutorial). However, OBJ is one of the most common types of models you can find, so you probably won’t have any problems here.
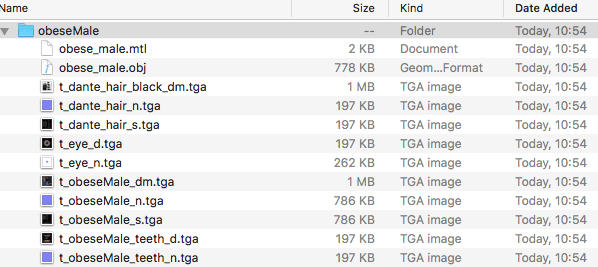
The model we’re going to use is an OBJ file with and MTL that describes the textures (in TGA format):
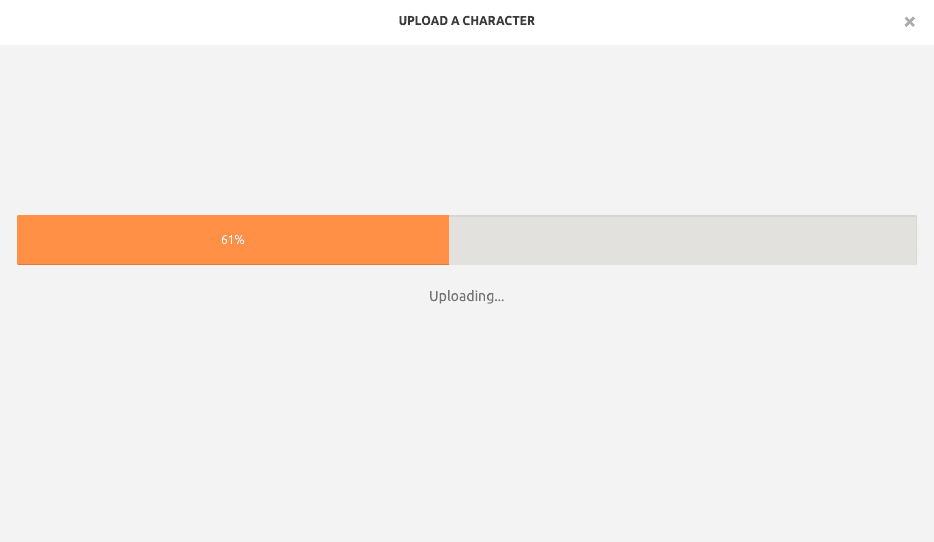
Compress all these files in a ZIP file (the original model was compressed as a 7zip file, which is not accepted by Mixamo) and upload it:
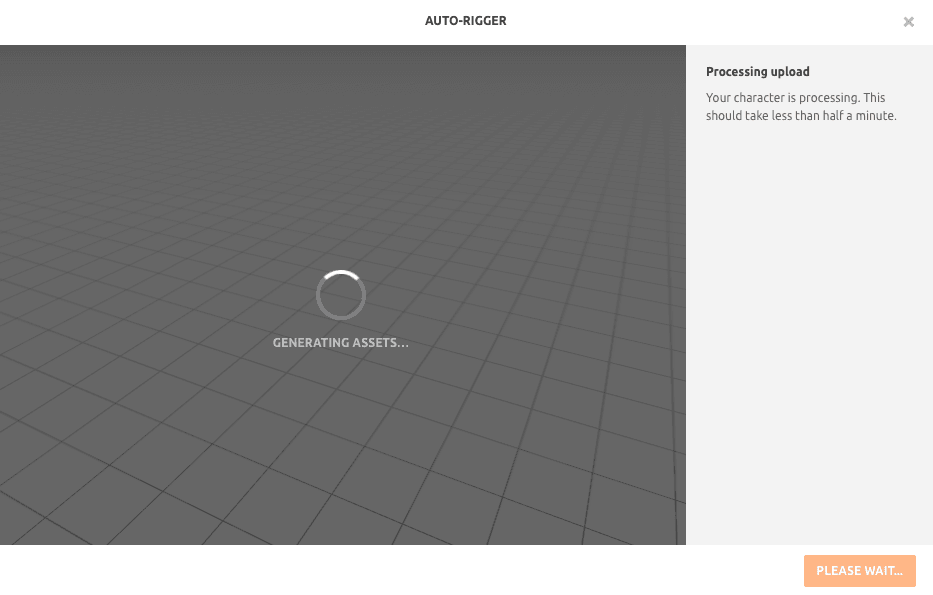
The file will be processed:
When everything is ready, a preview of the model will be shown. For best result, your character has to be in a T-pose facing forward, so you can use the rotation tools if needed:
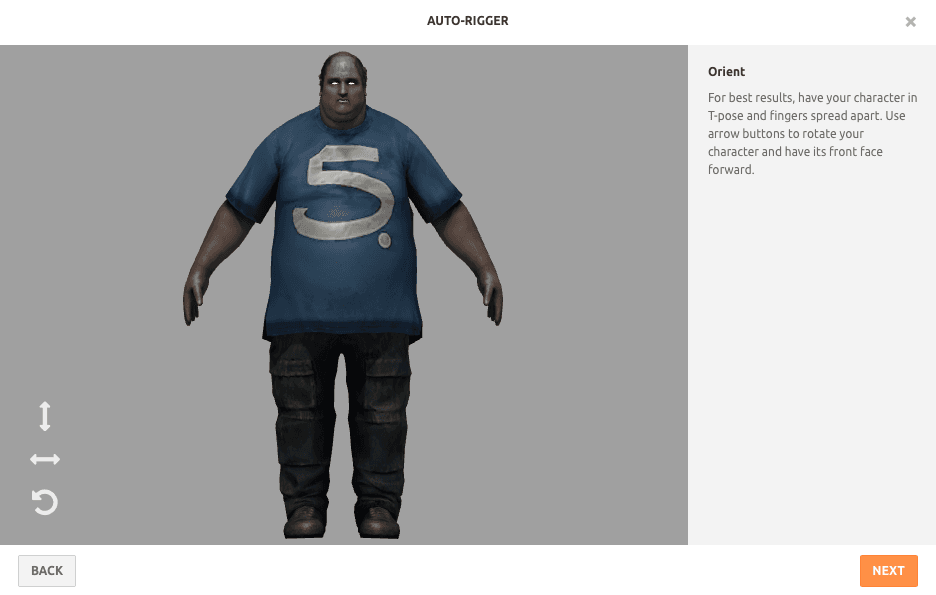
In our case it’s not necessary, so click on Next:
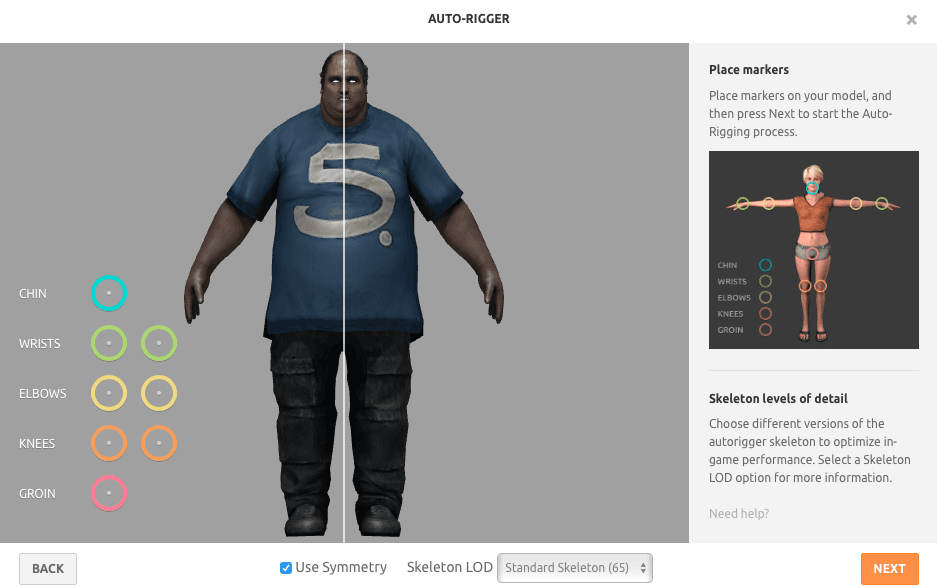
You’ll have to place markers on your model so the auto-rigging process can know where the chin, wrists, elbows, knees, and groin are. The process is straightforward. Since we are not going to animate the fingers of the hand, in the Skeleton LOD menu choose the option No Fingers (25):
When you click on Next, the auto-rigging process will start:
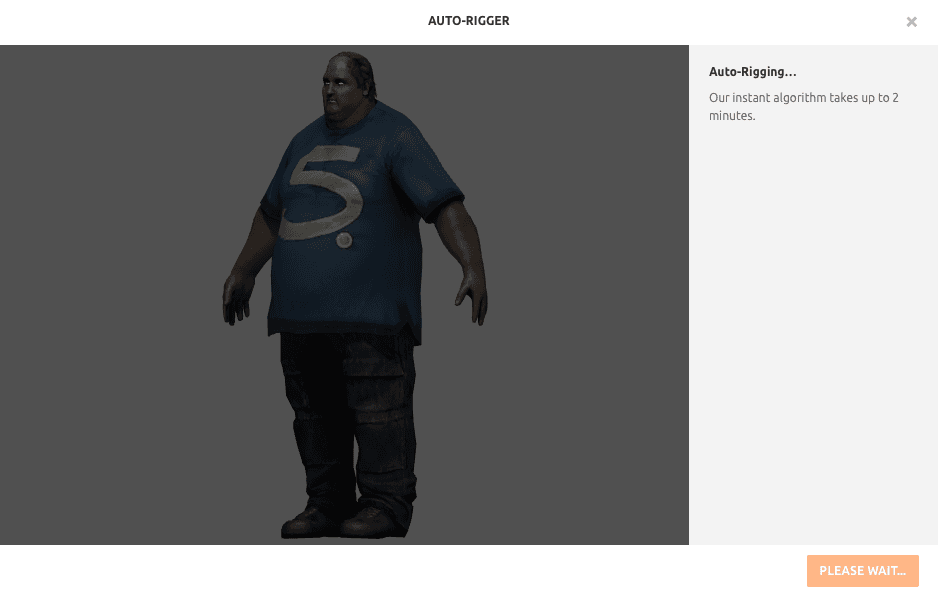
Wait a few seconds (depending on your model it can take longer) and then the result will be shown:
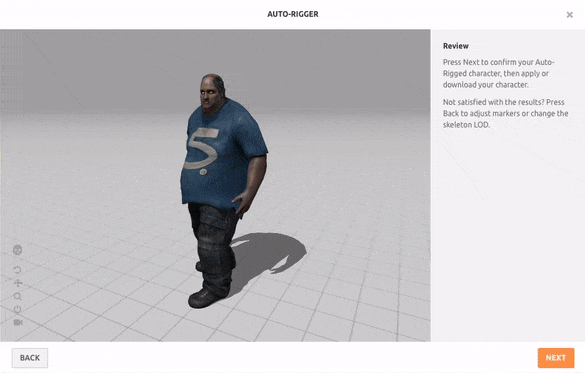
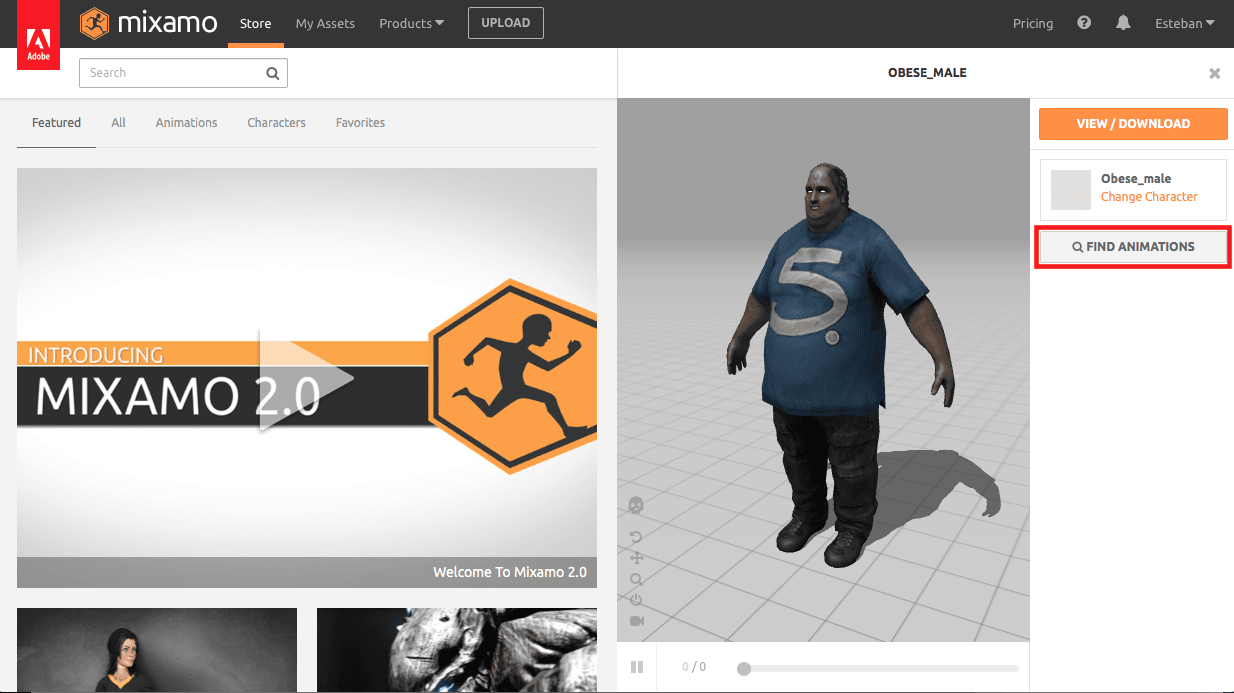
If there’s a problem go back and change some option(s), otherwise, click Next, the process will be finished. Click on Animate:
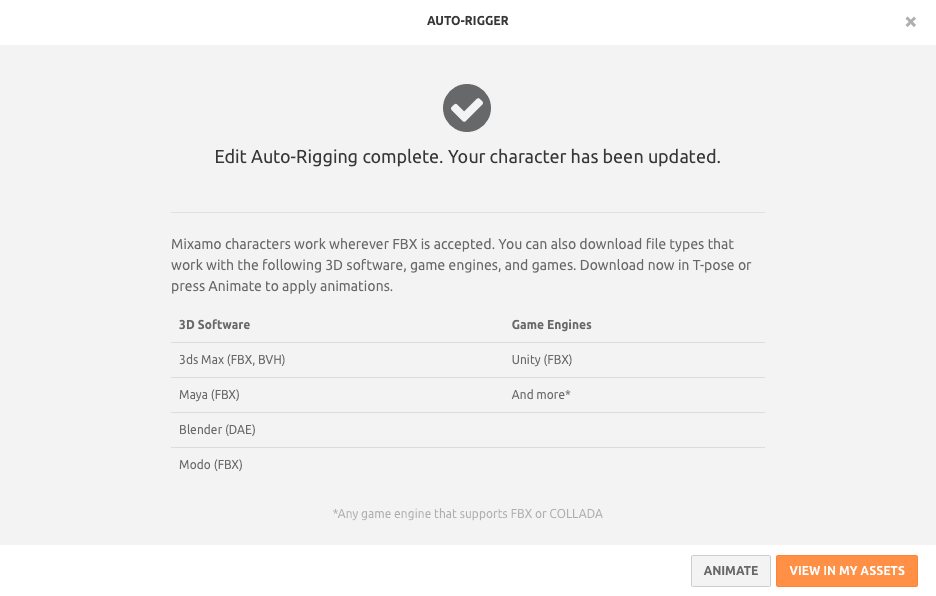
Then Find Animations:
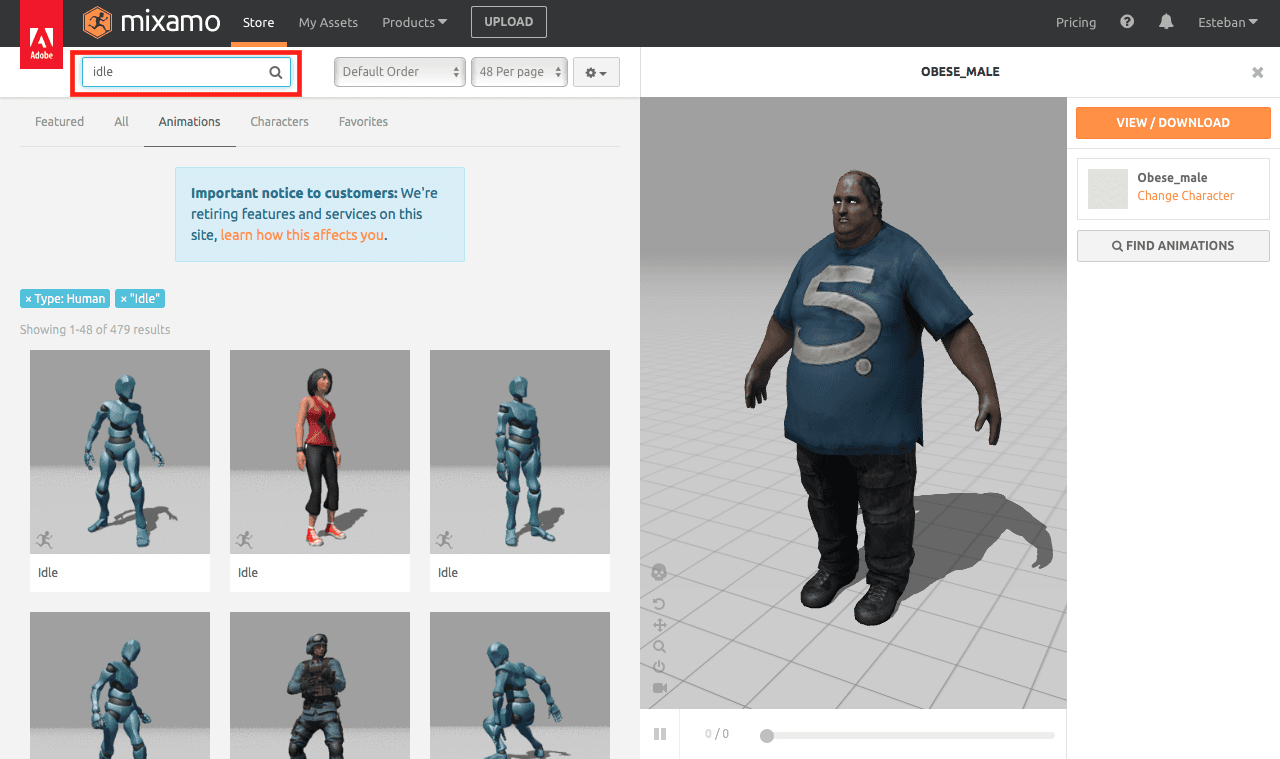
And let’s search for an idle pose animation:
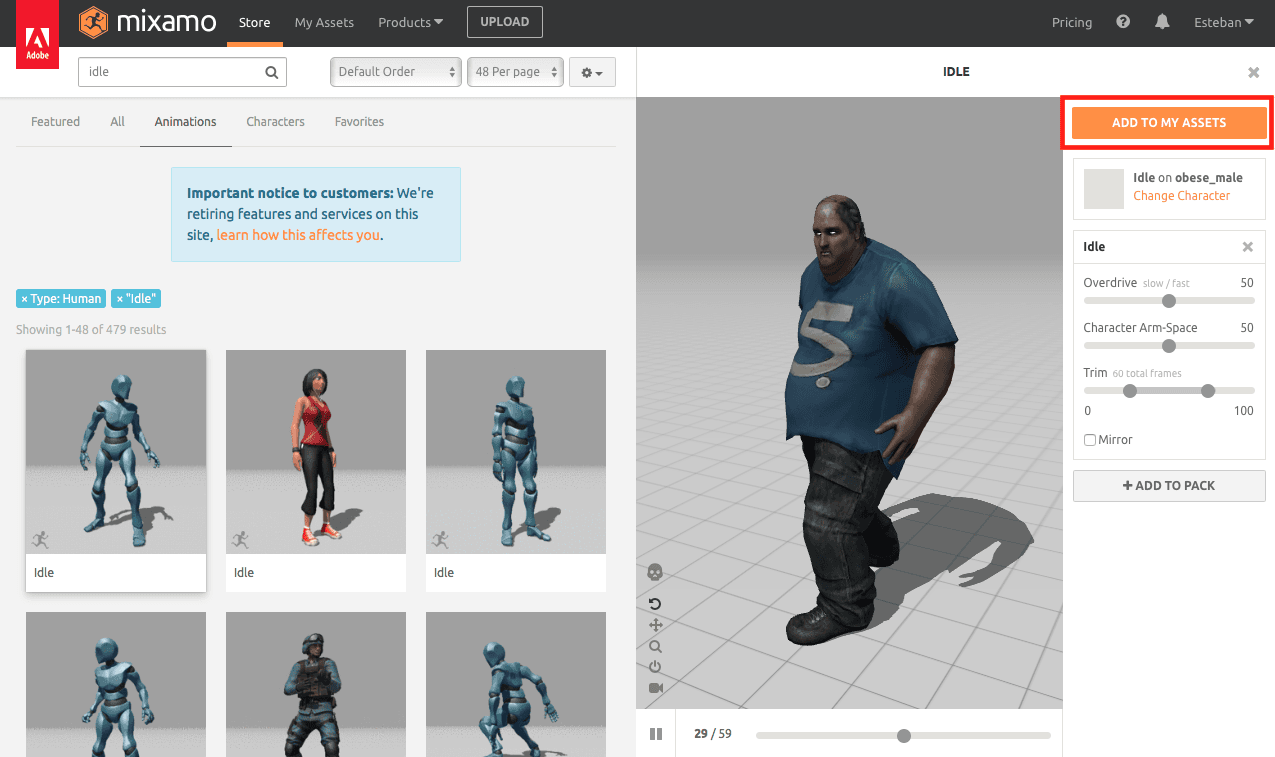
Let’s choose the first one. When you click on this animation, a panel will be shown and you’ll have the opportunity to customize the animation. When you’re done, click on Add To My Assets:
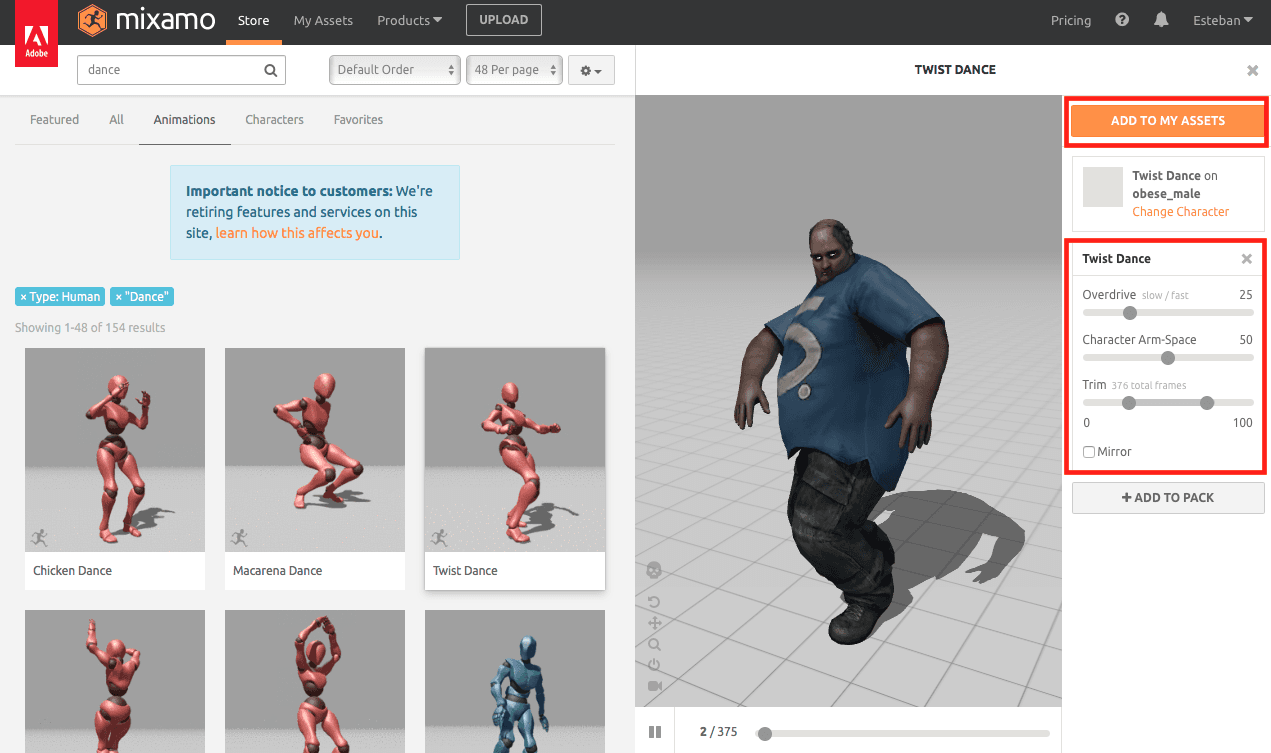
Since we’re already here, let’s add another animation. What if we make our guy dance? Maybe do the twist? Search for dance and choose Twist Dance:

Once again, customize the animation and then click on Add To My Assets:
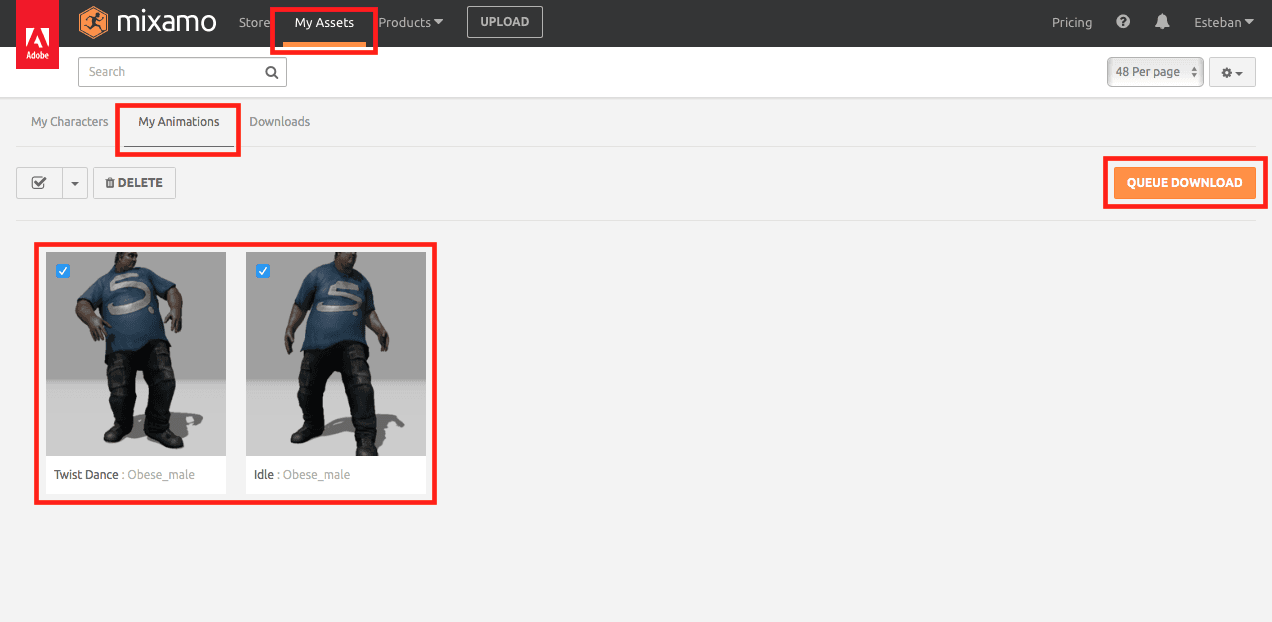
Now go to My Assets on the top menu and then to My Animations tab. Select both models and then click on Queue Download:
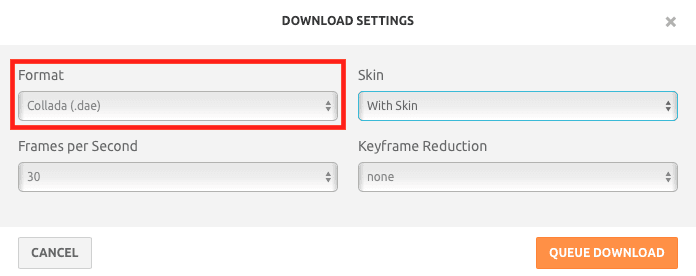
In the download settings, choose Collada (.dae) in Format and click on Queue Download:
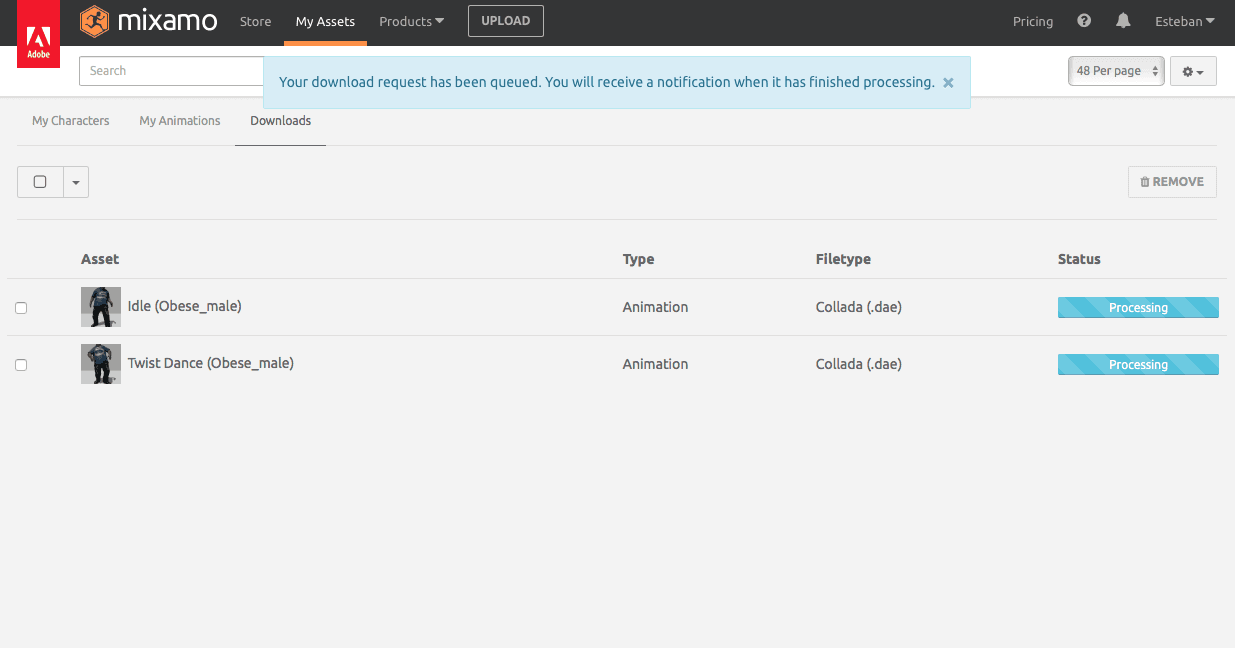
Wait a few seconds so the files can be formatted for download:
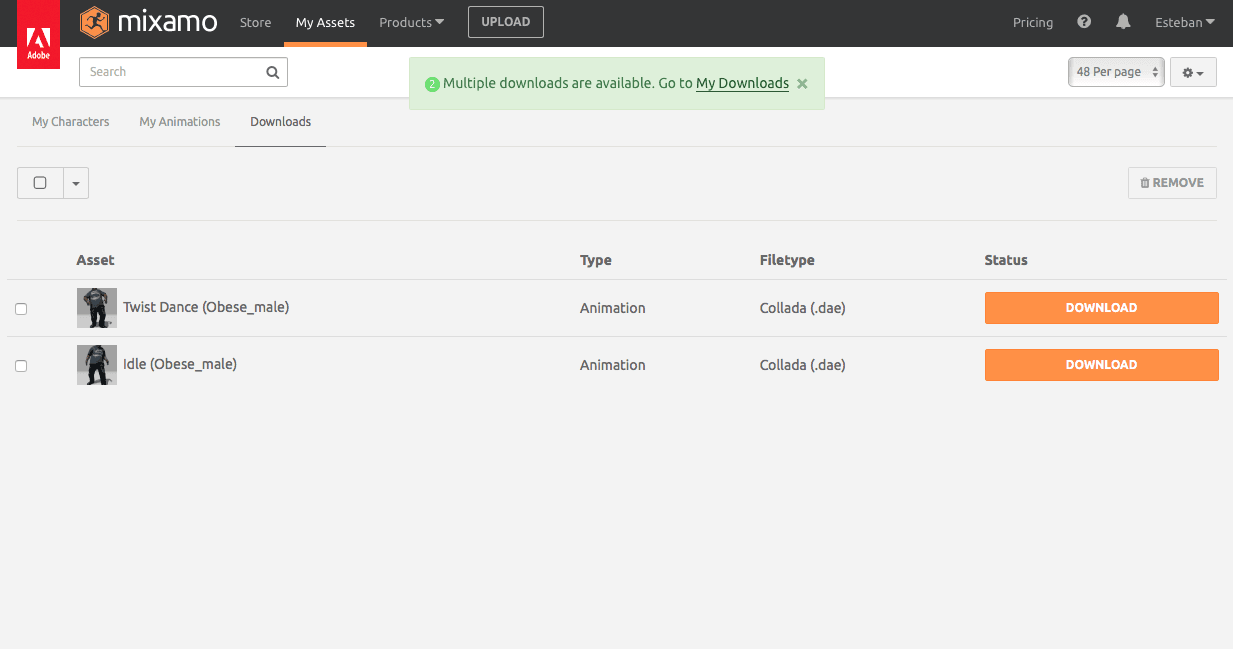
And finally, download the files:
Creating the Xcode project
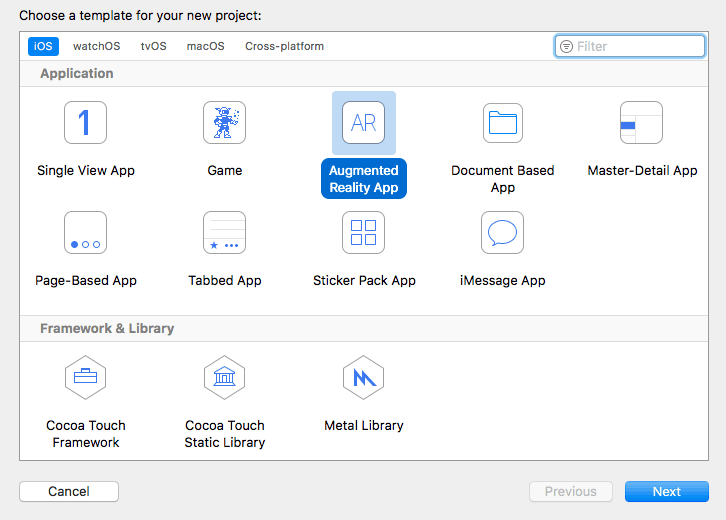
Open Xcode 9 and create a new AR app:
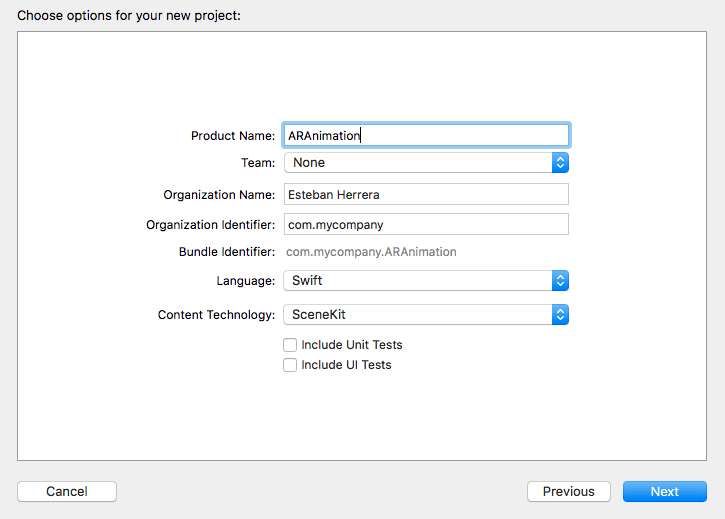
Enter the project information, choosing Swift as the language and SceneKit as the content technology and create the project:
At this time, AR cannot be tested on an iOS simulator, so we’ll need to test on a real device. For this, we’ll need to sign our app with our developer account. If you haven’t already, add your developer account to Xcode and choose your team to sign your app:
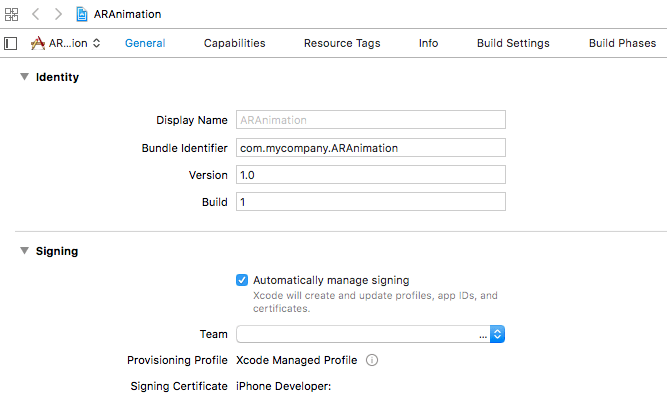
If you don’t have a paid developer account, you’ll have some limitations, like the fact that you can only create up to 10 App IDs every 7 days and that you can have up to 3 apps installed in your device.
Now go to the directory where you downloaded the files from Mixamo. You should have two directories (one for each model) and inside of them, a DAE file and a textures subdirectory:

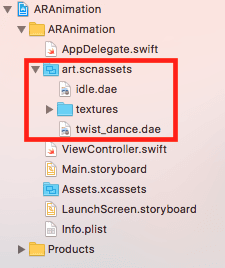
Drag one of the textures directories (there’s no need to copy to Xcode both) and the two DAE files to art.scnassets. Delete the ship model and its texture if you want:
Then, click on one of the DAE files, open the Scene Graph View with the icon at the bottom-left of the editor and expand Animations:
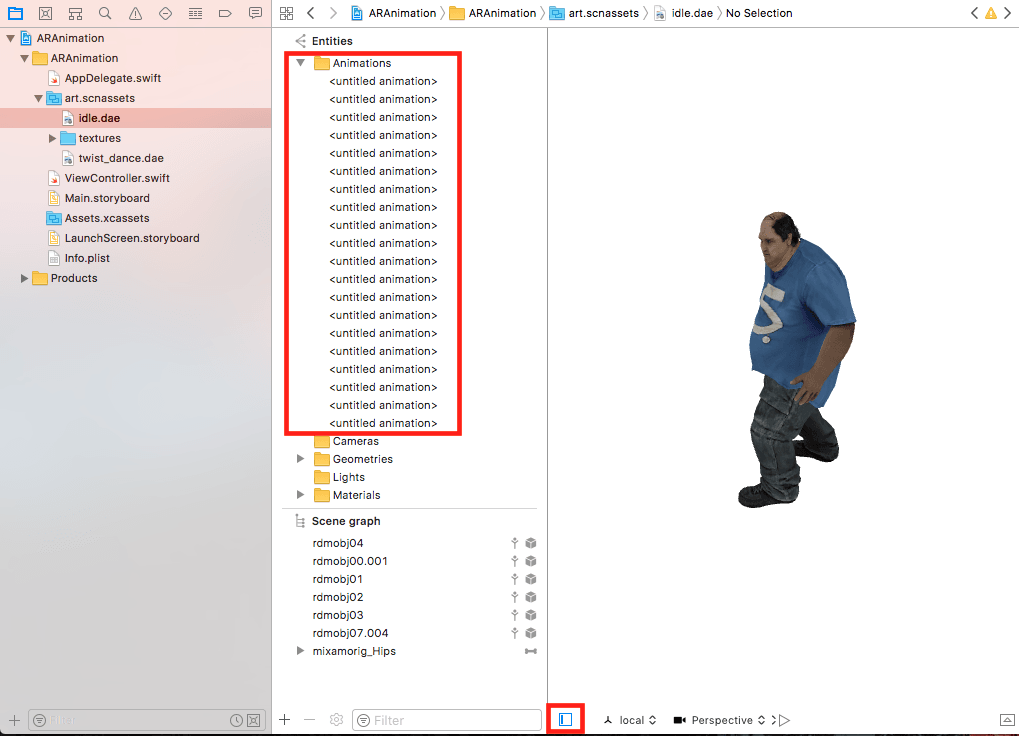
As you can see, there are a lot of animation nodes. That’s a problem because that will make code to manage the animation very complex. In the next section, we’ll need to clean up the files.
Cleaning the 3D model for Xcode
A DAE file is just an XML file that describes a 3D model. If you open idle.dae in a text editor, you’ll see its structure:
1<?xml version="1.0" encoding="utf-8"?> 2 <COLLADA xmlns="http://www.collada.org/2005/11/COLLADASchema" version="1.4.1"> 3 <asset><contributor><author>Mixamo</author><authoring_tool>COLLADA Mixamo exporter</authoring_tool><comments></comments></contributor><created>2017-07-11T06:09:20Z</created><modified>2017-07-11T06:09:20Z</modified><revision></revision><title></title><unit meter="0.010000"/><up_axis>Y_UP</up_axis></asset> 4 <library_images> 5 ... 6 </library_images> 7 <library_materials> 8 ... 9 </library_materials> 10 <library_effects> 11 ... 12 </library_effects> 13 <library_geometries> 14 ... 15 </library_geometries> 16 ... 17 </COLLADA>
Each untitled_animation is an individual animation that is represented by an animation element:
1<COLLADA ...> 2 ... 3 <library_animations> 4 <animation id="mixamorig_Hips-anim" name="mixamorig_Hips"><source id="mixamorig_Hips-Matrix-animation-input"><float_array id="mixamorig_Hips-Matrix-animation-input-array" count="60"> 5 ... 6 </animation> 7 <animation id="mixamorig_Spine-anim" name="mixamorig_Spine"> 8 ... 9 </animation> 10 ... 11 <library_animations> 12 ... 13 </COLLADA>
So what we can do is join all the animations elements in one. This StackOverflow answer explains the process and also offers an Automator service that does this automatically for you, but you should end up with something like this:
1<COLLADA ...> 2 ... 3 <library_animations> 4 <animation> <!-- Just one animation element --> 5 ... 6 </animation> 7 <library_animations> 8 ... 9 </COLLADA>
The problem with that service is that it expects a nicely formatted XML, it uses regular expressions and the command used to make the changes. However, Mixamo exports more than one element in the same line, for example:
1... 2 <animation id="mixamorig_Hips-anim" name="mixamorig_Hips"><source id="mixamorig_Hips-Matrix-animation-input"><float_array id="mixamorig_Hips-Matrix-animation-input-array" count="60"> 3 ...
If you don’t have a strong knowledge of regular expressions and sed (like me), probably the easiest way to fix this is with the command xmllint.
So open a Terminal window and execute the following command to create a cleaned-up version of the file:
1xmllint --format idle.dae > idleFixed.dae
Now install the Automator service, Ctrl-click on the file i_dleFixed.dae_ and choose the option ConvertToXcodeCollada:
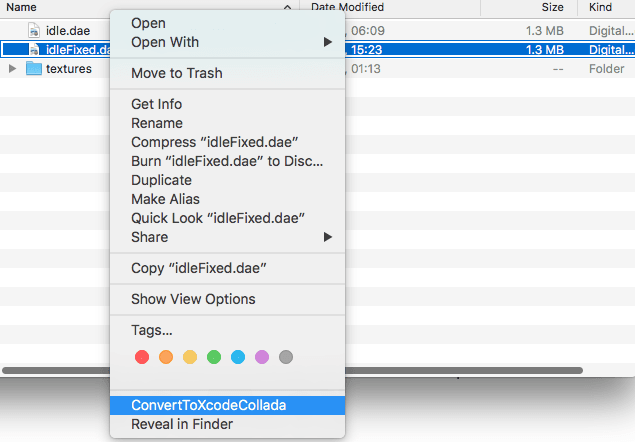
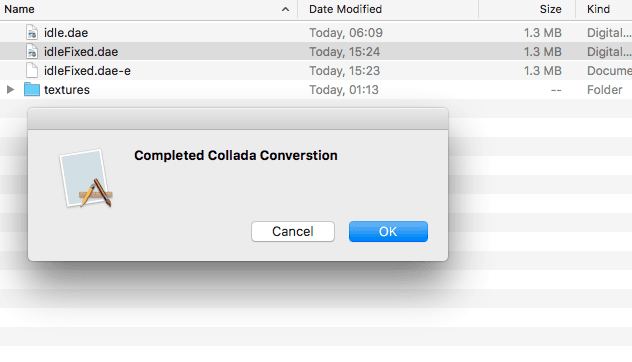
The file will be overwritten with the fixed version and the original will be backed up with the extension .dae-e:
Replace the file in Xcode and open the Scene Graph View. This time, you should find only one animation node:
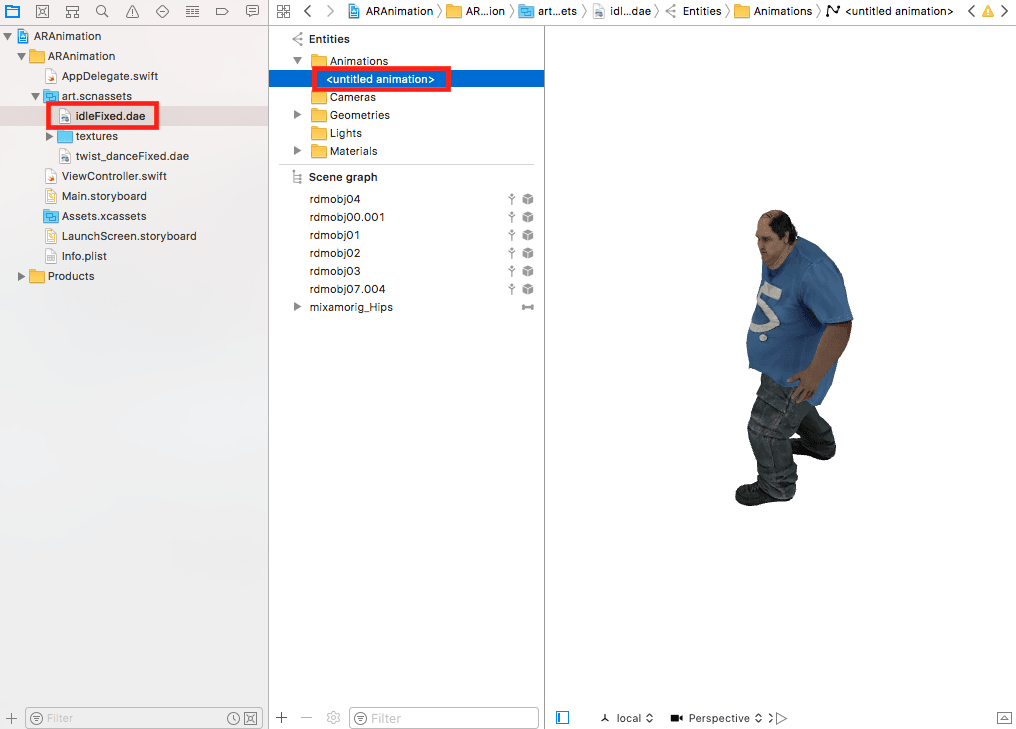
Also, notice that the animation node has the identifier idleFixed-1, in general, the identifier will be [NAME_OF_FILE]-1.
After you repeat all the steps for the other animation, we’ll be ready to code.
Loading the animations
In ViewController.swift, let’s add two properties to the class. One for storing the animations we’re going to play and another to know when to play the idle and dancing animations:
1class ViewController: UIViewController, ARSCNViewDelegate {
2
3 ...
4 var animations = [String: CAAnimation]()
5 var idle:Bool = true
6
7 ...
8 }
Now, in the method viewDidLoad(), instead of loading the ship model, create an empty scene and call a new method, loadAnimations():
1override func viewDidLoad() {
2 ...
3
4 // Create a new scene
5 //let scene = SCNScene(named: "art.scnassets/ship.scn")!
6 let scene = SCNScene()
7
8 // Set the scene to the view
9 sceneView.scene = scene
10
11 // Load the DAE animations
12 loadAnimations()
13 }
In the loadAnimations() method, we load the idle animation, adding all the child nodes of the model to a container node. Then, we set the container node’s position and scale properties so the model appears in front of us and with a good size. Finally, we add the node to the scene and load the other animation:
1func loadAnimations () {
2 // Load the character in the idle animation
3 let idleScene = SCNScene(named: "art.scnassets/idleFixed.dae")!
4
5 // This node will be parent of all the animation models
6 let node = SCNNode()
7
8 // Add all the child nodes to the parent node
9 for child in idleScene.rootNode.childNodes {
10 node.addChildNode(child)
11 }
12
13 // Set up some properties
14 node.position = SCNVector3(0, -1, -2)
15 node.scale = SCNVector3(0.2, 0.2, 0.2)
16
17 // Add the node to the scene
18 sceneView.scene.rootNode.addChildNode(node)
19
20 // Load all the DAE animations
21 loadAnimation(withKey: "dancing", sceneName: "art.scnassets/twist_danceFixed", animationIdentifier: "twist_danceFixed-1")
22 }
The method loadAnimation receives a key to identify the animation, the DAE file (without the extension), and the animation identifier. Remember that the animation identifier can be found in the Node Properties inspector of the Scene Kit editor integrated into Xcode. Here’s the definition of the function:
1func loadAnimation(withKey: String, sceneName:String, animationIdentifier:String) {
2 let sceneURL = Bundle.main.url(forResource: sceneName, withExtension: "dae")
3 let sceneSource = SCNSceneSource(url: sceneURL!, options: nil)
4
5 if let animationObject = sceneSource?.entryWithIdentifier(animationIdentifier, withClass: CAAnimation.self) {
6 // The animation will only play once
7 animationObject.repeatCount = 1
8 // To create smooth transitions between animations
9 animationObject.fadeInDuration = CGFloat(1)
10 animationObject.fadeOutDuration = CGFloat(0.5)
11
12 // Store the animation for later use
13 animations[withKey] = animationObject
14 }
15 }
First, we load the file as an SCNSceneSource, which is used to extract elements of a scene without keeping the entire scene and all the assets it contains. In this case, we use it to extract the animation as a CAAnimation object, on which we set the property repeatCount to only play the animation one time and fadeInDuration and fadeOutDuration to create a smooth transition between this and the idle animation. Finally, the animation is stored for later use.
Next, let’s implement the method touchesBegan. First, we have to get the touch location relative to the scene, so we can know if a 3D object was hit. If that’s the case, we check the idle flag to either play or stop the dancing animation:
1override func touchesBegan(_ touches: Set<UITouch>, with event: UIEvent?) {
2 let location = touches.first!.location(in: sceneView)
3
4 // Let's test if a 3D Object was touch
5 var hitTestOptions = [SCNHitTestOption: Any]()
6 hitTestOptions[SCNHitTestOption.boundingBoxOnly] = true
7
8 let hitResults: [SCNHitTestResult] = sceneView.hitTest(location, options: hitTestOptions)
9
10 if hitResults.first != nil {
11 if(idle) {
12 playAnimation(key: "dancing")
13 } else {
14 stopAnimation(key: "dancing")
15 }
16 idle = !idle
17 return
18 }
19 }
Finally, let’s define the playAnimation(key) and stopAnimation(key) functions. When an animation is added to the scene, it will replace the current animation. To stop it, we just remove it configuring a transition of 0.5 seconds:
1func playAnimation(key: String) {
2 // Add the animation to start playing it right away
3 sceneView.scene.rootNode.addAnimation(animations[key]!, forKey: key)
4 }
5
6 func stopAnimation(key: String) {
7 // Stop the animation with a smooth transition
8 sceneView.scene.rootNode.removeAnimation(forKey: key, blendOutDuration: CGFloat(0.5))
9 }
And that’s it. Here’s how it looks like when we test it:
Of course, we can tap our guy in the middle of the dance so it returns to the idle position with a smooth transition too:
Conclusion
In this tutorial, you have learned how to animate a 3D model with Mixamo without any special skills. Then, you learned how using Core Animation and SceneKit, we integrate the animation to an AR scene. If you want to know about animation on iOS, you can find more information about Core Animation here.
You can add your own animation, add background music, or use Pusher to control the animations from another device in realtime.
Remember that you find the source code of the entire project on GitHub.


© 2024 Pusher Ltd. All rights reserved.
Pusher Limited is a company registered in England and Wales (No. 07489873) whose registered office is at MessageBird UK Limited, 3 More London Riverside, 4th Floor, London, United Kingdom, SE1 2AQ.